DIY Vanity Table Mirror with Lights
Creating a custom vanity mirror with integrated lighting offers a personalized touch to any space while enhancing functionality. This article provides a comprehensive guide to constructing a DIY vanity mirror with lights, outlining the necessary materials, tools, and step-by-step instructions.
Essential Materials
Gathering the correct materials is crucial for a successful project. The following items are necessary for constructing a DIY vanity mirror with lights:
- Frameless mirror (desired size)
- Wooden board (larger than the mirror)
- Mirror adhesive
- Light bulbs (LED recommended)
- Light bulb sockets
- Wiring
- Power plug
- Switch
- Paint or stain (optional)
Required Tools
Having the appropriate tools ensures efficient and accurate assembly. The following tools are required:
- Measuring tape
- Pencil
- Drill
- Drill bits (various sizes)
- Screwdriver
- Wire strippers
- Safety glasses
- Sandpaper
Step-by-Step Construction
The construction process involves several key steps to ensure a secure and functional vanity mirror:
- Prepare the Wooden Board: Measure and mark the dimensions of the mirror on the wooden board. This board will serve as the backing for the mirror and house the wiring.
- Drill Holes for Lights: Mark the desired locations for the light bulbs on the wooden board. Drill holes of appropriate size for the light bulb sockets.
- Install Light Sockets: Insert the light bulb sockets into the drilled holes and secure them according to the manufacturer’s instructions.
- Wiring the Lights: Wire the light sockets together in series or parallel, depending on the desired lighting effect. Ensure proper polarity and secure connections.
- Attach the Power Cord and Switch: Connect the wiring to the power cord and install the switch in a convenient location on the wooden board.
- Test the Wiring: Before proceeding, plug in the power cord and test the lights to ensure all connections are functioning correctly. Address any wiring issues before attaching the mirror.
- Attach the Mirror: Apply mirror adhesive to the back of the mirror and carefully place it onto the wooden board, aligning it with the marked dimensions.
- Finishing Touches: Allow the adhesive to dry completely. Optionally, paint or stain the wooden frame for a customized aesthetic.
Choosing the Right Lighting
Selecting appropriate lighting is essential for achieving the desired effect. Factors to consider include:
- Bulb Type: LED bulbs are energy-efficient and offer a long lifespan, making them an ideal choice.
- Color Temperature: Choose a color temperature that complements the surrounding décor and provides adequate illumination for makeup application.
- Brightness: Select bulbs with appropriate brightness for the intended use. Dimmable bulbs offer greater control over lighting intensity.
Safety Considerations
Prioritizing safety throughout the construction process is paramount. The following safety measures are recommended:
- Eye Protection: Wear safety glasses throughout the entire project to protect eyes from debris and dust.
- Electrical Safety: Ensure all electrical connections are secure and properly insulated to prevent hazards.
- Proper Ventilation: Work in a well-ventilated area, especially when painting or staining.
Customization Options
Personalizing the vanity mirror allows for a unique and stylish addition to any room. Customization options include:
- Frame Style: Add a decorative frame around the mirror for enhanced aesthetics.
- Paint and Stain: Choose paint colors or wood stains that complement the existing décor.
- Adding a Dimmer: Installing a dimmer switch provides greater control over the lighting intensity.
Placement and Mounting
Careful consideration of placement and mounting options ensures optimal functionality and aesthetics:
- Wall Mounting: Securely mount the mirror to the wall using appropriate hardware.
- Tabletop Placement: Position the mirror on a vanity table or dresser, ensuring stability.
- Height Considerations: Position the mirror at a comfortable height for seated use.
Maintenance and Care
Proper maintenance ensures the longevity and optimal performance of the DIY vanity mirror:
- Cleaning: Regularly clean the mirror surface with a glass cleaner and a soft cloth.
- Bulb Replacement: Replace burnt-out bulbs promptly to maintain adequate lighting.
- Wiring Inspection: Periodically inspect the wiring for any damage or loose connections.

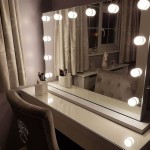
Simple Makeup Vanity With Lights Diy Table Mirror

Diy Vanity Mirror With Lights Under 150

Vanity Mirror With Desk Lights Bedroom

Diy Light Up Vanity Mirrors You Can Make Ohmeohmy Blog

10 Diy Vanity Mirror Projects That Show You In A Diffe Light

Gorgeous Diy Light Up Vanity Mirrors

How To Make A Diy Makeup Vanity With Hollywood Lighted Mirror

Diy Vanity With Lights Bedroom Room

Learn How To Turn A Desk Into Makeup Table With Light Up Vanity Mirror

10 Diy Vanity Mirror Projects That Show You In A Diffe Light

