Beveled Glass Mirror Replacement: A Comprehensive Guide
Mirrors, especially those with beveled edges, enhance interior aesthetics by adding depth, light, and a touch of elegance to any room. Beveled edges create a framed appearance, refracting light and adding sophistication. However, mirrors are fragile objects, and damage necessitating beveled glass mirror replacement can occur due to accidents, wear and tear, or environmental factors. Understanding the process, the potential challenges, and the available options is crucial for a successful replacement.
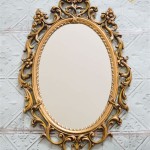
Beveled glass mirrors are characterized by their angled edges, typically ranging from ½ inch to 1 ½ inches in width. This angled edge is polished to a smooth, reflective surface, producing a decorative border. The beveling process involves grinding and polishing the edge of the mirror, creating a prism effect that disperses light and adds visual interest. While beveling enhances the aesthetic appeal of the mirror, it also adds complexity to the replacement process.
Replacing a beveled glass mirror requires careful planning, precise measurements, and specialized tools. This article outlines the key considerations, steps involved, and potential challenges associated with this process, offering guidance for homeowners and professionals alike.
Understanding the Need for Professional Assistance
While some minor mirror repairs can be attempted by experienced DIY enthusiasts, beveled glass mirror replacement often warrants professional intervention. Several factors justify this recommendation, including the complexity of the task, the risk of breakage, and the potential for injury. Improper handling of glass can lead to severe cuts and abrasions. Furthermore, inaccurate measurements or incorrect installation can result in a poorly fitted mirror, diminishing its aesthetic appeal and functionality.
Professional glaziers and mirror installers possess the expertise, tools, and experience necessary to handle beveled glass mirrors safely and effectively. They can accurately measure the space, select the appropriate glass thickness and bevel width, and install the new mirror securely. Moreover, professionals are insured against accidental damage or injury, providing homeowners with peace of mind.
Considering the cost of materials and the potential for errors, hiring a professional for beveled glass mirror replacement can often prove to be a cost-effective solution in the long run. It minimizes the risk of mistakes, ensures a high-quality installation, and guarantees the longevity of the replacement.
Key Steps in Beveled Glass Mirror Replacement
The process of replacing a beveled glass mirror typically involves several key steps, from initial assessment to final installation. Each step requires meticulous attention to detail to ensure a successful outcome.
1. Assessment and Measurement: The first step involves a thorough assessment of the existing mirror and the surrounding area. This includes identifying the type of mirror, the dimensions of the space, and any existing damage or obstructions. Accurate measurements are crucial for ordering the correct size replacement mirror. It is essential to measure the width and height of the mirror at multiple points to account for any variations. Furthermore, the thickness of the mirror needs to be determined, as this will affect the selection of appropriate adhesives or mounting hardware.
2. Removal of the Old Mirror: Removing the old mirror requires extreme caution to prevent breakage and injury. The method of removal depends on how the mirror was originally installed. Mirrors secured with adhesive may require the use of specialized tools, such as a piano wire or a heat gun, to loosen the adhesive bond. Mirrors held in place by clips or frames can be carefully dismounted by releasing the fasteners. It is recommended to wear safety glasses and gloves during this process to protect against flying shards of glass. The removed mirror should be disposed of properly to prevent injury to others. Many waste management services have specific guidelines for disposing of glass.
3. Surface Preparation: Once the old mirror has been removed, the surface behind it needs to be thoroughly cleaned and prepared. This may involve removing any residual adhesive, patching any holes or imperfections in the wall, and ensuring that the surface is smooth and level. A clean, smooth surface is essential for proper adhesion of the new mirror. Depending on the wall material, a primer may be required to improve adhesion. Allow the primer to dry completely before proceeding to the next step.
4. Ordering the Replacement Mirror: Based on the measurements and assessment, a replacement beveled glass mirror needs to be ordered. When ordering, specify the exact dimensions, bevel width, glass thickness, and any other desired features, such as a safety backing. Consider the type of glass used; options include float glass, which is standard, and low-iron glass, which offers greater clarity and color neutrality. Ensure that the vendor is reputable and experienced in producing high-quality beveled glass mirrors. Requesting a sample of the bevel can help ensure it matches the desired aesthetic.
5. Installation of the New Mirror: The installation process depends on the chosen method of attachment. Mirrors can be attached using adhesive, clips, or a combination of both. When using adhesive, apply a generous amount to the back of the mirror, ensuring even distribution. Press the mirror firmly against the wall and hold it in place until the adhesive has set. When using clips, ensure that they are properly aligned and securely fastened to the wall. A combination of adhesive and clips provides the most secure and stable installation. Use shims to ensure the mirror is level during installation. After installation, allow the adhesive to cure completely before removing any supports.
6. Final Inspection and Cleaning: After the mirror has been installed, inspect it carefully for any imperfections or misalignments. Clean the surface of the mirror with a glass cleaner to remove any smudges or fingerprints. Ensure that the edges are properly sealed to prevent moisture from seeping behind the mirror. A properly installed beveled glass mirror will enhance the aesthetic appeal of the room and provide years of reliable service.
Addressing Potential Challenges
Beveled glass mirror replacement can present several challenges, requiring careful planning and problem-solving skills.
1. Uneven Walls: Uneven walls can make it difficult to install a mirror flush against the surface. This can result in gaps or distortions, detracting from the overall appearance. To address this issue, shims can be used to create a level surface behind the mirror. Alternatively, a backing board can be installed to provide a consistent and even surface for the mirror to adhere to.
2. Difficult-to-Remove Adhesive: Removing old adhesive can be a tedious and challenging task. Specialized adhesive removers and tools, such as scrapers and heat guns, may be required. It is essential to follow the manufacturer's instructions carefully when using adhesive removers to avoid damaging the wall surface. In some cases, it may be necessary to sand the wall to remove stubborn adhesive residue.
3. Matching the Bevel: Ensuring that the replacement mirror has the same bevel width and angle as the original can be difficult, especially for older or custom-made mirrors. To address this, it is recommended to provide the vendor with a sample of the original mirror to ensure an accurate match. If an exact match is not possible, consider replacing all the mirrors in the room to maintain a consistent aesthetic.
4. Handling Large Mirrors: Large beveled glass mirrors can be heavy and unwieldy, making them difficult to handle and maneuver. This increases the risk of breakage and injury. It is recommended to enlist the help of at least two people when handling large mirrors. Use suction cups or carrying straps to provide a secure grip and distribute the weight evenly. Take frequent breaks to avoid fatigue and maintain focus.
5. Protecting Adjacent Surfaces: During the removal and installation process, it is essential to protect adjacent surfaces, such as walls, floors, and furniture, from damage. Cover these surfaces with protective sheeting or drop cloths to prevent scratches, dents, or spills. Use masking tape to protect delicate trim or moldings. Take extra care when working near electrical outlets or plumbing fixtures to avoid accidents.
6. Moisture Intrusion: In bathrooms or other damp environments, moisture can seep behind the mirror and damage the silvering. This can lead to discoloration or corrosion. To prevent moisture intrusion, seal the edges of the mirror with a waterproof sealant. Ensure that the wall behind the mirror is properly ventilated to prevent condensation from building up.
By carefully considering these potential challenges and implementing appropriate preventative measures, the likelihood of a successful beveled glass mirror replacement can be significantly increased.
Choosing the appropriate adhesive is crucial for ensuring a secure and long-lasting bond between the mirror and the wall. Several types of adhesives are available, each with its own advantages and disadvantages. Mirror mastic is a popular choice due to its strong adhesive properties and compatibility with mirrors. However, it is essential to use a mirror mastic specifically designed for use with mirrors, as some adhesives can damage the silvering on the back of the mirror.
Construction adhesive is another option, but it is important to choose a type that is non-corrosive and compatible with mirrors. Avoid using adhesives that contain solvents, as these can damage the mirror. Silicone-based adhesives are also suitable for mirror installation, as they are flexible and waterproof. However, they may not provide as strong of a bond as mirror mastic or construction adhesive. Carefully review the manufacturer's instructions before using any adhesive to ensure proper application and curing.
In addition to adhesive, mechanical fasteners, such as clips or mounting brackets, can be used to provide additional support for the mirror. These fasteners are particularly useful for large or heavy mirrors, where adhesive alone may not be sufficient. Ensure that the fasteners are securely anchored to the wall and that they are properly aligned to prevent the mirror from shifting or falling.
Safety is paramount when handling glass. Always wear safety glasses and gloves to protect your eyes and hands from cuts or abrasions. Work in a well-lit area to ensure good visibility. If the mirror breaks during removal or installation, carefully sweep up the broken glass and dispose of it properly. Avoid using a vacuum cleaner to clean up broken glass, as this can damage the vacuum cleaner and spread small glass particles into the air.

How To Find Stunning Custom Beveled Wall Mirrors Glass Doctor

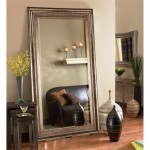
Beveled Glass Frame Mirror Pottery Barn

Beveled Glass Frame Mirror Pottery Barn

Guide To Glass Mirrors All Purpose Glazing

Dulles Glass Mirror Beveled For Replacement

Beveled Glass Frame Mirror Pottery Barn

Kenroy Home Medium Rectangle Beveled Glass Mirror 40 In H X 29 93 W 60418 The Depot

Beveled Glass Mirrors In Northern Virginia Abc Mirror

Beveled Glass And Mirrors By Paradise Mirror In Marco Island Fl

Fab Glass And Mirror Medium Round Beveled 24 In H X W 799456351766 The Home Depot