DIY LED Backlit Bathroom Mirror
A backlit bathroom mirror adds a touch of modern elegance and improved functionality to any bathroom. Creating one as a DIY project offers a personalized touch and potential cost savings. This article provides a comprehensive guide to constructing a DIY LED backlit bathroom mirror.
Planning and Preparation
Careful planning is crucial for a successful outcome. This includes determining the mirror's dimensions, selecting appropriate LED strips, and gathering necessary tools and materials. Accurate measurements ensure the proper fit of the lighting and frame.
Choosing the Right Mirror
The existing bathroom mirror can be used if it’s in good condition and the appropriate size. Alternatively, a new mirror can be purchased from a glass supplier or home improvement store. Consider the mirror's thickness and edges when selecting the frame and LED strips.
Selecting LED Strips
LED strips are available in various colors, brightness levels, and waterproofing ratings. For bathroom applications, waterproof (IP65 or higher) LED strips are essential to protect against moisture. Consider the desired color temperature (warm white, cool white, or RGB) and brightness (lumens per meter) to achieve the preferred ambiance.
Gathering Tools and Materials
Having all the necessary tools and materials readily available streamlines the construction process. This typically includes a measuring tape, pencil, safety glasses, gloves, a drill with appropriate bits, a soldering iron (optional), wire cutters, wire strippers, a power supply, mounting hardware, framing materials (wood, aluminum, etc.), and adhesive.
Constructing the Frame
The frame provides support for the mirror and houses the LED strips. It can be constructed from various materials, such as wood, aluminum, or plastic. The frame's dimensions should be slightly larger than the mirror to accommodate the LED strips and wiring. Accurate cutting and joining of the frame pieces are critical for a professional finish.
Mounting the LED Strips
Before attaching the LED strips, ensure they are the correct length and properly trimmed. Adhesive backing on most LED strips simplifies the mounting process. Apply the strips evenly around the inside perimeter of the frame, ensuring they are concealed from direct view when the mirror is mounted.
Wiring the LED Strips
LED strips typically require a low-voltage DC power supply. Connect the strips to the power supply following the manufacturer's instructions. Soldering may be required for certain connections. Ensure all wiring is secure and properly insulated to prevent short circuits.
Installing the Mirror
Once the LED strips are wired, carefully place the mirror within the frame. Secure the mirror using appropriate adhesive or mounting clips. Ensure the mirror is centered and flush with the frame. Test the LED lighting before finalizing the installation.
Connecting the Power Supply
The power supply can be connected to a nearby electrical outlet or wired directly into the bathroom's electrical system. Consult a qualified electrician for complex wiring projects. Ensure the power supply is appropriately grounded and meets all safety regulations.
Mounting the Backlit Mirror
The completed backlit mirror can be mounted to the wall using appropriate hardware. Consider the mirror's weight and the wall's construction when selecting mounting hardware. Ensure the mirror is securely fastened to prevent accidental dislodging.
Safety Precautions
Working with electricity requires adherence to safety precautions. Always disconnect the power supply before working with wiring. Wear safety glasses and gloves to protect against potential hazards. If unsure about any electrical work, consult a qualified electrician.
Testing and Troubleshooting
After completing the installation, thoroughly test the LED lighting. Check for any flickering or dimming, which may indicate loose connections or a faulty power supply. If any issues arise, carefully inspect the wiring and connections. Consult the LED strip and power supply manufacturer's troubleshooting guides for assistance.
Maintenance and Care
Regular cleaning of the mirror and frame helps maintain its appearance. Use a soft cloth and a mild cleaning solution to avoid damaging the mirror or LED strips. Avoid using abrasive cleaners or harsh chemicals that could scratch the mirror surface or corrode the wiring.
Customization Options
DIY backlit mirrors offer numerous customization options. Different LED strip colors, brightness levels, and control methods (dimmer switches, remote controls, etc.) can be incorporated to create a personalized look. The frame can also be customized with various materials, finishes, and decorative elements.

Es Diy 84 In W X 32 H Rectangular Frameless Led Light Anti Fog Wall Bathroom Vanity Mirror Rgb Backlit Front Lighted Cjfxbm8432rgb The Home Depot

25 Beautiful Diy Vanity Mirror That Is Easy And To Do Most Of This Projects Can Be Bathroom Makeover Small Mirrors

Es Diy 60 In W X 28 H Large Rectangular Frameless Led Dimmable Wall Bathroom Vanity Mirror With Clock Silver Hoz3kmbm6028fa The Home Depot

Bathroom Remodel Diy Backlit Mirror Leah And Joe Home Projects Crafts

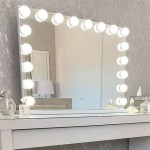
How To Diy Vanity Mirror With Led Strip Lights

How To Diy Vanity Mirror With Led Strip Lights

Custom Led Backlit Bathroom Mirror Diy Project

Es Diy 24 In W X 32 H Rectangular Frameless Led Light And Anti Fog Wall Bathroom Vanity Mirror Matte White Hoy1rebm2432vc The Home Depot

Diy Light Up Vanity Mirrors You Can Make Ohmeohmy Blog

Custom Led Backlit Bathroom Mirror Diy Project