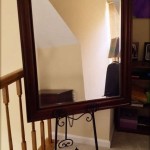
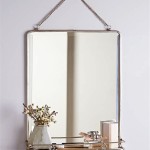
How To Frame a Mirror with Crown Molding
Framing a mirror with crown molding adds a touch of elegance and sophistication to any room. This project can be completed with basic tools and readily available materials, transforming a plain mirror into a custom, high-end piece.
Before beginning, gather the necessary materials. These include crown molding, a miter saw, measuring tape, wood glue, finishing nails, caulk, wood filler, sandpaper, primer, and paint. The specific type of crown molding is a matter of personal preference, but lightweight options are generally easier to work with, especially for beginners. Consider the existing décor of the room when selecting the molding profile and finish.
Accurate measurements are crucial for a professional-looking result. Begin by measuring the length and width of the mirror. Add the desired width of the molding to these measurements to determine the total length of molding required for each side. It's recommended to purchase slightly more molding than calculated to account for potential errors during cutting.
Cutting crown molding requires precision and understanding the angles involved. Crown molding is typically installed at an angle, not flat against the wall or mirror. This requires compound miter cuts. A miter saw is essential for achieving accurate angles. Practice cuts on scrap pieces of molding are highly recommended, especially for those unfamiliar with using a miter saw.
For outside corners, the molding needs to be mitered at a 45-degree angle. The angle is cut in opposite directions for each piece of molding that meets at the corner. Mark the molding carefully, indicating which direction the cut should be made to avoid errors. Double-check the measurements and angles before making each cut.
Inside corners require a different approach. One method involves coping the inside corner. This involves cutting one piece of molding at a 45-degree angle and then shaping the other piece to fit snugly against the profiled edge of the first piece. This creates a seamless joint that hides any imperfections.
An alternative method for inside corners involves mitering both pieces of molding at a 45-degree angle, similar to outside corners. While simpler than coping, this method can sometimes result in small gaps if the angles aren't perfectly accurate. Careful measurement and precise cuts are essential for a satisfactory result.
Once the molding pieces are cut, they can be attached to the mirror. Wood glue provides a strong bond and helps to keep the pieces in place while nailing. Apply a thin bead of glue to the back of the molding where it will contact the mirror. Then, carefully position the molding on the mirror and secure it with finishing nails. Use a nail set to countersink the nails, creating small depressions that can be filled later.
After the molding is attached, the next step is to fill any nail holes or gaps between the molding and the mirror. Wood filler is ideal for this purpose. Apply the filler to the holes and gaps, smoothing it out with a putty knife. Allow the filler to dry completely according to the manufacturer's instructions.
Once the filler is dry, sand the filled areas smooth using fine-grit sandpaper. This creates a smooth surface for painting and ensures a professional finish. Remove any dust created by sanding before proceeding to the next step.
Priming the molding is essential for proper paint adhesion and a uniform finish. Apply a thin, even coat of primer to the entire surface of the molding. Allow the primer to dry thoroughly before applying paint.
The final step is to paint the molding. Choose a paint that complements the existing décor of the room. Apply the paint in thin, even coats, allowing each coat to dry completely before applying the next. Multiple thin coats provide a smoother and more durable finish than one thick coat.
Caulking the seams where the molding meets the mirror and the wall creates a seamless and finished look. Choose a paintable caulk that matches the paint color. Apply a thin bead of caulk along the seams, smoothing it out with a damp finger or caulk tool. This step hides any imperfections and creates a professional, polished appearance.
Proper installation techniques and attention to detail are key to achieving professional-looking results when framing a mirror with crown molding. This project enhances the aesthetic appeal of the mirror and adds value to the overall décor of the room.

Bathroom Mirror Framed With Crown Molding Large Mirrors Frame Makeover

Crafty Again

Bathroom Mirror Framed With Crown Molding Hometalk

How To Upgrade Your Builder Grade Mirror Frame It

Bathroom Mirror Framed With Crown Molding Mirrors Diy Frame

Crafty Again

Simple Ways To Make A Framed Bathroom Mirror Hometalk

Framing A Builder Grade Mirror That Is Not Between Two Walls

Diy Bathroom Mirror Upgrade Tutorial Use Mdf Trim And Crown Molding To Build A Frame Around The Home Decor Remodeling

How To Frame A Bathroom Mirror Nest For Less