Hanging Bathroom Mirrors: A Comprehensive Guide
Bathroom mirrors serve a function far beyond simple reflection. They are integral components of bathroom design, influencing the perceived size of the space, the overall aesthetic, and the quality of light. Properly hanging a bathroom mirror requires careful planning, precise execution, and an understanding of both the practical and aesthetic considerations involved. This article provides a comprehensive guide to hanging bathroom mirrors, covering factors from mirror selection to installation techniques.
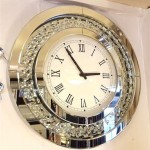
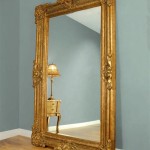
The selection of a bathroom mirror should be guided by the size and style of the bathroom. A small bathroom may benefit from a large, frameless mirror to create the illusion of more space. Conversely, a large bathroom can accommodate a more ornate, framed mirror that serves as a focal point. The mirror's shape is also a crucial consideration. Rectangular mirrors are versatile and work well in most bathrooms, while round or oval mirrors can soften the lines of a more angular space. Ultimately, the chosen mirror should complement the existing fixtures and overall design scheme of the bathroom.
Before even considering the aesthetics, it is necessary to evaluate the structural integrity of the wall where the mirror will be hung. Bathroom walls often contain plumbing and electrical wiring, and drilling without knowledge of their location can result in significant damage and potential injury. Using a stud finder is essential to identify the location of wall studs, which provide the strongest support for heavier mirrors. If studs are not available in the desired location, alternative anchoring methods, such as drywall anchors or toggle bolts, must be used. The weight of the mirror is the primary factor in determining the appropriate type and number of anchors required.
Key Point 1: Planning and Preparation
The success of any bathroom mirror installation hinges on meticulous planning and preparation. This stage involves gathering the necessary tools and materials, accurately measuring and marking the desired location for the mirror, and ensuring the safety of the surrounding area. Omitting or rushing through these steps can lead to errors and potentially hazardous situations.
The essential tools for hanging a bathroom mirror include: a measuring tape, a level, a pencil, a stud finder, a drill with appropriate drill bits, a screwdriver (or drill with screwdriver bits), safety glasses, and gloves. The specific drill bits required will depend on the type of wall material (drywall, plaster, tile) and the type of anchors being used. It is also advisable to have a dust mask to prevent inhalation of dust particles during drilling.
Accurate measurement is critical for ensuring the mirror is level and centered in the desired location. Use a measuring tape to determine the horizontal and vertical center points of the space. Mark these points lightly with a pencil. Then, hold the mirror against the wall and use a level to ensure it is perfectly straight. Lightly trace the outline of the mirror on the wall to serve as a visual guide during installation.
Prior to drilling, it is imperative to inspect the area for any signs of plumbing or electrical wiring. If there is any uncertainty, consult with a qualified professional. Turn off the power to the bathroom circuit breaker to minimize the risk of electrical shock. Cover any nearby surfaces with drop cloths to protect them from dust and debris. Safety glasses and gloves should be worn at all times during the installation process.
Key Point 2: Utilizing Appropriate Anchoring Methods
Choosing and implementing the correct anchoring method is paramount to ensuring the mirror's secure and long-lasting attachment to the wall. The weight of the mirror, the type of wall material, and the availability of wall studs all influence the selection of the appropriate anchoring technique. Failure to use adequate anchors can result in the mirror falling, causing damage and potential injury.
When possible, anchoring the mirror directly to wall studs is the preferred method, as it provides the strongest and most reliable support. Use a stud finder to locate the studs behind the drywall. Drill pilot holes through the drywall and into the studs, using a drill bit slightly smaller than the screws that will be used to attach the mirror. Ensure the screws are long enough to penetrate deeply into the studs for maximum holding power.
If wall studs are not located in the desired position, drywall anchors or toggle bolts are necessary. Drywall anchors are designed to expand behind the drywall, providing a secure grip. There are various types of drywall anchors available, each with different weight capacities. Select anchors that are rated to support at least the weight of the mirror, plus a safety margin. Toggle bolts are a more robust option for heavier mirrors. They consist of a bolt and a hinged "toggle" that expands behind the drywall, creating a strong and secure hold.
For tiled walls, specialized tile drill bits are required to prevent cracking or chipping the tile. Use a slow speed and apply gentle pressure to drill through the tile. Once the tile is penetrated, switch to a drill bit suitable for the wall material behind the tile (drywall or plaster). When using anchors in tile, it is particularly important to select anchors that are specifically designed for use with tile to ensure a secure and stable installation.
Key Point 3: Hanging the Mirror and Finishing Touches
After the anchors are securely installed, the final step involves hanging the mirror and ensuring it is properly aligned and secured. This stage also includes cleaning the mirror and surrounding area, and making any necessary adjustments to ensure a professional and polished final result.
Carefully lift the mirror and align it with the pre-drilled holes or installed anchors. If the mirror has pre-attached mounting hardware, such as D-rings or brackets, hang it directly onto the screws or hooks. If the mirror requires screws to be inserted through the glass or frame, use caution to avoid over-tightening, which can crack the glass or damage the frame. Ensure the screws are snug but not excessively tight.
Once the mirror is hanging, use a level to verify that it is perfectly straight. If necessary, make minor adjustments to the screws or anchors to achieve a level alignment. If the mirror is particularly heavy, it may be helpful to have an assistant hold the mirror in place while making these adjustments.
After confirming the mirror is securely hung and properly aligned, clean the surface of the glass with a glass cleaner and a soft cloth. Remove any dust or debris from the surrounding area. Inspect the installation for any imperfections or potential issues. If necessary, apply caulk around the edges of the mirror to create a watertight seal and prevent moisture from seeping behind the mirror. Finally, dispose of any leftover materials and tools properly.
The proper installation of a bathroom mirror significantly enhances the functionality and aesthetics of the space. Adhering to these steps and principles ensures a secure, professional, and visually appealing result.
Consider the long-term implications of mirror placement. Will future renovations or additions affect the mirror's position or compatibility with the bathroom's design? Anticipating these possibilities can save time and effort in the long run.
Before commencing any work, consult local building codes and regulations. Certain jurisdictions may have specific requirements for bathroom mirror installations, including height restrictions or electrical safety standards. Compliance with these codes is essential to ensure the safety and legality of the installation.
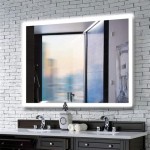
Selecting a mirror with integrated lighting can provide both functional illumination and an elegant aesthetic. These mirrors often feature LED lights that are energy-efficient and long-lasting. When installing a lighted mirror, ensure that the electrical wiring is properly connected and complies with all applicable safety standards.
Regular maintenance of the bathroom mirror will help to prolong its life and maintain its appearance. Clean the mirror regularly with a glass cleaner and a soft cloth. Avoid using abrasive cleaners, which can scratch the glass. Inspect the mounting hardware periodically to ensure that it is still secure. Tighten any loose screws or bolts as needed.

How To Pick And Hang The Perfect Bathroom Mirror Roomhints

Rounded Rectangular Hanging Rod Mirror Hotel Bathroom Homestay Luminous China Frame Glass Modern Made In Com

Sensio Ivy Round Ceiling Hanging Led Heated Bathroom Mirror 600mm Better Bathrooms

Suspended Mirror Bath

Hotel Bathroom Square Pole Hanging Mirror Washbasin Led Luminous Smart Frame Can Be Customized China Glass Modern Made In Com

Ivy Two Sided Hanging Bathroom Mirror Matt Black Adjustable Height

Tehome Ceiling Mount Mirrors For Bathrooms Suspend Black Metal Framed

Sensio Nova Round Hanging Led Bathroom Mirror Triotone Black 600mm Toolstation

Large Round Led Bathroom Vanity Mirror Light Anti Fog Wall Hanging Golden

Hanging Bathroom Mirror Hollywood Regency At Home In Arkansas