Mirror Frame DIY Tutorial: A Step-by-Step Guide to Elevate Your Decor
Elevate your home decor with a custom-made mirror frame that showcases your style and adds a touch of uniqueness to any room. Follow this comprehensive step-by-step tutorial to create a stunning mirror frame that complements your space.
Materials
- Wooden molding or trim
- Miter saw or coping saw
- Nail gun or hammer and nails
- Wood filler
- Sandpaper
- Stain, paint, or finish of your choice (optional)
Step 1: Planning and Measurement
Determine the desired dimensions of your mirror frame. Use a measuring tape to measure the perimeter of your mirror and add twice the width of the molding you're using to determine the total length of molding needed.
Step 2: Cutting the Molding
Using a miter saw or coping saw, cut the molding into four equal pieces, each at a 45-degree angle. To ensure accuracy, measure and mark the cuts carefully before making them.
Step 3: Joining the Frame
Apply a small amount of wood glue to the mitered ends of the molding pieces and join them together to form a square or rectangle. Use a nail gun or hammer and nails to secure the joints firmly.
Step 4: Reinforcing the Frame
For added durability, reinforce the corners of the frame with triangular braces. Cut two small pieces of molding at a 45-degree angle and nail them into the corners, creating a triangular support.
Step 5: Finishing the Frame
Fill any nail holes or gaps in the frame with wood filler and allow it to dry completely. Sand the frame to smooth out any rough edges or imperfections. Stain, paint, or apply a clear finish to the frame to protect and enhance its appearance.
Step 6: Attaching the Mirror
Carefully place the mirror inside the frame and secure it with mirror clips or adhesive strips designed for mirror mounting.
Tips for Success
* Choose a molding that complements the style of your decor and the space you're decorating. * Use a miter saw for precise and clean cuts. * Clamp the molding pieces together while nailing to ensure a strong and durable frame. * Allow sufficient drying time for wood filler and finish before attaching the mirror. * Hang your finished mirror frame using appropriate hardware for the weight and size of the frame. With a little bit of patience and attention to detail, you can create a custom mirror frame that adds a touch of elegance and sophistication to your home. Experiment with different styles, finishes, and embellishments to match your personal taste and make a truly unique statement piece.
30 Diy Mirror Frames Scratch And Stitch

Diy How To Make A Squiggle Mirror City Chic Decor

Diy Framed Mirror Jaime Costiglio

Easy Diy Stick Framed Mirror That Looks Expensive

Diy Full Length Mirror Frame

Diy Rustic Mirror Houseful Of Handmade

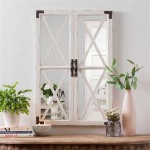
Diy Farmhouse Wood Frame Mirror She Gave It A Go

Diy Farmhouse Wood Frame Mirror She Gave It A Go

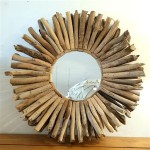
Easy Driftwood Mirror The Wood Grain Cottage

Diy Wood Mirror Frame Imperfectly Polished

