Building a Frame for a Mirror: A Step-by-Step Guide
Mirrors are essential elements of any home, serving both functional and decorative purposes. Whether you're looking to upgrade an existing mirror or create a custom frame from scratch, building your own frame offers a unique opportunity to personalize your decor while saving money. Building a frame for a mirror is a simple project that requires minimal tools and materials. With careful planning and execution, you can create a stunning frame that will complement your mirror perfectly and add a touch of elegance to your space. This step-by-step guide will provide you with all the essential knowledge and instructions to build a beautiful and durable frame for your mirror.1. Gather Your Tools and Materials
Before starting, make sure you have the necessary tools and materials: * Picture frame molding * Miter saw or miter box * Wood glue * Clamps * Hammer or brad nailer * Nails or brads * Measuring tape or ruler * Pencil * Sandpaper * Paint or stain (optional)2. Measure and Cut the Frame Molding
Measure the outer dimensions of your mirror and add twice the width of the frame molding to determine the length of each frame piece. Mark the measurements on the frame molding and cut four pieces (two for the vertical sides and two for the horizontal top and bottom) using a miter saw or miter box.3. Sand the Frame Pieces
Sand the cut edges of the frame pieces to remove any splinters or rough edges. This will ensure a smooth finish and a seamless fit when joining the pieces.4. Assemble the Frame
Apply wood glue to the mitered edges of the frame pieces and assemble the frame. Use clamps to hold the pieces securely together while the glue dries. Wipe away any excess glue that may squeeze out.5. Reinforce the Joints
Once the glue has dried, reinforce the joints with nails or brads. Hammer the nails or brads through the frame pieces into the mitered edges, ensuring they are well-secured.6. Finish the Frame
If desired, you can finish the frame by painting or staining it. Before applying the finish, sand the frame lightly to smooth the surface. Allow the finish to dry completely before attaching the mirror to the frame.7. Attach the Mirror
Apply mirror adhesive to the back of the mirror and carefully align it with the frame. Press the mirror firmly into place and allow the adhesive to dry completely.8. Hang the Frame
Once the adhesive has set, you can hang the frame on the wall using picture hooks or a wire hanger.
How To Build A Mirror Frame Sunshine And Rainy Days

How To Build A Mirror Frame Diy Ideas Glass Doctor

Cool Diy Framed Mirror From A Blah Builders Sawdust Paper Scraps

Diy Mirror Frame Just A Girl Blog
:max_bytes(150000):strip_icc()/kaylasimonehome-905941da7dd04a08af07c415df2a1fd8.jpeg?strip=all "20 Diy Mirror Frame Ideas To Inspire Your Next Project")
20 Diy Mirror Frame Ideas To Inspire Your Next Project

Diy Full Length Mirror Frame

Build A Wood Mirror Frame With This Easy Diy Building Bluebird

Frame Large Mirror Diy Project

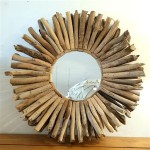
Build A Diy Round Mirror Frame Basic

Diy How To Add A Frame Builder Wall Mirror