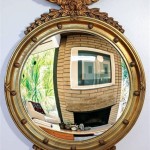
Circle Mirror Frame DIY: Adding a Touch of Elegance to Your Decor
A circle mirror frame can be an elegant and eye-catching addition to any home decor. It can instantly add a touch of sophistication and modernity to a room, while also serving the practical purpose of reflecting light and creating the illusion of more space. Fortunately, creating a circle mirror frame is a DIY project that can be tackled by anyone with a little time and effort. This article will guide you through the process, outlining the materials needed, steps involved, and some design ideas to personalize your creation.
Gathering the Materials
The first step is to gather the necessary materials. This will depend on the desired size and style of your frame. You may need:
- A circular mirror
- Wood or metal for the frame
- A saw for cutting the wood or metal
- Wood glue or metal adhesive
- Clamps
- Sandpaper
- Paint or stain (optional)
- Hardware for hanging (optional)
- Measuring tape
- Pencil
- Safety goggles
- Work gloves
If you are working with wood, select a type that is sturdy and easy to work with. Pine and oak are good options, but there are many others available depending on your budget and aesthetic preferences. For a more modern look, you can choose metal such as aluminum or steel.
Crafting the Frame
Once you have gathered your materials, you can begin crafting the frame. The first step is to measure the circumference of the mirror. This will determine the length of wood or metal you need to cut for the frame. After cutting the wood or metal to the desired length, use a compass or a template to mark the circular shape on the material. You can then carefully cut out the circular shape using a saw. It is important to wear safety goggles and gloves during this step to protect yourself from dust and sharp edges. Once the circle is cut, you can sand the edges to create a smooth finish.
Assembling and Finishing the Frame
The next step is to assemble the frame. Depending on the material you chose, this will involve either gluing or welding the pieces together. For wood frames, apply wood glue to the edges of the pieces and clamp them together until the glue dries. For metal frames, you will need to weld the pieces together using a welding torch. Once the frame is assembled, you can paint or stain it to your liking. This is a great way to personalize the frame and match it to your home decor. You can also add decorative elements such as beads, ribbons, or fabric to the frame. Once the paint or stain is dry, you can attach the mirror to the back of the frame using adhesive or screws. Finally, you can add hardware to the back of the frame for easy hanging.
Design Ideas for Your Circle Mirror Frame
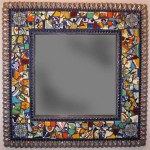
There are many different design ideas you can explore for your circle mirror frame. You can choose a simple and minimalist design, using a single color of paint or stain. Alternatively, you can create a more intricate design using multiple colors, patterns, or textures.
Additional Design Ideas
- Rustic Look: Use reclaimed wood for a natural and rustic look, leaving the bark on for a more textured finish.
- Modern Style: Opt for sleek metal with a polished finish for a contemporary feel.
- Bohemian Vibe: Incorporate macrame, beads, or colorful fabrics for a vibrant and eclectic style.
The possibilities are endless when it comes to designing your circle mirror frame. Let your creativity flow and enjoy the satisfaction of creating a unique piece for your home decor.

Easy Diy Stick Framed Mirror That Looks Expensive

How To Frame A Round Mirror

Build A Diy Round Mirror Frame

30 Diy Mirror Frames Scratch And Stitch

20 Easy Creative Diy Mirror Frame Ideas

Diy Wood Bead Circle Mirror Alice And Lois

Diy Mirror Frame Upcycle That

30 Diy Mirror Frames Scratch And Stitch

Easy Diy Stick Framed Mirror That Looks Expensive

30 Diy Mirror Projects That Are Fun And Easy To Make