Restoration Hardware Pivot Mirror Mounting: A Comprehensive Guide
Restoration Hardware pivot mirrors are renowned for their elegant design and versatility, adding a touch of sophistication to any room. Mounting these mirrors correctly is crucial to ensure their functionality and aesthetic appeal. This comprehensive guide will provide you with all the essential steps to successfully mount your Restoration Hardware pivot mirror.
1. Gather Necessary Tools and Materials
Before beginning the installation process, gather the following tools and materials:
- Drill
- Screwdriver
- Level
- Pencil or marker
- Stud finder (optional)
- Drywall anchors (if mounting into drywall)
- Lag screws or wood screws (depending on the wall material)
- Mounts or brackets (included with the mirror)
2. Determine Mounting Location and Height
Decide where you want to mount the mirror and the desired height. For best visibility, position the mirror at eye level when you are standing in front of it. Use a level to ensure the mirror is straight and aligns with the surrounding décor.
3. Find Wall Studs (Optional)
If possible, mount the mirror directly into wall studs for added support. Use a stud finder to locate the studs and mark their positions with a pencil.
4. Install Mounts or Brackets
Place the mounts or brackets against the wall at the marked location. Use a drill and screws to secure the mounts into the wall studs (if available) or drywall anchors. Ensure they are firmly attached.
5. Hang the Mirror
Lift the mirror and align the pivot bar on the back of the mirror with the mounts or brackets on the wall. Carefully lift the mirror until it is secure and hangs straight.
6. Level the Mirror
Use a level to check if the mirror is level both horizontally and vertically. If necessary, adjust the mounts or brackets until the mirror is perfectly balanced.
Tips for Success
* Use strong screws or lag bolts to ensure a secure mount. * If mounting into drywall, use drywall anchors to provide additional support. * If the mirror is heavy, consider using two people to lift and hang it. * Clean the mirror and wall surface before mounting to remove any dirt or debris. * Allow the mirror to cure for 24 hours before applying any weight or hanging objects from it. By following these steps, you can successfully mount your Restoration Hardware pivot mirror and enjoy its beauty and functionality for years to come. Remember, if you encounter any difficulties or have concerns, consult a professional installer for assistance.
Modern Classic Pivot Mirror Rh

Asbury Traditional Pivot Mirror Rh

Dillon Traditional Pivot Mirror Rh

Industrial Rivet Pivot Mirror Rh

Replacement Parts For Restoration Hardware Pivot Mirror

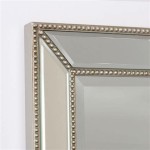
Restoration Hardware Astoria Pivot Mirror Design Ideas

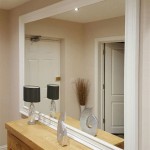
Restoration Hardware Pivot Mirror Transitional Bathroom Olga Adler Interiors

Restoration Hardware Astoria Flat Mirror Offers A Curved Pivot Feature With Chrome Trim In Bl Glass Shelves Kitchen Bathroom Design Black And

Grafton Traditional Pivot Mirror Rh

Restoration Hardware Astoria Pivot Mirror Design Ideas