DIY Wall Hanging Mirror Decoration: Elevate Your Interior Design
A wall hanging mirror can instantly transform a space, adding depth, light, and a touch of elegance. Whether you're seeking a statement piece for your living room or a subtle accent for your bedroom, creating your own DIY wall hanging mirror allows for personalized expression and significant cost savings. This guide explores the essential steps and creative ideas for crafting a unique and eye-catching wall hanging mirror decoration.
1. Choosing the Right Mirror and Materials
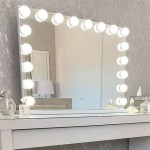
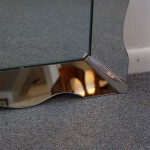
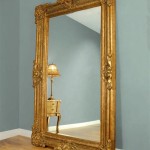
The heart of your project lies in selecting the perfect mirror. Consider the size, shape, and style that best complements your existing decor. For a contemporary look, opt for a geometric or minimalist shape. For a more traditional aesthetic, consider an ornate frame or a vintage-inspired design.
Once you've chosen your mirror, gather the necessary materials:
- Mirror: Choose a size and shape that suits your space.
- Rope or Cord: Natural rope, macrame cord, or leather cord are excellent options for a rustic or bohemian vibe; chain or wire offer a more modern feel.
- Hardware: D-rings, hooks, or eyelet screws to attach the rope or cord to the mirror.
- Decorative Elements: Beads, feathers, dried flowers, fabric scraps, or other embellishments can add visual interest.
- Tools: Scissors, pliers, a drill (if needed for eyelet screws), and a measuring tape.
2. Designing and Creating the Hanging Mechanism
The hanging mechanism plays a crucial role in the overall look and stability of your wall hanging mirror. Here are some popular options:
- Rope or Cord Loop: Cut two pieces of rope or cord to your desired length. Attach a D-ring or hook to each end, allowing you to hang the mirror from a hook on the wall.
- Macrame Hanger: If you're comfortable with macrame, create a custom hanger with knots and patterns to add texture and bohemian flair.
- Chain or Wire: For a more modern aesthetic, use chain or wire to suspend the mirror. You can create a simple loop or add a decorative element like a bead.
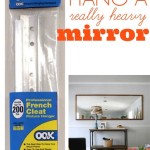
- Eyelet Screws: Attach eyelet screws to the back of the mirror and then thread rope or cord through the eyelets. This method is particularly suitable for heavier mirrors.
3. Embellishing and Finishing Touches
The final step involves personalizing your wall hanging mirror with decorative elements. Here are some creative ideas to inspire you:
- Beads and Charms: Add strings of beads, charms, or decorative objects to the rope or cord for a playful and whimsical touch.
- Fabric and Lace: Wrap the rope or cord with fabric scraps, lace, or ribbon to create a unique and textured look.
- Natural Elements: Incorporate natural elements like feathers, dried flowers, or branches for a rustic or bohemian feel.
- Geometric Shapes: For a modern and geometric look, add metal rings, wooden shapes, or other geometric elements to your hanger.
- Personalized Touches: Add a monogram, a personal quote, or a special date for a truly unique and meaningful decoration.
Remember to experiment with different arrangements and materials until you achieve the desired look. The beauty of DIY is the freedom to personalize your creation and make it a reflection of your own style and preferences.

Diy Mirror Wall Decor Easy Hanging From And Cardboard

30 Amazing Diy Decorative Mirrors Decor Mirror

Diy Mirror Decor

Diy Wall Hanging Mirror Decoration Room Decor Art With Creativity

15 Stylish Diy Mirror Ideas To Decorate Your Home Decor Wall Art

Diy Sunburst Mirror Wall Hanging How To Make Decor Artmypassion

Diy Wall Mirrors Thirty Best Home Decor Projects

5 Best Inspiring Simple Diy Crafts Design Ideas Wood Mirror Frame Home Decor Projects

10 Amazing Wall Decor With Mirror Gadac Diy Hanging Crafts Home Craft Idea

Diy Project Ripples Wall Mirror Klapit Design Your Walls