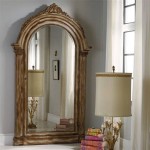
DIY Mirror Frame with Crown Molding: A Step-by-Step Guide to Add Elegance to Your Home
A stunning mirror can elevate the aesthetics of any space, but a custom-made frame can truly make it a focal point. With a little know-how and some basic tools, you can create a magnificent DIY mirror frame using crown molding. Here's a comprehensive guide to help you achieve this stylish upgrade for your home.
Materials You'll Need:
- Mirror
- Crown molding (enough to frame the mirror)
- Miter saw or miter box
- Wood glue
- Clamps
- Nails or screws
- Hammer or drill
- Sandpaper
- Wood filler (optional)
- Paint or stain (optional)
Step 1: Measure and Cut the Crown Molding
Begin by measuring the perimeter of the mirror to determine the total length of crown molding needed. Divide this measurement by the length of a single piece of molding to calculate the number of pieces required. Using a miter saw or miter box, cut the molding to 45-degree angles at each end.
Step 2: Assemble the Frame
Apply wood glue to the mitered edges of the crown molding and clamp them together. Wipe away any excess glue and let it dry completely. Once the glue is set, reinforce the joints with nails or screws.
Step 3: Attach the Frame to the Mirror
Place the assembled frame around the mirror and mark the locations where the nails or screws will be driven. Ensure the frame is centered and fits snugly around the mirror. Pre-drill pilot holes to prevent the wood from splitting.
Step 4: Fill and Finish
If there are any gaps or imperfections in the frame, fill them with wood filler and let it dry. Once the filler is dry, sand the frame smooth and apply a coat of paint or stain to match your desired decor. Allow ample drying time before hanging the mirror.
Step 5: Hang the Mirror
Determine the desired placement of the mirror and securely hang it using appropriate hardware. Ensure the mirror is level and firmly attached to the wall.
Tips for a Flawless Finish:
- Use a sharp blade on your miter saw to ensure clean cuts.
- Dry fit the frame before gluing and nailing to make sure it fits perfectly.
- Wipe away excess wood glue immediately to prevent it from staining the frame.
- Pre-drill pilot holes to avoid splitting the wood.
- Sand the frame thoroughly before painting or staining for a smooth finish.
Conclusion:
Creating a DIY mirror frame with crown molding is a rewarding project that adds a touch of elegance and sophistication to your home. With careful planning and the right tools, you can achieve a custom-made frame that perfectly complements your mirror and decor. Enjoy the pride of knowing you've created a stylish and unique piece that will enhance the beauty of your space for years to come.

Bathroom Mirror Framed With Crown Molding Large Mirrors Frame Makeover

Crafty Again

Mirror Molding Framing A With Crown Mirrormate

Crafty Again

Bathroom Mirror Framed With Crown Molding Frame Mirrors Diy Large
How To Upgrade Your Builder Grade Mirror Frame It

How To Frame A Bathroom Mirror Nest For Less

How To Frame A Mirror Sand And Sisal
Framing A Builder Grade Mirror That Is Not Between Two Walls

Crafty Again


