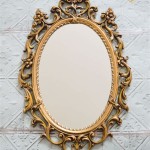
How To Hang a Mirror on a Tile Wall
Hanging a mirror on a tile wall presents unique challenges compared to drywall. The hard, slick surface of tile requires specialized tools and techniques to ensure a secure and lasting hold without damaging the tiles. This article outlines the necessary steps and considerations for successfully hanging a mirror on a tile wall.
Assessing the Mirror and Wall
Before beginning the hanging process, careful assessment of both the mirror and the tile wall is crucial for selecting appropriate hanging hardware and methods. Consider the following:
- Mirror Weight: Heavier mirrors necessitate stronger anchors and hanging hardware. Accurately determine the mirror's weight to select appropriate hardware.
- Mirror Size: Larger mirrors distribute weight differently and may require multiple hanging points for stability.
- Tile Type: Different tile types (ceramic, porcelain, glass) possess varying degrees of hardness and fragility. This influences the drilling process and anchor selection.
- Wall Condition: Ensure the tiled surface is clean, level, and free of cracks or damage that could compromise the integrity of the installation.
- Location: Consider the specific location on the wall, noting any obstructions like electrical wiring or plumbing. A stud finder can help locate these potential hazards.
Choosing the Right Hanging Hardware
The success of hanging a mirror on tile hinges on selecting appropriate hardware. Several options exist, each suited to different weights and tile types:
- Adhesive Hooks: Suitable for lightweight mirrors, adhesive hooks provide a damage-free option. Ensure the adhesive is specifically designed for tile and follow manufacturer instructions carefully.
- Suction Cups: Another damage-free option for lighter mirrors, suction cups can be a practical solution but require a smooth, non-porous tile surface for effective adhesion.
- Heavy-Duty Adhesive Strips: Designed for heavier mirrors, these adhesive strips provide a strong bond but are often permanent and can be difficult to remove.
- Specialty Tile Anchors: These anchors are specifically designed for use in tile and provide a secure hold for heavier mirrors. Various types exist, including toggle bolts and plastic expansion anchors.
- Mirror Clips & Screws: For maximum security with heavy mirrors, mirror clips paired with screws anchored into wall studs or tile anchors offer the most robust solution.
Gathering Necessary Tools and Materials
Having the right tools at hand streamlines the hanging process and contributes to a successful outcome. Gather the following:
- Measuring Tape: Essential for accurate placement and marking drilling points.
- Level: Ensures the mirror hangs straight.
- Pencil or Marker: For marking drilling locations and other measurements.
- Drill with Masonry Bit: A specialized drill bit designed for penetrating tile is essential to prevent cracking. Carbide-tipped bits are recommended.
- Masking Tape: Placing masking tape over the drilling location can help prevent the drill bit from slipping.
- Safety Glasses: Protect eyes from dust and debris during the drilling process.
- Hammer: For tapping anchors into place, if necessary.
- Screwdriver: For driving screws into anchors or clips.
Drilling into Tile
Drilling into tile requires careful execution to prevent cracking or chipping. Adhering to the following steps will minimize risks:
- Mark the Drilling Location: Accurately mark the desired drilling location with a pencil or marker.
- Apply Masking Tape: Cover the marked area with masking tape. This provides grip for the drill bit and helps prevent slippage.
- Start Slowly: Begin drilling at a slow speed with minimal pressure to create a pilot hole. Gradually increase speed as the bit penetrates the tile.
- Keep the Drill Bit Cool: Drilling generates heat which can damage both the drill bit and the tile. Periodically stop to allow the bit to cool or use a spray bottle filled with water to cool the drilling area.
- Drill to the Correct Depth: Ensure the hole is deep enough to accommodate the chosen anchor.
Installing the Hanging Hardware & Mirror
Once the holes are drilled, installing the hanging hardware and mounting the mirror represents the final steps:
- Insert Anchors (If Applicable): Gently tap or insert the chosen anchors into the drilled holes according to the manufacturer's instructions.
- Attach Hanging Hardware: Securely attach the chosen hanging hardware (hooks, clips, etc.) to the anchors or directly into studs if available.
- Hang the Mirror: Carefully hang the mirror onto the installed hardware, ensuring it is level and secure.
Maintaining the Hanging Mirror
After installation, periodic inspection and maintenance ensure the mirror remains securely attached to the tiled wall.
- Check for Loosening: Periodically check the mirror for any signs of loosening or movement. Tighten screws or replace anchors as needed.
- Clean the Mirror and Surroundings: Regularly clean the mirror and surrounding tiles to prevent the buildup of dust and grime that can compromise adhesive bonds.
- Inspect Hanging Hardware: Examine the hanging hardware for signs of wear or corrosion. Replace any damaged components promptly to prevent future issues.

How To Hang Mirrors On Tile 3 Ways A Bonus The Palette Muse

How To Hang Mirrors On Tile 3 Ways A Bonus The Palette Muse

How To Hang A Mirror On Tile Wall Remington Avenue

How To Hang Mirrors On Tile 3 Ways A Bonus The Palette Muse

Tutorial How To Hang A Bathroom Mirror The Diy Playbook

How To Hang A Bathroom Mirror Over Tile Wainscoting Mimzy Company

Diy Hanging Mirrors On Tiles Easy Way To Drill In Tile Picture System Hang Mirror

How To Hang A Mirror On Tile Wall Remington Avenue

3 Simple Ways To Hang A Mirror On Wall Without Nails Wikihow

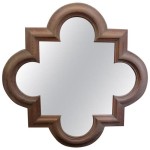
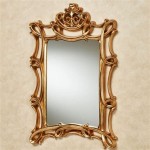
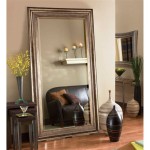
Artforma Irregular Vertical Wall Hanging Mirror L214