How to Put a Mirror on Bathroom Tiles
Adding a mirror to your bathroom can instantly elevate its style and functionality. Whether you're replacing an old one or installing a new one, hanging a mirror on bathroom tiles requires some careful planning and execution to ensure a secure and attractive result. Here's a comprehensive guide to help you hang a mirror on bathroom tiles with ease:
Materials You'll Need:
- Mirror
- Mirror adhesive
- Level
- Tape measure
- Pencil or marking tool
- Clean cloth
- Optional: Spacer blocks (if needed)
Step 1: Prepare the Surface
Before hanging the mirror, clean the bathroom tiles thoroughly with a clean cloth and a mild detergent. Wipe away any dirt, dust, or soap residue to ensure the adhesive bonds properly. Let the tiles dry completely.
Step 2: Determine the Placement
Decide where you want to hang the mirror and measure the distance from the floor or ceiling, and the distance between the mirror and other fixtures. Mark the center point on the wall where the mirror will be hung.
Step 3: Level and Mark
Hold the mirror in place against the wall and use a level to ensure it's perfectly horizontal or vertical. Once you're satisfied with the placement, lightly mark the top and bottom corners of the mirror on the tiles.
Step 4: Apply Mirror Adhesive
Apply a thin, even bead of mirror adhesive to the back of the mirror, following the manufacturer's instructions. Avoid using too much adhesive, as it can squeeze out and create a mess.
Step 5: Position and Press
Carefully position the mirror on the wall, aligning it with your marks. Press the mirror firmly against the tiles, starting from the bottom and working your way up, to ensure proper adhesion. Use spacer blocks if necessary to create a slight gap between the mirror and the wall.
Step 6: Support the Mirror
To prevent the mirror from falling before the adhesive cures, use masking tape or clamps to support it against the wall. Leave it in place for the recommended curing time specified by the adhesive manufacturer, typically 24 to 48 hours.
Step 7: Remove Support and Clean Up
Once the adhesive is fully cured, remove the masking tape or clamps and clean up any excess adhesive that may have squeezed out. Use a damp cloth to gently wipe away any residue from the tiles.
Tips for Success:
- Always follow the manufacturer's instructions for the adhesive you're using.
- Use a strong adhesive specifically designed for mirrors and bathroom environments.
- Ensure the weight of the mirror is compatible with the adhesive and the type of tile on your wall.
- If you're hanging a heavy mirror, consider using additional support, such as corner brackets or wall anchors.
- Keep the mirror clean by wiping it down with a glass cleaner and a soft cloth regularly.

How To Hang A Mirror On Tile Wall Remington Avenue

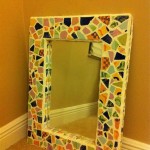
Diy Mosaic Tile Bathroom Mirror Centsational Style

How To Hang Mirrors On Tile 3 Ways A Bonus The Palette Muse

Diy Mosaic Tile Bathroom Mirror Centsational Style

How To Hang Mirrors On Tile 3 Ways A Bonus The Palette Muse

How To Hang A Bathroom Mirror Over Tile Wainscoting Mimzy Company

How To Hang Mirrors On Tile 3 Ways A Bonus The Palette Muse

Diy Mosaic Tile Bathroom Mirror Centsational Style

Diy Mosaic Tile Bathroom Mirror Centsational Style

How To Put Up A Bathroom Mirror Baths