Stained Glass Mirror DIY: A Comprehensive Guide to Creating Unique Reflective Art
Stained glass, traditionally associated with illuminating cathedrals and historical buildings, offers a versatile medium for artistic expression. Incorporating stained glass elements into a mirror design presents an opportunity to transform a functional object into a captivating piece of art. This article provides a detailed guide to creating a stained glass mirror, outlining the necessary materials, tools, and steps involved in this engaging DIY project.
Key Point 1: Preparation and Material Gathering
The foundation of any successful DIY project lies in thorough preparation. For a stained glass mirror, this begins with gathering the appropriate materials and ensuring a safe and organized workspace. Failing to acquire the correct tools or neglecting safety precautions can compromise the project's outcome and potentially lead to injury.
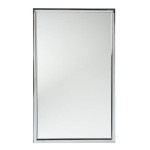
Firstly, a suitable mirror blank is required. This can be a pre-cut mirror from a hardware store or a custom-cut piece from a glass supplier. The size and shape of the mirror will dictate the overall design and complexity of the stained glass border. Consider the placement of the finished mirror and choose dimensions that complement the intended space. A thorough cleaning of the mirror surface with glass cleaner is essential to ensure proper adhesion of the stained glass pieces and prevent contaminants from affecting the finished product.
Secondly, a selection of stained glass is needed. The color palette and textures should reflect the desired aesthetic. Small pieces of scrap glass are often ideal for mirror projects, allowing for creative use of remnants and minimizing material waste. Stained glass is available at varying price points, so budgeting for the project is crucial. Prioritize purchasing quality glass to ensure durability and vibrant colors in the final piece.
Thirdly, lead came or copper foil are the two primary methods for joining the stained glass pieces. Lead came offers a traditional and robust approach, creating a strong and visually appealing framework. Copper foil, on the other hand, is more versatile for intricate designs and allows for a smoother finish. The choice between the two depends on personal preference and the complexity of the planned design. Both materials require specific tools and techniques for proper application.
Fourthly, essential tools include a glass cutter, running pliers, grozing pliers, copper foil or lead came tools (depending on the chosen method), a soldering iron, solder, flux, a burnishing tool (for copper foil), and safety glasses. A glass grinder is highly recommended for smoothing the edges of the glass pieces and ensuring a precise fit. A pattern or design template is also necessary to guide the cutting and assembly process. Proper ventilation is crucial when soldering to avoid inhaling harmful fumes.
Finally, additional materials such as glass cleaner, masking tape, and a sealant are needed for finishing the mirror. Masking tape can be used to temporarily hold the stained glass pieces in place during assembly. A sealant applied to the finished mirror helps protect the lead came or copper foil from oxidation and enhances its longevity. Safety glasses are mandatory throughout the project to protect the eyes from glass shards and soldering splatter.
Key Point 2: Design and Construction
The design phase is crucial for determining the aesthetic of the stained glass mirror. Careful consideration should be given to the color scheme, pattern complexity, and overall style. The construction phase requires precision and patience to ensure a well-crafted and visually appealing result.
Firstly, creating a pattern is essential. The pattern serves as a template for cutting the glass pieces and assembling the stained glass border. The pattern can be hand-drawn or computer-generated, depending on the desired level of precision. Ensure the pattern fits the dimensions of the mirror blank and allows for sufficient space for the lead came or copper foil. Numbering the pattern pieces helps to keep track of the glass pieces during the assembly process. A copy of the pattern should be kept for reference throughout the project.
Secondly, cutting the glass requires careful handling and appropriate technique. Score the glass firmly along the pattern lines using a glass cutter. Apply even pressure to create a clean and consistent score. Use running pliers to separate the glass along the score line. Grozing pliers can be used to remove small pieces of glass and refine the edges. A glass grinder is highly recommended for smoothing the edges of the glass pieces and ensuring a precise fit. Always wear safety glasses when cutting and grinding glass to protect the eyes from flying debris.
Thirdly, assembling the stained glass border involves either applying copper foil or using lead came. For copper foil, wrap the edges of each glass piece with copper foil, overlapping the foil slightly on both sides. Burnish the foil to create a smooth and secure bond. For lead came, cut the lead came to the appropriate length for each piece of glass. Insert the glass pieces into the channels of the lead came, ensuring a snug fit. Use a lead stretcher to gently adjust the lead came to the desired shape.
Fourthly, soldering the joints is a critical step in securing the stained glass border. Apply flux to the joints between the copper foil or lead came. Use a soldering iron to melt solder onto the joints, creating a strong and permanent bond. Ensure proper ventilation when soldering to avoid inhaling harmful fumes. Practice proper soldering techniques to create smooth and aesthetically pleasing solder joints. A well-soldered mirror will be structurally sound and visually appealing.
Fifthly, attaching the stained glass border to the mirror requires careful consideration. Adhesives specifically designed for glass are recommended. Apply the adhesive to the back of the stained glass border and carefully position it onto the mirror surface. Use masking tape to hold the border in place while the adhesive cures. Ensure the border is centered and aligned correctly before the adhesive sets. Allow sufficient drying time for the adhesive to fully cure and create a strong bond between the stained glass border and the mirror.
Key Point 3: Finishing and Maintenance
The final stages of the stained glass mirror project involve cleaning, polishing, and applying a sealant to protect the finished piece. Proper maintenance will ensure the longevity and beauty of the stained glass mirror for years to come.
Firstly, cleaning the mirror is essential to remove any residue or fingerprints. Use a glass cleaner specifically designed for stained glass to avoid damaging the lead came or copper foil. Wipe the mirror surface with a soft cloth to achieve a streak-free finish. Avoid using abrasive cleaners or scouring pads, as these can scratch the glass surface.
Secondly, polishing the lead came or copper foil enhances its shine and protects it from oxidation. Use a specialized metal polish designed for lead or copper. Apply the polish to a soft cloth and gently rub it onto the metal surface. Buff the metal with a clean cloth to remove any excess polish and achieve a lustrous shine. Regular polishing will help maintain the beauty of the metal components of the mirror.
Thirdly, applying a sealant protects the lead came or copper foil from environmental factors. Choose a sealant specifically designed for stained glass projects. Apply the sealant to the joints between the glass and the metal, as well as to the back of the stained glass border. The sealant will prevent moisture from seeping into the joints and causing corrosion. Allow the sealant to dry completely before handling or displaying the mirror.
Fourthly, proper handling and storage are crucial for maintaining the integrity of the stained glass mirror. Avoid dropping or bumping the mirror, as this can damage the glass or the solder joints. When storing the mirror, protect it from direct sunlight and extreme temperatures. Use a soft cloth or bubble wrap to cushion the mirror during transport. Display the mirror in a location where it will not be subject to excessive moisture or humidity.
Fifthly, regular inspection and maintenance will help identify and address any potential problems. Check the solder joints for cracks or weaknesses. Clean the mirror regularly to remove dust and grime. Reapply sealant as needed to protect the lead came or copper foil. By following these maintenance guidelines, the stained glass mirror will remain a beautiful and functional work of art for years to come. The reflective quality of the mirror combined with the vibrant colors and textures of the stained glass create a unique and captivating piece that adds a touch of artistry to any space. The DIY process itself provides an opportunity for creative expression and personal satisfaction, resulting in a handcrafted heirloom that can be enjoyed for generations.

Snowdrop Stained Glass Mirror Mosaic Art Garden

Easy Mirror Diy A Hanging Lamp Repurpose Girl Just

How To Make A Stained Glass Mirror

Tips For Using Mirrors In Copper Foiled Stained Glass

Szklo Glass Handmaid Stained Mountain Mirror Crafts Diy Art

My Favorite Piece So Far The Kraken Stained Glass Mirror Diy Window

Easy Mirror Diy A Hanging Lamp Repurpose Girl Just

Stained Glass Mirror Mosaic Circular

Stained Glass Mirror Patterns Frames Diy Craft Book

How To Make A Mirror Color Blocked Diy