Wall Mirror Removal Instructions
Removing a wall mirror can seem like a daunting task, especially if it's large, heavy, or secured with adhesive. However, with the right tools and a methodical approach, it's a task that can be accomplished safely and efficiently. This article provides a comprehensive guide to removing wall mirrors, outlining the necessary steps and precautions to ensure a successful and damage-free process.
1. Assess the Mirror and Its Mounting
Before embarking on the removal process, it's crucial to assess the mirror and its mounting method. This step involves examining the following:
- Mirror Size and Weight: Consider the size and weight of the mirror. A large, heavy mirror will require extra care and potentially more assistance.
- Mounting Method: Determine how the mirror is attached to the wall. Is it hung with nails, screws, picture hangers, or adhesive?
- Surface Type: Identify the type of wall surface, such as drywall, plaster, or concrete. This will influence the removal method and the tools required.
Understanding the details of the mirror's attachment and the wall surface will guide the subsequent removal steps and minimize the risk of damage.
2. Gather Necessary Tools and Materials
Having the right tools on hand will make the mirror removal process much smoother. The following tools are typically required:
- Screwdriver: Choose a screwdriver that matches the size of the screws used to mount the mirror. A Phillips head screwdriver is commonly used.
- Hammer: If the mirror is hung with nails, a hammer will be needed to gently tap them out. A rubber mallet can be used for more delicate tasks.
- Pliers: Pliers can be helpful for gripping and removing nails, screws, or hooks.
- Utility Knife: A utility knife with a sharp blade can be used to cut through adhesive or heavy-duty tape.
- Gloves: Wear gloves to protect your hands from sharp edges or potential adhesive residue.
- Safety Glasses: Protective eyewear is essential to safeguard your eyes from falling debris or sharp edges.
- Ladder or Stool: If the mirror is positioned high on the wall, a stable ladder or stool will be necessary to reach it safely.
- Drop Cloth or Sheet: Protect the floor from potential damage or debris by spreading a drop cloth beneath the mirror.
Having all the necessary tools readily available will streamline the removal process and ensure a safer working environment.
3. Remove the Mirror Securely
Once you have assessed the mirror and gathered the necessary tools, you can begin the removal process. Follow these steps:
- Prepare the Area: Clear the area surrounding the mirror to provide ample space for maneuvering.
- Locate Mounting Points: Identify the points where the mirror is attached to the wall. Look for nails, screws, picture hangers, adhesive strips, or other mounting mechanisms.
- Remove Hanging Hardware: If the mirror is hung with nails or screws, carefully remove them using a hammer and screwdriver. Work slowly and cautiously to avoid damaging the wall surface.
- Loosen Adhesive: If the mirror is attached with adhesive, use a utility knife to carefully cut through the adhesive strips. Work from the edge of the mirror inward, gently lifting and peeling away the adhesive.
- Support the Mirror: Once the hanging hardware or adhesive is loosened, provide support for the mirror as you detach it from the wall. Use a second person to help hold the mirror steadily or utilize a sturdy object to support its weight.
- Carefully Remove the Mirror: Slowly tilt the mirror away from the wall, ensuring it remains securely supported. Guide it down gently to avoid damaging the mirror or surrounding surfaces.
- Fill Holes: Use spackle or patching compound to fill in any nail or screw holes. Apply the compound with a putty knife, ensuring it is level with the surrounding wall surface.
- Remove Adhesive Residue: Use a putty knife or scraper to remove adhesive residue from the wall. For stubborn residue, consider using a commercial adhesive remover.
- Smooth and Paint: Once the holes are filled and the adhesive residue is removed, sand the repaired area smooth. Prime the surface and apply a matching paint to blend in the repaired section with the rest of the wall.
These steps ensure a safe and controlled removal process, minimizing the risk of damage to the mirror, the wall, or yourself.
4. Repair Wall Damage
After removing the mirror, it's essential to assess and repair any damage to the wall. This step depends on the type of mounting method used and the wall surface. If nails or screws were used, there will likely be holes. If the mirror was attached with adhesive, there may be residue left behind. Here are some general guidelines for repairing wall damage:
By addressing any wall damage caused by the mirror removal, you can restore the wall to its original appearance and prepare it for future use.

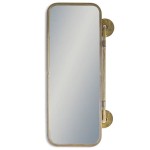
Orc Week 4 How To Remove A Mirror Glued The Wall Pure Happy Home

How To Remove A Mirror Glued The Wall Forbes Home

Orc Week 4 How To Remove A Mirror Glued The Wall Pure Happy Home

How To Safely Remove A Wall Mirror Diy Network

How To Safely And Easily Remove A Large Bathroom Builder Mirror From The Wall Site Title

How To Safely And Easily Remove A Large Bathroom Builder Mirror From The Wall Site Title

Orc Week 4 How To Remove A Mirror Glued The Wall Pure Happy Home

How To Remove Builder Mirrors Sawdust Girl

How To Safely And Easily Remove A Large Bathroom Builder Mirror From The Wall Site Title

Orc Week 4 How To Remove A Mirror Glued The Wall Pure Happy Home