How To Mount A Mirror On The Ceiling
Mounting a mirror on the ceiling can dramatically alter a room's perception, creating an illusion of spaciousness and adding a unique design element. However, this task requires careful planning and execution due to the weight and fragility of mirrors and the potential safety hazards involved. The following steps outline the process of securely and effectively mounting a mirror to a ceiling.
Assessing the Situation
Before starting, several factors must be considered. These factors will influence the choice of mounting method and the necessary preparations.
- Mirror Weight and Size: Heavier and larger mirrors require more robust mounting systems. Accurate measurements are crucial for selecting appropriate hardware.
- Ceiling Type: Different ceiling types (drywall, plaster, concrete) necessitate different mounting techniques and hardware. Determine the ceiling's composition to ensure proper anchoring.
- Mirror Frame: The presence and type of frame impact how the mirror can be attached. Frameless mirrors often require specialized adhesive systems.
- Location Considerations: Consider the intended location of the mirror in relation to lighting fixtures, ceiling joists, and other obstacles.
Gathering Necessary Materials and Tools
Having the correct tools and materials at hand ensures a smooth and efficient installation process. Improvising with inadequate tools can compromise the safety and stability of the mounted mirror.
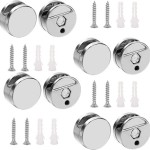
- Mirror Mounting Hardware: Choose appropriate hardware based on the mirror's weight, size, and the ceiling type. Options include J-hooks, mirror clips, and adhesive systems. Heavy-duty toggle bolts or anchors are recommended for heavier mirrors.
- Drill and Drill Bits: The correct drill bit size is essential for creating pilot holes and ensuring a secure fit for the chosen hardware. A hammer drill may be required for concrete ceilings.
- Stud Finder: Locating ceiling joists is crucial for secure mounting, especially with heavier mirrors. A stud finder helps pinpoint these structural supports.
- Measuring Tape and Pencil: Precise measurements are vital for proper placement and alignment. Marking the desired location with a pencil ensures accuracy.
- Level: A level ensures the mirror hangs straight and evenly. This is particularly important for larger mirrors where any slight tilt is noticeable.
- Safety Glasses and Gloves: Protecting your eyes and hands is essential while drilling and working with mounting hardware.
- Adhesive (if applicable): For frameless mirrors or specific mounting systems, specialized mirror adhesive may be required.
Preparing the Ceiling and Mirror
Proper preparation ensures a secure and long-lasting installation. This includes locating ceiling joists and preparing the mirror for attachment.
- Locating Ceiling Joists: Using a stud finder, mark the location of the ceiling joists near the intended mirror placement. These joists provide the strongest points for mounting.
- Marking the Mirror Placement: Carefully measure and mark the desired location of the mirror on the ceiling. Use a level to ensure the markings are straight and even.
- Preparing the Mirror Backing (if necessary): Some mirrors may require additional backing or support for mounting hardware attachment. Consult the mirror manufacturer's instructions for specific recommendations.
Mounting the Mirror
This stage involves carefully attaching the mirror to the ceiling using the chosen hardware. Precision and adherence to safety precautions are critical during this phase.
- Drilling Pilot Holes: Drill pilot holes at the marked locations using the appropriate drill bit size for the chosen hardware.
- Installing Mounting Hardware: Securely install the chosen mounting hardware (J-hooks, clips, or adhesive) into the drilled holes or directly onto the ceiling, following the manufacturer's instructions.
- Attaching the Mirror: Carefully lift and attach the mirror to the installed mounting hardware. Ensure the mirror is securely seated and level.
Final Checks and Adjustments
After mounting, it's essential to confirm the mirror's stability and make any necessary adjustments.
- Stability Check: Gently tug on the mirror to ensure it is firmly attached. If any movement or instability is detected, re-evaluate the mounting hardware and its installation.
- Leveling Adjustment: If the mirror is not perfectly level, make minor adjustments to the mounting hardware as needed until it hangs straight.
- Cleaning: Carefully clean the mirror surface to remove any fingerprints or dust accumulated during installation.
By following these steps and adhering to safety precautions, mounting a mirror on the ceiling can be achieved successfully, adding a striking and elegant element to any space.

Ceiling Mirrors For Bedrooms Pictures Options Tips Ideas

Metropolitan Pivoting Mirror Ceiling Mounted Great For In Front Of A Window Small Bathroom Remodel Design

Mounts Grand Mirrors Stainless Steel For The Bathroom Mirror

Tehome Ceiling Mount Mirrors For Bathrooms Suspend Black Metal Framed

Who Says Your Bathroom Mirror Has To Be On The Wall I Love Idea Of These Ceiling Mounted Mirrors Design

Ceiling Mirrors Trend That Becomes Actual Again

Bathroom Ceiling Mounted Mirror In Front Of Windows Design Trends Home Remodeling

Ceiling Mounted Led Mirror Furniture Home Living Decor Mirrors On Carou

Pin On Furniture Ideas Make Overs Diy S And More

Advance Tabco Mi 48 24 X Ceiling Mounted Tilting Demo Mirror

