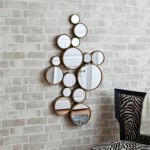
How to Hang a Large Round Mirror on the Wall
Hanging a large round mirror can elevate a room's aesthetic, creating an illusion of spaciousness and reflecting light. However, due to its size and shape, it requires careful planning and execution to ensure secure and visually appealing placement. This guide provides a comprehensive walkthrough of the process, equipping readers with the knowledge and steps necessary for successful installation.
1. Assessing the Wall and Mirror
Before initiating the hanging process, evaluating both the wall type and the mirror's weight is crucial. Different wall types—drywall, plaster, concrete, or brick—require specific hardware for secure attachment. Determining the mirror's weight helps select appropriate hanging hardware that can safely support the load. Measure the mirror's diameter to visualize its placement and ensure sufficient wall space.
2. Gathering Necessary Tools and Materials
Having the right tools ensures a smooth and efficient installation process. The project necessitates a stud finder, measuring tape, pencil, level, drill (with appropriate drill bits for the wall type), screwdriver, and safety glasses. Essential hanging hardware includes heavy-duty D-ring hangers (or wire hanging kit specifically designed for mirrors), appropriate wall anchors, and screws. Selecting anchors specifically designed for the wall type (e.g., drywall anchors, toggle bolts for hollow walls, or concrete anchors) ensures a secure hold.
3. Marking the Desired Location
Visualizing the mirror's position is key to achieving the desired aesthetic. Using a pencil, lightly mark the center point of the desired location on the wall. Consider the surrounding furniture, lighting fixtures, and traffic flow when determining placement. From this center point, measure and mark the mirror's radius on the wall to create a faint circle. This provides a visual guide for aligning the mirror during installation.
4. Installing D-Ring Hangers or Wire
If the mirror doesn't come with pre-installed hanging hardware, attaching D-ring hangers or a wire hanging kit is necessary. For D-rings, carefully measure and mark equidistant points on the back of the mirror frame, ensuring they are level. Following the manufacturer's instructions, securely attach the D-rings using appropriate screws. If using a wire hanging kit, follow the kit's instructions for proper installation, ensuring the wire is taut and securely fastened.
5. Locating Wall Studs
Locating wall studs provides the most secure anchoring points, particularly for heavier mirrors. Use a stud finder to identify the studs behind the marked area on the wall. Mark the stud locations with a pencil. Ideally, the D-rings or wire hanging points should align with the studs. If this isn't feasible, heavy-duty wall anchors appropriate for the wall type will be necessary.
6. Installing Wall Anchors (If Necessary)
If the studs do not align with the hanging points, install appropriate wall anchors. Drill pilot holes at the marked hanging points using the correct drill bit size for the chosen anchors. Insert the anchors following the manufacturer's instructions, ensuring they are flush with the wall surface. Wall anchors provide a secure base for the screws, distributing the weight of the mirror more evenly.
7. Hanging the Mirror
With the wall anchors installed (if needed), carefully lift the mirror and align the D-rings or wire with the screws or anchors in the wall. Slowly lower the mirror onto the screws or anchors, ensuring they engage securely. Gently wiggle the mirror to confirm its stability. It is highly recommended to have an assistant help with this step, especially for larger and heavier mirrors.
8. Checking for Level and Making Adjustments
After hanging, use a level to verify that the mirror is perfectly straight. If adjustments are necessary, slightly loosen the screws or anchors, adjust the mirror's position, and re-tighten. Double-check the level to ensure optimal alignment. Minor adjustments can make a significant difference in the overall presentation.
9. Final Inspection and Cleaning
Once the mirror is level and secure, conduct a final inspection to ensure all hardware is properly installed and concealed. Gently clean the mirror surface with a glass cleaner to remove any fingerprints or smudges accumulated during the installation process. Step back and admire the newly installed mirror, enjoying its reflective qualities and the enhanced aesthetic of the room.

How To Hang A Large Mirror Melanie Lissack Interiors

How To Hang Circular Mirror Tradux Mirrors
Hanging My Heavy Dining Room Mirror House Full Of Summer Coastal Home Lifestyle

How To Hang Circular Mirror Tradux Mirrors

Frame Less Mirror Round Step By Installation Fab Glass And

How To Hang A Mirror Simple Guide

How To Hang Circular Mirror Tradux Mirrors

How To Hang Circular Mirror Tradux Mirrors
:strip_icc()/cdn.cliqueinc.com__cache__posts__189779__this-neat-trick-makes-your-room-look-bigger-and-chic-1731583-1460589715.700x0c-296ae8a3d6984048a8a9be4f15af1316.jpg?strip=all)
30 Ways To Style Large Round Mirrors
:strip_icc()/cdn.cliqueinc.com__cache__posts__189779__this-neat-trick-makes-your-room-look-bigger-and-chic-1731584-1460589719.700x0c-4180baad59e746e2851ea13535378992.jpg?strip=all)
30 Ways To Style Large Round Mirrors

