How To Distress a Wood Mirror Frame
Distressing a wood mirror frame can add character and a touch of rustic charm to any décor. This technique involves intentionally creating imperfections on the frame's surface to mimic the wear and tear of age. Whether aiming for a shabby chic, farmhouse, or vintage aesthetic, distressing offers a versatile approach to customization.
Gathering Necessary Materials
Before beginning the distressing process, gather the necessary materials. Proper preparation ensures a smooth and efficient workflow, minimizing potential disruptions. The recommended materials include:
- Wood mirror frame
- Sandpaper (various grits)
- Paint (optional)
- Stain (optional)
- Paintbrushes or rags
- Hammer
- Screwdriver or other sharp object
- Drop cloth or old newspapers
- Safety glasses
- Gloves
Preparing the Work Area
Creating a suitable work area is essential for a successful distressing project. A well-prepared workspace promotes efficiency and minimizes cleanup. Key considerations include:
- Select a well-ventilated area.
- Cover the work surface with a drop cloth or old newspapers.
- Ensure adequate lighting.
Preparing the Frame
Proper frame preparation is crucial for achieving the desired distressed look. This involves ensuring the frame is ready to receive the distressing techniques. Key steps include:
- Remove the mirror from the frame. This protects the mirror from damage during the distressing process.
- Clean the frame thoroughly. Removing dust, dirt, and any existing finish ensures optimal adhesion of paint or stain.
- Sand the frame lightly with medium-grit sandpaper. This creates a slightly rough surface, promoting better adhesion.
Distressing Techniques
Several techniques can be employed to achieve a distressed look. Experimenting with different methods allows for customization and unique results. Some common techniques include:
- **Sanding:** Use coarse-grit sandpaper to create worn edges and areas of simulated wear. Focus on areas that would naturally receive the most wear over time, such as corners and edges.
- **Hitting with a Hammer:** Gently strike the frame with a hammer to create dents and dings. Vary the force and location of the impacts for a more natural appearance.
- **Creating Wormholes:** Use a screwdriver or other sharp object to create small holes, simulating wormholes. These can be clustered together or scattered randomly across the frame.
- **Dry Brushing:** Apply a small amount of paint to a dry brush and lightly brush it across the frame, leaving streaks and highlighting the texture of the wood.
- **Layering Paint:** Apply multiple layers of paint in different colors, allowing each layer to dry before applying the next. Then, sand through the top layers to reveal the colors underneath, creating a chipped and aged effect.
Applying Paint or Stain (Optional)
Applying paint or stain enhances the distressed look. This step is optional but can significantly impact the final appearance. Consider the following:
- Choose a paint color that complements the desired aesthetic. Consider using chalk paint for a vintage look.
- Apply the paint or stain using a brush or rag, working in the direction of the wood grain.
- Allow the paint or stain to dry completely before proceeding.
Sealing the Frame
Sealing the frame protects the distressed finish and enhances its longevity. This final step ensures the frame remains visually appealing and resistant to wear. Key aspects include:
- Choose a sealant appropriate for the chosen paint or stain.
- Apply the sealant evenly using a brush or rag.
- Allow the sealant to dry completely before re-inserting the mirror.
Reassembling the Mirror
Once the sealant has dried completely, the mirror can be re-inserted into the frame. This completes the distressing process and restores the mirror to its functional state. Carefully follow the original assembly instructions for the mirror and frame.
Safety Precautions
Observing safety precautions is crucial during the distressing process. Protecting oneself from potential hazards ensures a safe and enjoyable experience. Always adhere to the following safety guidelines:
- Wear safety glasses to protect your eyes from dust and debris.
- Wear gloves to protect your hands from splinters and chemicals.
- Work in a well-ventilated area to avoid inhaling dust and fumes.

How To Cheat A Distressed Look Confessions Of Serial Do It Yourselfer

The Yellow Cape Cod How To Match A Potterybarn Distressed Finish Mirror Frame Diy Coral Painted Furniture

12 Techniques To Painting Antique Mirrors Hallstrom Home

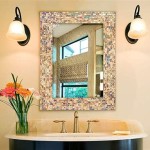
Farmhouse Mirrors A Timeless Addition To Your Home Decor Goals Distressed Wood Frames Framed Mirror Rustic Style

Distressed Wood Mirror For Rustic Decor The Cabin S

Handmade Burnt Wooden Mirror Frames 1 On Free Natural Wood Color Vintage Rustic Distressed Design Rural Craft

Distressed Wood Framed Mirror Industrial Farm Co

Distressed Wood Frame Wall Mirror Kirklands Home

Distressed Wood Mirror 34 6 L X 16 5 W 1 2 D Wall Mirrors Set Of

Distressed Reclaimed Wood Mirror Frame Size Dimension 24 Inch At Rs 1000 In Jaipur