DIY Bathroom Mirror Border: Elevating Your Bathroom with Simple Techniques
A bathroom mirror border can significantly enhance the overall aesthetic of the space. This article explores various DIY methods for creating stylish and personalized borders, transforming a plain mirror into a focal point.
Mirror Border Materials
Choosing the right materials is crucial for the project's success and longevity. Several options offer varying aesthetics and levels of difficulty:
- Wood: Offers a classic and versatile look, adaptable to various stain and paint finishes.
- Tile: Provides a durable and water-resistant border with numerous design possibilities.
- Mosaic: Allows for intricate and personalized designs using small pieces of glass, ceramic, or stone.
- Rope or Jute: Creates a natural and textured border, ideal for nautical or rustic bathroom themes.
- Metal Trim: Adds a sleek and modern touch with various finishes like brushed nickel or oil-rubbed bronze.
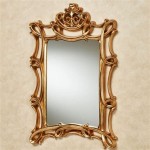
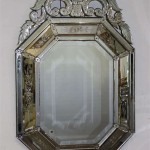
- Mirror Tiles: Offer a glamorous and reflective border, expanding the perceived size of the mirror.
- Peel-and-Stick Border: Provides a quick and easy solution with various patterns and colors.
Preparing the Mirror and Bathroom
Adequate preparation ensures a smooth and successful installation. The following steps are crucial:
- Clean the mirror surface: Thoroughly clean the mirror with a glass cleaner to remove any dirt, grease, or residue.
- Protect surrounding surfaces: Use painter's tape to mask off the wall and any adjacent fixtures to prevent damage or unwanted adhesive.
- Measure accurately: Precise measurements are essential for determining the required material quantities and ensuring a proper fit.
- Gather necessary tools: Assemble all required tools, including a measuring tape, level, adhesive, cutting tools, and safety equipment.
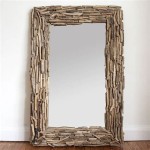
Creating a Wooden Frame Border
A wooden frame provides a classic and timeless border option:
- Cut and miter the wood: Cut the wood pieces to the desired length and miter the corners for a seamless join.
- Sand and finish the wood: Sand the wood smooth and apply a stain or paint finish for desired aesthetic and protection.
- Attach the frame to the mirror: Use a strong adhesive suitable for both wood and glass to secure the frame to the mirror.
- Secure with finishing nails (optional): Small finishing nails can provide extra stability for larger frames.
Applying Tile or Mosaic Border
Tiles offer a durable and visually appealing border:
- Plan the tile layout: Determine the desired tile arrangement and ensure proper spacing.
- Apply tile adhesive: Use a thin-set mortar or appropriate tile adhesive to adhere the tiles to the mirror surface.
- Grout the tiles: Apply grout between the tiles to fill the gaps and create a finished look.
- Clean excess grout: Remove any excess grout promptly to prevent staining.
- Seal the grout (optional): Sealing the grout provides added protection against moisture and staining.
Utilizing Rope or Jute for a Natural Border
Rope or jute offers a unique and textured border option:
- Choose the desired rope or jute: Select a rope or jute thickness that complements the mirror size and bathroom style.
- Measure and cut the rope/jute: Cut the rope or jute to the required length, adding extra for overlap.
- Apply adhesive to the mirror edge: Use a strong adhesive suitable for glass and the chosen material.
- Attach the rope/jute: Carefully press the rope or jute onto the adhesive, ensuring a smooth and even application.
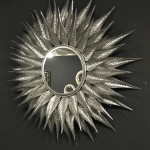
Installing a Metal Trim Border
Metal trim adds a sleek and contemporary touch:
- Measure and cut the metal trim: Cut the metal trim to the required length, using appropriate metal cutting tools.
- Apply adhesive or use mounting clips: Depending on the type of metal trim, use a strong adhesive or mounting clips to secure the trim to the mirror.
- Ensure proper alignment: Carefully align the metal trim to create a seamless and professional finish.
Applying Peel-and-Stick Border
Peel-and-stick borders offer a quick and easy DIY solution:
- Clean the mirror surface: Ensure the mirror surface is clean and dry.
- Measure and cut the border: Measure and cut the peel-and-stick border to the required length.
- Peel and apply: Carefully peel the backing from the border and apply it to the mirror edge, smoothing out any air bubbles.
Maintaining the Mirror Border
Regular maintenance helps preserve the border's appearance and longevity:
- Regular Cleaning: Regularly clean the border with appropriate cleaning solutions based on the material.
- Inspect for Damage: Periodically inspect the border for any signs of damage and address any issues promptly.
- Reseal Grout (if applicable): For tiled borders, resealing the grout periodically helps prevent staining and maintain its integrity.

Mirror Frame Diy How To Update A Basic Bathroom Our Faux Farmhouse

Mirror Frame Diy How To Update A Basic Bathroom Our Faux Farmhouse

Diy Stick On Mirror Frame Sawdust Sisters

How To Frame Out That Builder Basic Bathroom Mirror For 20 Or Less

Diy Bathroom Mirror Frame Without Removing Clips Her Happy Home

Diy Bathroom Mirror Frame With Molding The Happier Homemaker

How To Make An Easy Diy Bathroom Mirror Frame Momhomeguide Com

How To Frame A Mirror

Diy Bathroom Mirror Frame For Under 10 O Hayley Blog

How To Frame A Mirror Sand And Sisal