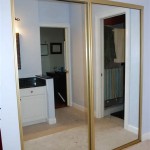
Behind Closet Door Mirror Replacement
Replacing a mirror attached to the back of a closet door can seem daunting, but with the right tools and approach, it can be accomplished efficiently and safely. This article provides a comprehensive guide to the process, outlining the necessary materials, preparatory steps, and the replacement procedure itself.
Before beginning, it's essential to gather the required tools and materials. These typically include a new mirror (cut to the correct dimensions), safety glasses, work gloves, a pry bar or putty knife, a screwdriver, mirror adhesive, and optionally, wood shims and a measuring tape.
Safety should be the paramount concern throughout this process. Wearing safety glasses is crucial to protect eyes from potential glass shards. Work gloves provide protection against sharp edges and offer a better grip. Always ensure the work area is well-lit and free of obstructions.
The first step in the replacement process involves careful removal of the old mirror. Begin by opening the closet door fully and securing it in place to prevent movement. If the existing mirror is cracked or broken, cover it completely with packing tape to minimize the risk of further shattering during removal. This will also help hold the pieces together, making the process safer.
Next, carefully examine how the old mirror is attached to the door. It might be held in place with clips, screws, adhesive, or a combination of these. If screws or clips are used, use a screwdriver to remove them. If adhesive was used, a pry bar or putty knife can be carefully inserted between the mirror and the door to loosen the bond. Work slowly and methodically, applying even pressure to avoid cracking the mirror further. If the mirror is particularly stubborn, a heat gun can be used to soften the adhesive, making it easier to remove. However, exercise extreme caution when using a heat gun, as excessive heat can damage the door.
Once the old mirror is free, clean the door surface thoroughly. Remove any remaining adhesive residue, dust, or debris. A clean surface is essential for proper adhesion of the new mirror.
Before installing the new mirror, take precise measurements of the opening where it will be placed. It's always best to measure twice and cut once to ensure a perfect fit. If the new mirror needs to be cut, it's recommended to have this done professionally by a glass shop to guarantee accurate dimensions and clean edges.
With the door surface prepared and the new mirror ready, the next step is applying the mirror adhesive. Follow the manufacturer's instructions carefully regarding application and drying time. Depending on the type of adhesive, it may be applied in beads, a zig-zag pattern, or evenly across the back of the mirror. Avoid applying adhesive too close to the edges of the mirror to prevent it from squeezing out when the mirror is pressed against the door.
Carefully position the new mirror onto the door, ensuring proper alignment. If using wood shims, place them around the edges of the mirror to maintain even spacing and prevent the mirror from coming into direct contact with the door frame. These shims also help to accommodate any slight imperfections in the door surface. Apply gentle pressure to the mirror to ensure a secure bond with the adhesive. If necessary, use masking tape to hold the mirror in place while the adhesive cures.
Allow the adhesive to dry completely according to the manufacturer's instructions. Avoid disturbing the mirror during this time to prevent shifting or weakening the bond. Once the adhesive is fully cured, carefully remove any shims or masking tape.
For added security and a finished look, consider installing mirror clips or molding around the perimeter of the mirror. These can provide extra support and prevent the mirror from shifting over time. They also offer a more aesthetically pleasing finish, concealing any gaps between the mirror and the door.
Replacing a behind-the-closet-door mirror requires patience and attention to detail. Following these steps ensures a successful and safe installation. However, if there are any concerns about handling the process independently, consulting a professional installer is always a prudent option.
Choosing the right mirror adhesive is crucial for a successful installation. Consider factors such as the weight and size of the mirror, the material of the closet door, and the ambient temperature and humidity. Different adhesives have varying bonding strengths and drying times. Consulting with a hardware store professional can help determine the most appropriate adhesive for the specific application.
Proper disposal of the old mirror is important. Wrap the broken pieces in thick cardboard or several layers of newspaper and label it clearly as "broken glass" to prevent injuries to waste handlers. Check local regulations for specific guidelines on disposing of broken glass.

20 Diy Closet Mirror Door Makeover Angela Rose Home

Sliding Closet Door Makeover With Paint Tape Making Maanita

Sliding Closet Door Makeover With Paint Tape Making Maanita

Secret Mirror Door Buy Now Secure The

Sliding Mirror Closet Doors All You Need To Know

Affordable Solutions For Updating Mirrored Closet Doors In Your Home Mirror Door Makeover Sliding

Affordable Solutions For Updating Mirrored Closet Doors In Your Home Mirror Sliding Door Alternative

Mirror Reflections Closet Doors In Sunnyvale Interior Door Replacement Company

Our Team Is Frequently Replacing Old Closet Doors With New Ones In This Particular Insta Door Makeover Sliding Mirror

Closet Sliding Barn Doors Build Plans Houseful Of Handmade

