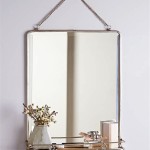
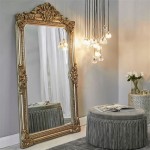
Brackets For Hanging Large Mirrors: A Comprehensive Guide
Hanging a large mirror can dramatically enhance the aesthetic appeal and functionality of any room. Large mirrors create the illusion of more space, amplify natural light, and serve as striking decorative focal points. However, the weight and size of these mirrors present unique challenges when it comes to installation. Selecting the appropriate brackets is crucial for ensuring safety, stability, and a professional-looking result. This article provides a comprehensive guide to understanding the different types of brackets available for hanging large mirrors, factors to consider when choosing brackets, and best practices for installation.
Understanding the Weight and Dimensions of Your Mirror
Before exploring various bracket options, it is essential to accurately determine the weight and dimensions of the mirror. The weight is a primary factor in determining the load-bearing capacity required of the brackets. The dimensions, including height, width, and thickness, influence the placement and number of brackets needed to provide adequate support and prevent warping or breakage. Most mirror manufacturers provide specifications regarding the weight, but if unavailable, it can be estimated based on the surface area and thickness of the glass.
Accurate measurements are also critical for planning the installation process. Knowing the dimensions allows for precise marking on the wall and ensures the mirror is positioned correctly. Furthermore, consider the frame, if any, as the frame itself adds to the overall weight and dimensions, impacting bracket selection and placement. A frame can also dictate the type of bracket best suited for the mirror's design.
The weight calculation must also account for anticipated future additions in some cases. If the mirror is likely to be subject to movement or impact, it's wise to select brackets rated for significantly higher load capacity than the mirror's static weight. This provides a safety margin and significantly reduces the risk of bracket failure over time.
Types of Brackets for Large Mirrors
The market offers a wide variety of brackets designed specifically for hanging large mirrors. Each type offers unique advantages and is suited for different mirror styles and wall constructions. Understanding the characteristics of each bracket type is essential for making an informed decision.
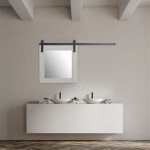
Z-Bar Hangers (French Cleats): Z-bar hangers, also known as French cleats, consist of two interlocking metal profiles. One profile is attached to the back of the mirror frame, while the other is mounted flush against the wall. The angled design allows the mirror to securely slide down and lock into place. Z-bar hangers offer exceptional strength and weight distribution, making them ideal for heavy mirrors. They also provide a nearly concealed mounting solution and allow for easy removal of the mirror should it be necessary.
The French cleat system also allows for minor adjustments to the horizontal position of the mirror after it is mounted. This feature is particularly useful when aligning multiple mirrors or ensuring perfect centering on a wall. When using Z-bar hangers, it is critical to ensure that both profiles are perfectly aligned to ensure a secure and balanced installation.
Heavy-Duty D-Rings and Wire: While often used for picture frames, heavy-duty D-rings and wire can be adapted for lighter large mirrors. D-rings are attached to the back of the mirror frame, and a strong wire is strung between them. The wire is then hung on hooks or screws secured in the wall. This method is generally less secure than Z-bar hangers and is not recommended for very heavy mirrors or high-traffic areas where the mirror could easily be bumped. It's important to calculate the wire gauge needed to hold the weight of the mirror plus a generous safety margin.
If using D-rings and wire, select D-rings constructed from high-quality steel or brass. The wire itself should be braided steel cable, rated for several times the mirror's weight. Regularly inspect the wire and D-rings for signs of wear or corrosion to ensure the mirror remains securely mounted. The advantage of this system is its relative simplicity and low cost, however, this convenience comes with a trade-off in security.
Mirror Clips: Mirror clips are small metal or plastic brackets that hold the mirror edges against the wall. They are typically used for frameless mirrors or mirrors with minimal frames. Mirror clips are available in various styles, including top clips, bottom clips, and side clips. Some clips have adjustable features that accommodate different mirror thicknesses. While generally simple to install, mirror clips are less robust than Z-bar hangers and are best suited for smaller or lighter mirrors.
When using mirror clips, ensure that the clips are properly spaced to distribute the mirror's weight evenly. The spacing will depend on the mirror's size and thickness, but generally, clips should be placed every 12-18 inches. Use high-quality screws or anchors to secure the clips to the wall, particularly if the wall material is drywall or plaster. Consider using clips with rubber or felt pads to protect the mirror's edges from scratches.
J-Channels: J-channels are metal profiles that create a supportive groove along the bottom edge of the mirror. The mirror rests within this channel, and the top edge is secured with clips or brackets. J-channels provide excellent support for the bottom edge of heavy mirrors and help distribute the weight evenly. They are often used in conjunction with other bracket types to provide a comprehensive mounting solution.
Installing J-channels requires careful measurement and precise installation. The channel must be perfectly level to ensure the mirror hangs straight. Use shims if necessary to level the channel before securing it to the wall. Select a J-channel with a depth that matches the mirror's thickness. Some J-channels are designed to be paintable, allowing them to blend seamlessly with the wall color.
Factors to Consider When Choosing Brackets
Selecting the appropriate brackets for a large mirror requires careful consideration of several factors, including the mirror's weight, wall construction, desired aesthetic, and budget. A thorough assessment of these factors will ensure a safe and successful installation.
Wall Construction: The type of wall construction significantly impacts the choice of brackets and the installation method. Drywall, plaster, and concrete walls require different types of anchors and screws. Drywall, for example, is relatively weak and requires specialized anchors to distribute the weight of the mirror. Stud finders can be used to locate wall studs within the drywall, which offer a much stronger anchoring point. Concrete calls for the use of masonry screws and anchors that can grip the hard surface. Plaster walls, depending on their condition, may require a combination of techniques. The wall's ability to hold the weight of the mirror and the brackets is paramount.
If wall studs are not conveniently located where the mirror needs to be hung, consider using drywall anchors that are specifically designed for heavy loads. Toggle bolts are a good option for drywall, as they provide a secure hold by spreading the weight across a wider area. For concrete walls, use concrete screws or expansion bolts that are designed to grip the concrete and prevent the bracket from pulling out. Careful selection of appropriate wall anchors is crucial for preventing the mirror from falling and causing damage or injury.
Weight Rating: Always select brackets with a weight rating that exceeds the mirror's actual weight. A general rule is to choose brackets that can support at least 1.5 to 2 times the mirror's weight to provide a safety factor. Overestimating the required weight capacity is essential, especially if the mirror is located in a high-traffic area or is subject to vibrations. This ensures that the brackets can withstand any unexpected forces and prevent the mirror from falling.
Consider the location of the mirror when determining the appropriate weight rating. For example, a mirror hung in a child's room or near a doorway is more likely to be bumped or accidentally hit. In such cases, it is even more important to select brackets with a higher weight rating to ensure the mirror remains securely mounted. Regular inspection of the brackets and wall anchors is recommended to check for any signs of loosening or damage.
Aesthetic Considerations: The type of brackets chosen should complement the overall aesthetic of the mirror and the room. Some brackets are designed to be concealed, while others are visible and can add a decorative element. Z-bar hangers, for example, offer a clean and minimalist look as they are hidden behind the mirror. Mirror clips, on the other hand, may be visible but can be selected in finishes that match the mirror frame or the wall color.
Consider the finish and style of the brackets when making your selection. Available finishes like chrome, brushed nickel, or matte black can dramatically alter the visual impact. Choose brackets that blend seamlessly with the mirror's design and the room's décor. In some cases, painting the brackets to match the wall color can help them disappear. The goal is to achieve a cohesive and visually appealing look that enhances the mirror's presence in the room.
Best Practices for Installation
Proper installation is just as important as selecting the right brackets. Following best practices ensures that the mirror is securely mounted and minimizes the risk of damage or injury.
Accurate Measurement and Marking: Before installing any brackets, carefully measure and mark the desired location of the mirror on the wall. Use a level to ensure the mirror will hang straight. Consider using a laser level for greater precision, especially for large mirrors. Accurate marking is essential for ensuring that the brackets are properly aligned and spaced. Double-check all measurements before drilling any holes in the wall.
Use a pencil to mark the exact locations of the bracket mounting holes on the wall. Use a template, if provided with the brackets, to ensure accurate placement. If necessary, use painter's tape to protect the wall surface and prevent chipping or cracking. Take your time and pay attention to detail, as accurate measurements and markings are crucial for a successful installation.
Using Appropriate Anchors and Screws: Select the appropriate anchors and screws based on the wall construction and the weight of the mirror. Drywall requires specialized anchors, while concrete requires masonry screws. Ensure that the screws are long enough to penetrate the wall studs or anchors and provide a secure grip. Avoid using screws that are too short, as they may not provide adequate support. Follow the manufacturer's instructions for installing the anchors and screws.
If installing brackets into drywall, consider using self-drilling drywall anchors that are designed to be easily installed without pre-drilling. For heavier mirrors, use toggle bolts or molly bolts, which provide a more secure hold. When installing screws into concrete, use a hammer drill to create pilot holes. Always wear safety glasses when drilling to protect your eyes from debris. Using the correct anchors and screws is essential for ensuring the mirror is securely mounted and preventing it from falling.
Proper Bracket Spacing and Placement: Distribute the brackets evenly across the back of the mirror frame to provide balanced support. The spacing will depend on the mirror's size and weight, but generally, brackets should be placed every 12-18 inches. For larger mirrors, it may be necessary to use more brackets to distribute the weight effectively. Ensure that the brackets are aligned properly to prevent the mirror from warping or twisting.
Consider the mirror's shape when determining bracket placement. For rectangular mirrors, place brackets along the top and bottom edges, as well as the sides if necessary. For irregularly shaped mirrors, distribute the brackets strategically to provide maximum support. Use a level to ensure that the brackets are aligned horizontally and vertically. Proper bracket spacing and placement are essential for ensuring the mirror is securely and evenly supported.

Simple Mount 30 In Heavy Duty Mirror And Picture Hanger Hm 30d The Home Depot

Heavy Picture Mirror Hanging Kit 50 Kg

Mirror Hanging Brackets Strip Wall Mounts For Mirrors 1m 2m Rail

Heavy Picture Mirror Hanging Kit 50 Kg

Mirror Hanging Hang Mirrors With Brackets Hooks Rails Hanger Kits

How To Hang A Heavy Mirror C R F T

Mirror Clamp Support Wall Mounted Glass Bracket Heavy Duty

Heavy Picture Mirror Hanging Kit 50 Kg

How To Hang A Heavy Mirror Diy Family Handyman

Simple Mount 30 In Heavy Duty Mirror And Picture Hanger Hm 30d The Home Depot