Distressed Mirror Glass DIY: A Step-by-Step Guide to Creating a Unique and Elegant Mirror
Distressed mirror glass adds a touch of antique charm to any room. Whether you're looking to update an existing mirror or create a new one, this DIY project is easy to follow. With a few simple steps, you can achieve a stunning distressed look that perfectly complements your home décor.
Materials You'll Need:
- Glass mirror (any size or shape)
- Dremel tool or rotary tool
- Diamond cutting wheel or grinding stone
- Safety glasses
- Paint stirrer or wooden spoon
- Vinegar
- Water
- Old toothbrush or sponge
- Wax or clear sealant (optional)
Step-by-Step Instructions:
Step 1: Safety First
Put on safety glasses before operating power tools. Ensure you have a clean, well-ventilated workspace.
Step 2: Cut the Mirror
Use the Dremel tool with the diamond cutting wheel to cut the mirror to the desired shape and size. Handle the mirror with care and score around the edges before cutting. This will help prevent the glass from shattering.
Step 3: Distress the Edges
Attach the grinding stone to the Dremel tool and gently grind around the edges of the mirror glass. Hold the tool at an angle to create a feathered effect. This will simulate the wear and tear of an antique mirror.
Step 4: Create Scratches and Swirls
To add more depth to the distressed look, use a paint stirrer or wooden spoon dipped in vinegar and water to create scratches and swirls on the mirror surface. Apply light pressure and move the tool in random directions.
Step 5: Acid Etching (Optional)
For a more dramatic distressed look, you can etch the mirror with vinegar. Mix vinegar with equal parts water in a spray bottle. Mist the vinegar solution onto the mirror surface and let it sit for a few minutes. Rinse the vinegar off with clean water.
Step 6: Brush Away Loose Glass
Use an old toothbrush or sponge to brush away any loose glass particles from the mirror surface. Rinse the mirror thoroughly with water.
Step 7: Seal the Mirror (Optional)
To protect the distressed finish and enhance its durability, apply a coat of wax or clear sealant over the mirror surface. This will prevent moisture and tarnishing.
Step 8: Enjoy Your Distressed Mirror
Your beautifully distressed mirror is now complete! Hang it on a wall, lean it against a bookcase, or use it as a unique centerpiece for your dressing table. The distressed effect will add a touch of elegance and character to any room in your home.

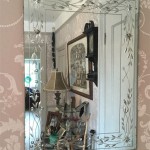
The Ultimate Guide On Diy Antique Mirrors So Much Better With Age

Diy Antique Mirror Easy To Do And Looks Authentic My Creative Days

How To Antique A Mirror From The Front With Paint Average But Inspired

The Ultimate Guide On Diy Antique Mirrors So Much Better With Age

Diy Antiqued Mirror Olive June

Diy Antique Mirror Easy To Do And Looks Authentic My Creative Days

How To Antique A Mirror Easy No Scratching The Navage Patch

10 Tutorials On How To Antique A Mirror So Much Better With Age

How To Antique A Mirror 9 Fast Diys Shelterness

Diy Mercury Glass Gilded Mirror Made From Old Photo Frames