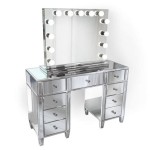
DIY Full-Length Mirror Stand: Elevate Your Interior Design with a Custom Piece
A full-length mirror is a valuable addition to any home, offering practicality and aesthetic appeal. It can enhance the illusion of space, add brightness to a room, and serve as a crucial tool for getting ready. However, finding a mirror stand that complements your existing décor and budget can be challenging. Enter the world of DIY – where you can craft a custom full-length mirror stand that perfectly suits your needs and style. This article will guide you through the process, outlining key elements, and providing insights to create a stunning and functional piece.
Choosing the Right Materials for Your DIY Mirror Stand
The first step in creating your mirror stand is selecting the appropriate materials, which will determine its style, durability, and overall aesthetic. Common choices include:
Wood:
A classic and versatile option, wood offers a warm, natural feel. It's readily available in various types, each with unique characteristics. Pine is affordable and lightweight, while hardwoods like oak or walnut provide sturdiness and a luxurious look.-
Metal:
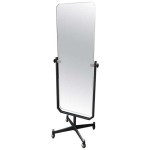
For a modern and industrial vibe, metal is an excellent choice. Steel, iron, and aluminum offer different strengths and finishes. Metal can be easily welded or attached, making it ideal for intricate designs. -
Acrylic:
A lightweight and transparent material, acrylic is a contemporary option that adds a sleek and clear aesthetic. It's easy to work with and can be cut to precise dimensions.
Consider the weight of your mirror and your desired style when making your material selection. For instance, a heavy mirror might require a sturdy wood or metal framework for support.
Constructing the Mirror Stand: Instructions and Tips
Once you've chosen your materials, you can begin constructing the stand. The specifics will vary depending on your chosen design, but here's a general guide:
-
Planning and Design:
Start by sketching out your design, considering the height, width, and overall shape of the mirror stand. Determine the optimal placement for the mirror and any decorative elements you desire. Measure your mirror carefully to ensure a precise fit. -
Cutting Materials:
Cut your chosen materials according to your design using tools like a saw (for wood), a metal shear (for metal), or an acrylic cutter (for acrylic). Be sure to wear safety glasses and appropriate gloves for protection. -
Assembling the Stand:
Using woodworking glue, screws, or welding techniques (depending on your materials), assemble the stand according to your plan. Ensure all joints are strong and secure. Consider using wood glue for a more permanent bond. -
Finishing Touches:
Once the stand is assembled, sand down any rough edges and apply a finish, such as paint, stain, or varnish. Choose a finish that complements your decor and the chosen materials. For metal stands, consider using primer and a rust-resistant finish to prevent corrosion. -
Securing the Mirror:
Attach the mirror to the stand using appropriate hardware. Ensure the mirror is securely attached to prevent accidental falls.
Remember to be patient and meticulous during the construction process. Accuracy and precision are key to achieving a professional-looking result. If you're unfamiliar with woodworking or metalworking techniques, consider enlisting help from an experienced DIY enthusiast.
Adding Personal Touches: Enhancing the Mirror Stand's Aesthetic
A DIY mirror stand offers endless possibilities for adding personal touches. To elevate the design, consider incorporating these elements:
-
Decorative Elements:
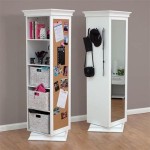
Add decorative elements like shelves, drawers, or compartments to enhance the stand's functionality and visual appeal. These can be used to store jewelry, cosmetics, or other personal belongings. You could also incorporate decorative molding for a more elegant look. -
Lighting:
Install integrated lighting to create dramatic effects and improve visibility when using the mirror. Consider LED lights for energy efficiency and longevity. You can place lights around the mirror's frame or even within the stand's structure. -
Paint and Finish:
Choose paint colors and finishes that align with your overall décor. A distressed paint finish can create a vintage look, while a glossy black paint can offer a modern, elegant touch. -
Upcycling Materials:
Embrace sustainability by upcycling existing items like old furniture or reclaimed wood. This can add unique character to your DIY mirror stand.
By incorporating your personal touches, you'll create a truly unique statement piece that reflects your style and personal taste. Experiment with various design elements to create a mirror stand that is both practical and visually striking.

Diy Full Length Mirror With Storage Addicted 2

Diy Full Length Mirror With Storage Addicted 2

Building A Large Mirror Stand

From Master To Mastered Home Decor Rustic Mirrors

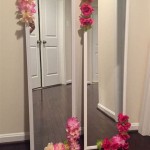
Diy Full Length Mirror

Brown Rectangle Freestanding Full Length Mirror With Clothes Rack H 170 Cm X W 32 Diy At B Q

Shigaken Full Length Mirror Wooden Frame Floor Dressing With Stand Wall Mounted Freestanding Leaning 63 18 Brown Wood Diy Standing

Freestanding Arch Full Length Mirror With Storage Shelf In Wheel 45 X 160 Cm Diy At B Q

Diy Full Length Mirror Shanty 2 Chic

Industrial Metal And Wood Floor Mirror Tutorial Cherished Bliss

