DIY Hinged Wall Mirror: A Step-by-Step Guide
Adding a hinged wall mirror to a room can instantly elevate its style and functionality. Not only do these mirrors provide a decorative focal point, but they also offer versatility in terms of how they can be used. Whether you're looking to create a glamorous vanity area, a functional hallway mirror, or a statement piece in your living room, a DIY hinged wall mirror is a rewarding project for any home improvement enthusiast. This article will provide a comprehensive guide, breaking down the process into manageable steps for a successful and stylish outcome.
Choosing the Right Materials
Before embarking on your DIY journey, selecting the right materials is crucial. This will ensure both the aesthetic appeal and the longevity of your mirror. Consider the following factors:
- Mirror Size and Shape: Determine the desired size and shape of your mirror based on the space it will occupy. Rectangular mirrors are a classic choice, but you can also explore circular, oval, or even more unique shapes.
- Mirror Material: Choose a mirror material that complements your desired style. Standard glass mirrors are budget-friendly, while beveled edges or decorative details can add sophistication.
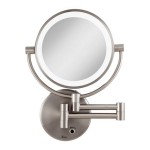
- Hinge Type: For hinges, you have two primary options:
- Flush Mount Hinges: These sit flush against the wall, providing a minimalist look.
- Decorative Hinges: These come in various styles and can serve as a decorative element, especially if you want to enhance the vintage or rustic aesthetic.
- Frame Options: You can choose to leave the mirror frameless or add a custom-made wooden frame to complement the overall design.
- Hardware: Select appropriate screws, nails, and mounting brackets based on the wall material and the weight of your mirror.
Step-by-Step Construction Guide
Once you've gathered your materials, follow these steps to build your hinged wall mirror:
- Prepare the Mirror: If necessary, cut the mirror to your desired size and shape using a glass cutter. Be sure to wear protective gear, including gloves and eye protection.
- Install the Hinges: Attach the hinges to the back of the mirror. For flush mount hinges, use a drill to create pilot holes and then secure them with screws. For decorative hinges, follow the manufacturer's instructions.
- Create the Wall Mount: Construct a sturdy wall mount to support the mirror. A simple option is to use a wooden board, at least 4 inches wide and long enough to accommodate the mirror. For more elaborate designs, you can use decorative metal brackets.
- Secure the Wall Mount: Mount the wall mount to the wall, ensuring it is level and securely fastened. Use appropriate screws or anchors based on your wall material.
- Attach the Mirror to the Wall Mount: Carefully attach the mirror to the wall mount using the hinges. Make sure the mirror is securely attached and hangs freely.
- Finishing Touches: Once the mirror is in place, you can add any decorative elements you desire, such as a frame, paint, or additional hardware.
Tips for a Successful Project
Here are some additional tips to ensure a successful DIY hinged wall mirror project:
- Measure Twice, Cut Once: Accurate measurements are essential for a perfect fit. Double-check all measurements before making any cuts.
- Safety First: Wear protective gear, especially when working with glass and tools. Use caution when handling heavy objects.
- Consider Weight Distribution: Ensure the wall mount is strong enough to support the weight of the mirror. If necessary, use additional support brackets or consider a heavier wall mount.
- Use a Level: Ensure the mirror is hung straight by using a level during installation.
- Plan for Accessibility: Consider how you will access the mirror for cleaning or adjustments. Leave enough space around the hinge area for easy movement.
Creating a DIY hinged wall mirror can be a rewarding project that enhances both the aesthetic appeal and functionality of your space. By carefully selecting materials, following a step-by-step guide, and incorporating helpful tips, you can create a unique and stylish addition to your home.
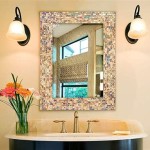
Diy Medicine Cabinet Removed Old From The Wall Patched And Painted Hole Then Mounted A Bathroom Mirrors Trendy
Diy Full Length Mirror With Storage Addicted 2
Diy Bathroom Mirror Storage Case Shanty 2 Chic
Diy Full Length Mirror With Storage Addicted 2
Do It Yourself Ladies Diyl 3 Way Mirror All You Need 1 Power Drill Long Mirrors 4 6 Door Hinges Some S Obvi Remodel Bedroom Diy Home
Diy Bathroom Mirror Storage Case Shanty 2 Chic
How To Turn A Mirror Into Medicine Cabinet Diy Bathroom
How To Build A Sliding Mirror Jewelry Cabinet Designed Decor
How To Build A Mirrored Wall Mount Jewelry Cabinet Interior Frugalista
How To Turn A Mirror Into Medicine Cabinet Diy Bathroom