Creating a Striking Statement Piece: DIY Large Sunburst Mirror
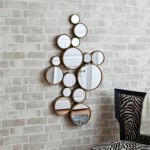
The sunburst mirror has risen to become a popular décor element, offering a captivating focal point for any room. Its radiating design, reminiscent of the sun's rays, adds a touch of elegance and sophistication to any space. While these mirrors can be expensive to purchase, crafting your own sunburst mirror allows for personalized creativity and the satisfaction of creating a unique statement piece. This DIY project is surprisingly manageable, combining simple materials and a dash of patience for a remarkable result.
Choosing Your Materials: Setting the Stage
The initial step in creating a DIY sunburst mirror involves selecting the materials that align with your vision. These materials form the foundation of your mirror, dictating its size, style, and overall aesthetic.
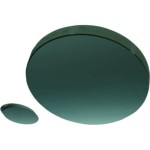
1. The Mirror: The core of your sunburst mirror is the mirror itself. Opt for a circular mirror that complements the desired dimensions of your design. Consider the size and shape of the mirror carefully; a larger mirror will create a bolder statement, while a smaller mirror can offer a more subtle touch.
2. The Sunburst Frame: This element defines the shape and style of your sunburst mirror. You can choose from a variety of materials, each possessing its own unique aesthetic qualities:
- Wood: Offers a natural, rustic charm and allows for easy customization with paint or stain.
- Metal: Provides a modern, industrial feel with diverse finishes, from polished chrome to antique brass.
- Plastic: Offers a lightweight, affordable option, available in various colors and textures.
- Cardboard: Ideal for creating a budget-friendly and easily customizable sunburst frame.
3. Adhesive: The adhesive plays a crucial role in securing the sunburst frame to the mirror. Strong adhesive, like construction adhesive or hot glue, is recommended to ensure long-lasting stability.
4. Finishing Touches: These elements add the final touches to your sunburst mirror, personalizing its aesthetic:
- Paint: Use paint to transform the frame and mirror, creating a cohesive color scheme or adding accents.
- Decorative elements: Add beads, sequins, or other embellishments to enhance the visual appeal.
- Hardware: Choose a hanging mechanism that suits the weight and size of your creation.
Mastering the Construction: Bringing Your Vision to Life
Once you have gathered your materials, the process of constructing your sunburst mirror involves several distinct steps:
1. Preparation: The first step is preparing the mirror and frame for assembly. Clean the mirror thoroughly to remove any dirt or dust. If using wood, sand the frame for a smooth finish and stain or paint it according to your desired aesthetic.
2. Creating the Sunburst Frame: This step involves cutting and shaping the frame based on your design. If using wood, utilize a saw to cut pieces of varying lengths, creating the radiating effect of the sunburst. For alternative materials like cardboard or metal, use a craft knife or metal shears for precise cuts.
3. Assembling the Frame: To assemble the sunburst frame, use your chosen adhesive to attach the cut pieces to the back of the mirror. Start by attaching the longest pieces at the bottom of the mirror, gradually attaching shorter pieces as you move towards the top. This process allows for a gradual progression of the radiating pattern.
4. Finishing Touches: Once the frame is secure, add any finishing touches. Paint the frame or mirror, apply decorative elements, and attach any hardware for hanging. Allow the adhesive to dry completely before hanging your sunburst mirror.
Customization and Variations: Expressing Your Style
The sunburst mirror is a versatile project, offering ample opportunity for customization and experimentation. Explore the possibilities of varying materials, colors, and sizes to create a unique and personal piece.
1. Color: Experiment with a spectrum of colors to enhance the mirror's visual impact. From bold, vibrant hues to soft, muted tones, the color choices reflect your individual style and the surrounding décor.
2. Size: The size of your sunburst mirror is determined by the dimensions of the mirror and the frame. Adjust these elements to suit the designated space and create a statement that aligns with the room's scale.
3. Embellishment: Personalize your sunburst mirror with decorative elements that complement its overall aesthetic. Beads, sequins, or even natural elements like branches or twigs add a touch of individuality, reflecting your unique taste.
4. Materials: The choice of materials for the frame offers a vast array of possibilities. From traditional wood to modern metal, each material introduces a distinct aesthetic quality to the final product. Consider the materials that resonate with your creative vision and personal style.
By embarking on this DIY journey, you can create an impressive sunburst mirror that elevates the style of any room. With a dash of creativity and a passion for personalized design, you can transform a simple concept into a captivating statement piece.

How To Make A Fabulous Diy Sunburst Mirror For Joyful Derivatives

Starburst Mirror Diy A Beautiful Mess

Diy Large Multi Colored Wood Shim Sunburst Mirror Addicted 2 Decorating

Knockoff Sunburst Mirror How I Made A Statement Piece For 10 True Value

Diy Large Sunburst Mirror To Occupy The Whole Wall Shelterness

How To Make A Fabulous Diy Sunburst Mirror For Joyful Derivatives

Diy Sunburst Mirror Edith Evelyn

Diy Sunburst Mirror 4 Wall Art

Diy Gold Sunburst Mirror Wildfire Interiors

Diy Large Multi Colored Wood Shim Sunburst Mirror Addicted 2 Decorating