DIY Mirror Jewelry Box: The Ultimate Guide to Creating a Personalized Treasure Trove
Whether you're a seasoned jewelry collector or simply looking for a chic and functional storage solution, a DIY mirror jewelry box is a project that combines practicality with a touch of personal flair. Read on for a comprehensive guide on how to create your very own customized jewelry box, complete with a mirror for effortless accessorizing.
Choosing the Right Materials
The first step is selecting the materials for your jewelry box. Here are a few popular options:
- Wood: Wood is a classic choice for its durability and versatility. You can use reclaimed wood for a rustic look or opt for sleek hardwoods like mahogany or walnut.
- Cardboard: Cardboard is a budget-friendly option that's easy to work with. Just be sure to reinforce it with additional layers or a wooden frame for extra strength.
- Acrylic: Acrylic offers a transparent and modern aesthetic. It's strong and lightweight, making it ideal for boxes with compartments or drawers.
Designing the Jewelry Box
Once you have your materials, consider the design of your jewelry box. Here are some things to keep in mind:
- Size: Determine the size of your jewelry box based on the amount of jewelry you need to store.
- Shape: Choose a shape that complements your personal style and décor. Rectangle, square, and round are common choices.
- Compartments: Decide which compartments and drawers you need to organize your jewelry. Consider different sizes and depths for necklaces, rings, bracelets, and earrings.
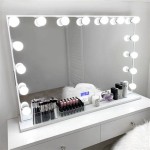
- Mirror: Don't forget to include a mirror in your design. A small mirror is ideal for putting on jewelry or checking your appearance.
Assembling the Jewelry Box
With your design in place, it's time to assemble your jewelry box:
- Cut and join the pieces: Cut the materials to size and join them using wood glue, nails, or screws.
- Add the compartments: Create and attach compartments and drawers as per your design.
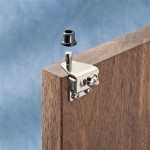
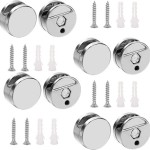
- Attach the mirror: Secure the mirror to the inside of the box using glue or a mounting bracket.
- Sand and finish: Sand the box to remove any splinters or rough edges. Apply a finish, such as paint, varnish, or stain.
- Add hardware: Install any necessary hardware, such as knobs or hinges, for opening and closing the box.
- Paint or stain: Choose a color that matches your style and décor.
- Decoupage: Apply decorative papers or fabrics to the exterior of the box.
- Embellishments: Add beads, sequins, or other embellishments for a touch of sparkle.
- Lining: Line the interior of the box with soft fabric or velvet to protect your jewelry from scratches.
Decorating the Jewelry Box
Once your jewelry box is assembled, you can personalize it with decorations:
Conclusion
With a little planning and effort, you can create a stunning and functional DIY mirror jewelry box that will keep your prized possessions organized and within reach. Whether you choose a rustic wooden box or a sleek acrylic design, your custom-made jewelry box will be a cherished accessory for years to come.

Diy Jewelry Organizer Shanty 2 Chic

How To Build A Mirrored Wall Mount Jewelry Cabinet Interior Frugalista

Diy Jewelry Organizer Shanty 2 Chic

How To Build A Mirrored Wall Mount Jewelry Cabinet Interior Frugalista

Diy Full Length Mirror With Storage Addicted 2

Diy Jewelry Organizer Shanty 2 Chic

How To Build A Mirrored Wall Mount Jewelry Cabinet Interior Frugalista

Diy Inset Jewelry Cabinet Part 1 Infarrantly Creative

Wall Mirror Jewelry Storage Diy Home Decor

How To Build A Mirrored Wall Mount Jewelry Cabinet Interior Frugalista


