DIY Mirror Wall: A Comprehensive Guide to Installation and Design
Mirror walls have become a popular design element, offering the illusion of expanded space and increased natural light. While professional installation is an option, constructing a mirror wall independently provides cost savings and customization possibilities. This article details the process of creating a DIY mirror wall, covering essential considerations from planning and material selection to installation techniques and safety precautions.
Planning and Design Considerations
Before commencing any physical work, thorough planning is crucial for a successful mirror wall project. This stage involves assessing the space, determining the desired aesthetic, and making essential measurements. The size and shape of the intended mirror wall directly influence the quantity of materials needed and the complexity of the installation process.
The first step in planning is to measure the wall accurately. Consider the overall dimensions, including height and width, and note any irregularities such as uneven surfaces, pipes, or electrical outlets. These obstructions will affect the placement and cutting of the mirrors. It is advisable to create a detailed sketch of the wall, marking all measurements and potential obstacles. This sketch acts as a visual guide throughout the project.
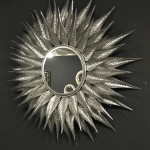
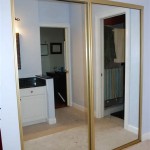
Next, decide on the style and arrangement of the mirrors. Several options are available, including a single large mirror panel, multiple smaller square or rectangular mirrors arranged in a grid, or irregularly shaped mirrors for a more artistic effect. The chosen style should complement the existing décor and reflect the desired ambiance. Consider the reflective properties of the mirror and how it will interact with existing light sources in the room. A poorly positioned mirror can create glare or unwanted reflections.
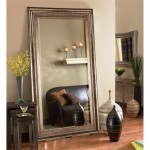
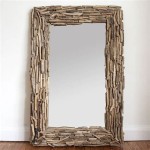
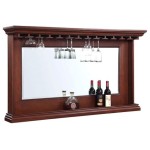
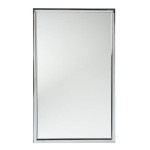
Furthermore, consider the type of mirror best suited for the project. Standard clear mirrors offer a classic look, while tinted mirrors, such as bronze or gray, can add a touch of sophistication. Antique mirrors, with their aged appearance, provide a vintage aesthetic. The thickness of the mirror is also important. Thicker mirrors are more durable and less prone to distortion, but they are also heavier and more expensive. A thickness of ¼ inch is generally suitable for most mirror wall applications.
Once the overall design is finalized, calculate the exact number of mirrors needed. For a grid arrangement, this involves dividing the total wall area by the area of each individual mirror. Account for any gaps or spacing between the mirrors. Order slightly more mirrors than needed to allow for potential breakage or cutting errors. This also provides extra material for future repairs or modifications.
Material Selection and Preparation
The selection of appropriate materials is just as important as the design phase. Using high-quality adhesives, appropriate cutting tools, and suitable safety equipment ensures both the longevity of the mirror wall and the safety of the installer. The following materials are typically required for a DIY mirror wall project:
Mirrors: As previously discussed, choose the type, size, and thickness of the mirrors based on the design specifications. Ensure the mirrors are clean and free from any scratches or blemishes before commencing installation. If cutting the mirrors yourself, acquire a specialized glass cutter and practice on scrap pieces first.
Mirror Adhesive: Select a high-quality adhesive specifically formulated for mirrors. These adhesives are designed to be non-corrosive and will not damage the reflective backing of the mirror. Avoid using general-purpose adhesives, as they may contain chemicals that can discolor or degrade the mirror over time. Read the manufacturer's instructions carefully regarding application techniques and curing times.
Mounting Tape (Optional): Double-sided mounting tape can be used in conjunction with mirror adhesive to provide temporary support while the adhesive cures. This helps to prevent the mirrors from sliding or shifting during the drying process. Choose a heavy-duty mounting tape that is designed for vertical applications.
Level: A level is essential for ensuring that the mirrors are installed straight and plumb. Use a long level, preferably at least 4 feet in length, to span across multiple mirrors and ensure consistent alignment. A laser level can also be used for greater accuracy.
Measuring Tape: A reliable measuring tape is necessary for accurate measurements and precise mirror placement. Ensure the measuring tape is in good condition and free from any bends or kinks.
Pencil or Marker: Use a pencil or marker to mark the wall with guidelines for mirror placement. Choose a color that is visible against the wall's surface. A grease pencil or wax marker is ideal for marking the mirror surface itself.
Caulk Gun and Caulk (Optional): If desired, a caulk gun and caulk can be used to seal the edges of the mirror wall, creating a clean and seamless look. Choose a caulk that is specifically designed for use with mirrors and is resistant to mildew and moisture. Clear caulk is often the best option, as it blends in with the mirror surface.
Safety Glasses and Gloves: Safety glasses are essential for protecting the eyes from glass shards during cutting and installation. Wear gloves to protect the hands from cuts and abrasions.
Cleaning Supplies: Prepare a clean, lint-free cloth and glass cleaner for cleaning the mirrors and the wall surface before installation. Remove any dust, dirt, or grease to ensure proper adhesion.
Installation Techniques and Safety Precautions
With the design finalized and materials prepared, the installation process can begin. This requires careful attention to detail and adherence to safety guidelines to ensure a professional and safe outcome.
Wall Preparation: Thoroughly clean the wall surface with a damp cloth and allow it to dry completely. Ensure the wall is smooth and free from any loose paint or debris. If the wall is textured, consider sanding it down to create a smoother surface for better adhesion. Prime the wall if necessary, especially if it is painted with a glossy finish.
Marking Guidelines: Using the measurements from the design plan, mark the wall with guidelines for mirror placement. Use a level to ensure that the lines are straight and plumb. These guidelines will serve as a visual reference during installation and help to maintain consistent spacing between the mirrors.
Applying Adhesive: Apply the mirror adhesive to the back of each mirror according to the manufacturer's instructions. Typically, this involves applying several vertical beads of adhesive spaced evenly across the mirror surface. Avoid applying adhesive too close to the edges, as this can cause it to squeeze out when the mirror is pressed against the wall.
Mounting the Mirrors: Carefully position the first mirror against the wall, aligning it with the marked guidelines. Press firmly and hold it in place for several seconds to allow the adhesive to make initial contact. If using mounting tape, apply it to the back of the mirror before applying the adhesive for added support.
Leveling and Spacing: Use a level to ensure that the mirror is perfectly level before releasing it. Adjust the position as needed. If installing multiple mirrors, maintain consistent spacing between them using spacers or shims. This will create a uniform and professional look.
Securing the Mirrors: Once the mirrors are in place, allow the adhesive to cure completely according to the manufacturer's instructions. This typically takes 24 to 48 hours. Avoid disturbing the mirrors during this time to prevent them from shifting or falling.
Finishing Touches: After the adhesive has cured, remove any spacers or shims. If desired, apply caulk along the edges of the mirror wall to create a seamless look. Smooth the caulk with a wet finger or a caulk smoothing tool for a professional finish. Clean the mirror surface with glass cleaner to remove any fingerprints or smudges.
Safety Considerations: Always wear safety glasses and gloves when handling mirrors. Be cautious when cutting mirrors, as glass shards can be extremely sharp. Dispose of broken glass properly to prevent injuries. Ensure the wall is structurally sound and capable of supporting the weight of the mirrors. If unsure, consult with a professional contractor. Work in a well-ventilated area when using adhesives and caulks.

The Genius Diy For Creating A Stunning Mirror Wall Using 2 Buys Living Room Decor

Diy Gold Industrial Mirror Tutorials Never Skip Brunch

How To Make A Diy Mirror Wall Under 85

Mirror The White Thistle

Quick And Easy Home Decorating Ideas Greatest Decor You Ve Decoración De Casas Modernas Paredes Casa Pequeñas

Diy Large Paneled Wall Mirror Shanty 2 Chic

Diy Large Grid Mirror Pine And Poplar

Diy Mirrored Wall

Diy Industrial Mirror Wall For 60 How To

Diy Mirror Jewelry Wall Hangers Homey Oh My