DIY Projects with Mirrors
Mirrors offer a versatile and cost-effective way to enhance home decor. Their reflective properties can brighten spaces, create illusions of depth, and add a touch of elegance. Numerous DIY projects utilize mirrors to achieve various aesthetic and functional goals.
Mirrored Tray
A mirrored tray adds a touch of glamour to any surface. This project repurposes an old picture frame or serving tray for a personalized touch.
Materials needed:
- Picture frame or serving tray with a flat surface
- Mirrored glass cut to size
- Strong adhesive suitable for glass
- Felt pads (optional)
Instructions:
- Clean the surface of the frame or tray thoroughly.
- Apply the adhesive evenly to the back of the mirrored glass.
- Carefully place the mirrored glass onto the frame or tray, ensuring proper alignment.
- Allow the adhesive to dry completely according to the manufacturer's instructions.
- Attach felt pads to the bottom of the tray to prevent scratching surfaces (optional).
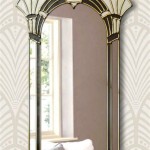
Mirrored Wall Art
Creating mirrored wall art allows for customization and a unique statement piece. This project can be tailored to various styles and sizes.
Materials needed:
- Multiple mirrors of varying shapes and sizes
- Strong adhesive or mirror mounting clips
- Level
- Measuring tape
Instructions:
- Plan the layout of the mirrors on the wall using the measuring tape and level.
- Starting with the central mirror, apply adhesive or use mounting clips to secure each mirror to the wall.
- Ensure each mirror is level and evenly spaced.
Mirrored Backsplash
A mirrored backsplash can dramatically transform a kitchen or bathroom. This DIY project reflects light and creates an illusion of spaciousness.
Materials needed:
- Mirrored tiles or a large sheet of mirror cut to size
- Mirror adhesive
- Grout (if using tiles)
- Grout float
- Sponge
Instructions:
- Prepare the wall surface by cleaning it thoroughly and ensuring it is level.
- Apply mirror adhesive to the back of each tile or the large sheet of mirror.
- Carefully adhere the mirrors to the wall, ensuring proper alignment.
- If using tiles, apply grout between the tiles using a grout float.
- Wipe away excess grout with a damp sponge.
- Allow the grout to dry completely.
Mirrored Furniture Update
Adding mirrors to furniture can revitalize older pieces and create a modern look. This technique works well on flat surfaces like tabletops or drawer fronts.
Materials needed:
- Mirrored glass cut to size
- Strong adhesive suitable for the furniture material
- Sandpaper (optional)
- Primer (optional)
Instructions:
- Prepare the furniture surface by sanding and priming if necessary.
- Apply adhesive to the back of the mirrored glass.
- Carefully position the mirrored glass onto the furniture surface, ensuring proper alignment.
- Allow the adhesive to dry completely.
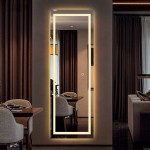
Mirrored Closet Doors
Replacing standard closet doors with mirrored doors can visually expand a room and provide a functional full-length mirror.
Materials needed:
- Mirrored closet doors (pre-made or custom-cut)
- Door hardware
- Screwdriver
- Level
Instructions:
- Remove the existing closet doors and hardware.
- Install the new mirrored doors using the appropriate hardware.
- Use a level to ensure the doors are plumb and operate smoothly.
Antiqued Mirror
Creating an antiqued mirror effect adds a vintage touch to any space. This technique utilizes a specialized mirror effect spray paint.
Materials needed:
- Mirror
- Mirror effect spray paint
- Drop cloth
- Painter’s tape
Instructions:
- Protect the surrounding area with a drop cloth and painter's tape.
- Following the manufacturer's instructions, apply the mirror effect spray paint to the mirror surface.
- Allow the paint to dry completely.
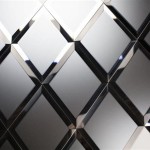
Geometric Mirror Design
Creating a geometric design with mirrors adds a modern and artistic flair to any wall.
Materials needed:
- Multiple mirrors of varying geometric shapes
- Strong adhesive or mirror mounting clips
- Level
- Measuring tape
Instructions:
- Plan the geometric design on the wall using the measuring tape and level.
- Starting from the center or bottom, apply adhesive or use mounting clips to secure each mirror to the wall.
- Ensure each mirror is level and evenly spaced according to the planned design.

The 50 Best Diy Mirror Projects Ever Made

5 Best Inspiring Simple Diy Crafts Design Ideas Wood Mirror Frame Home Decor Projects

30 Diy Mirror Projects That Are Fun And Easy To Make
:max_bytes(150000):strip_icc()/bloomingdiyer-372b1cae2a6c43af917f3bea506c11da.jpg?strip=all "20 Diy Mirror Frame Ideas To Inspire Your Next Project")
20 Diy Mirror Frame Ideas To Inspire Your Next Project

20 Fantastic Diy Mirror Frame Ideas A Cultivated Nest

Easy Driftwood Mirror The Wood Grain Cottage

30 Amazing Diy Decorative Mirrors Decor Mirror

Easy Diy Stick Framed Mirror That Looks Expensive

30 Diy Mirror Frames Scratch And Stitch

Diy Wall Mirrors Thirty Best Home Decor Projects