Framing a Mirror with Molding
Adding molding to a mirror elevates its appearance, transforming a simple looking glass into a stylish focal point. This relatively straightforward project requires basic carpentry skills and readily available materials. This article will guide readers through the process of framing a mirror with molding, offering detailed instructions and practical advice.
The first step involves selecting the appropriate molding. A wide variety of molding profiles are available, ranging from simple, flat designs to ornate, carved patterns. Consider the existing décor when choosing a molding profile. A minimalist frame complements modern interiors, while a more elaborate frame suits traditional or classical settings. The molding's width should also be considered, ensuring it is proportional to the mirror's size. Too narrow a frame can look insignificant on a large mirror, while too wide a frame can overwhelm a smaller one.
Once the molding is selected, accurate measurements are crucial for a professional-looking result. Measure the mirror's length and width precisely. These measurements will determine the length of the molding pieces required. It is advisable to add a few extra inches to each measurement to account for potential cutting errors. These extra inches can be trimmed later for a perfect fit.
Cutting the molding requires a miter saw for accurate angled cuts. Standard picture frames utilize 45-degree miter cuts. Mark the cutting lines on the molding with a pencil, ensuring precision. When cutting the molding, ensure the saw blade is sharp and the molding is securely held against the saw's fence. This prevents the molding from shifting during the cut, which could result in inaccurate angles or damaged molding.
After cutting the molding pieces, the next step is assembling the frame. Wood glue is typically used to join the mitered corners. Apply a thin bead of glue to both mitered edges, then carefully join the pieces, ensuring tight, flush corners. Use painter's tape to secure the joined corners while the glue dries. This helps maintain proper alignment and prevents the frame from shifting.
Once the glue has dried, further reinforcement may be necessary, particularly for larger frames. Small finishing nails, also known as brads, can be used to secure the corners. Use a nail gun or hammer and nail set to drive the brads into the molding, ensuring they are countersunk to avoid interfering with the frame's finish.
With the frame assembled, the next step is attaching it to the mirror. Several methods can be used depending on the mirror's construction and the desired finished look. For mirrors with a flat, unframed edge, construction adhesive can be used to bond the frame directly to the mirror's surface. Apply the adhesive to the back of the frame, then carefully position the frame onto the mirror, ensuring even spacing on all sides.
For mirrors with a beveled edge or for a more decorative approach, the frame can be attached using mirror clips or mounting hardware. These are typically affixed to the back of the frame and then secured to the wall, allowing the mirror to rest within the frame. This method provides a more secure attachment and allows for easier removal of the mirror if necessary.
The final step in framing a mirror with molding involves finishing the frame. This typically involves painting or staining the molding to achieve the desired look. Before painting or staining, lightly sand the frame to create a smooth surface. This will ensure even application of the finish and enhance its adhesion. Apply the paint or stain according to the manufacturer's instructions, allowing sufficient drying time between coats.
Careful consideration of the project's details, from the selection of the molding to the finishing touches, can significantly impact the final result. By following these steps and paying attention to detail, one can successfully frame a mirror with molding, adding a touch of elegance and sophistication to any space.
Different types of wood and composite moldings are available, each with unique characteristics. Solid wood moldings offer a classic, timeless look and can be stained or painted. Composite moldings, often made from MDF (medium-density fiberboard), are a cost-effective alternative and provide a smooth, consistent surface for painting. Understanding the differences between these materials will assist in selecting the best option for the project.
Before beginning the project, gather all necessary tools and materials. This includes the chosen molding, a miter saw, measuring tape, wood glue, painter's tape, finishing nails, a hammer or nail gun, safety glasses, and the desired finish (paint or stain). Having all necessary items readily available ensures a smooth and efficient workflow.
Safety should always be a priority when undertaking any DIY project. When using power tools like a miter saw, always wear appropriate safety glasses. Ensure the work area is well-ventilated when using paints, stains, or adhesives. Following safety precautions helps prevent accidents and ensures a positive project experience.

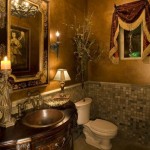
Bathroom Mirror Framed With Crown Molding Large Mirrors Frame Makeover

Mirror Molding The Easy Upgrade To Boring Bathrooms Mirrorchic

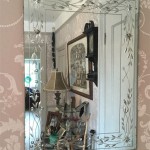
How To Frame A Mirror Sand And Sisal

Diy Bathroom Mirror Frame With Molding The Happier Homemaker

Framing A Bathroom Mirror Tempting Thyme

Crafty Again

How To Make An Easy Diy Bathroom Mirror Frame Momhomeguide Com

How To Frame Out That Builder Basic Bathroom Mirror For 20 Or Less

How To Frame A Bathroom Mirror Lowe S

How To Frame A Bathroom Mirror