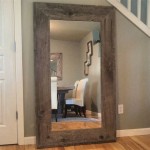
Framing A Bathroom Mirror With Molding
Transforming a simple bathroom mirror into a statement piece can be achieved with the addition of decorative molding. This technique, often employed in traditional and transitional interior design styles, adds visual interest and complexity to a space. By framing a mirror with molding, homeowners can elevate the look of their bathroom, creating a focal point that enhances the overall aesthetic.
The process of framing a bathroom mirror with molding involves a few essential steps. Firstly, selecting the appropriate molding is crucial, as it significantly impacts the final appearance. Secondly, accurate measurements and precise cuts are essential for a seamless and professional finish. Lastly, proper installation techniques ensure that the molding adheres securely to the wall and the mirror, adding a touch of elegance and lasting durability.
Choosing the Right Molding
The first step in framing a bathroom mirror with molding involves selecting the right type of molding. The variety of molding options available can be overwhelming, so it's important to consider the bathroom's style and the desired aesthetic. For a traditional bathroom, ornate moldings with intricate details and a classic profile, like crown molding or picture frame molding, might be ideal. Modern bathrooms, in contrast, might benefit from sleek, minimalist moldings with clean lines, such as flat stock or simple profiles.
The material of the molding is another important consideration. Wood molding, while offering a timeless elegance, requires careful maintenance to withstand the humidity of a bathroom environment. Alternatively, PVC molding offers durability and moisture resistance, making it a popular choice for bathrooms. Primed molding eliminates the need for painting, saving time and effort. However, unfinished molding allows for greater customization, enabling homeowners to paint it to match their desired color scheme.
Measuring and Cutting the Molding
Once the molding is chosen, accurate measurements are essential for a professional-looking installation. Start by measuring the width and height of the mirror, allowing for an extra inch or two on each side for the molding. These measurements will be used to cut the molding to the correct dimensions. It's advisable to use a miter saw for precise cuts, ensuring clean and even angles that create a seamless frame.
To create the frame, cut four pieces of molding: two vertical pieces for the sides, one horizontal piece for the top, and one horizontal piece for the bottom. The corners of the frame will require miter cuts at 45-degree angles. When cutting the molding, ensure that the cuts are perfectly aligned to prevent gaps and ensure a smooth, professional appearance.
Installation Techniques
The chosen installation method will depend on the type of molding and the wall surface. Adhesive, often referred to as construction adhesive, can be used to secure the molding to the wall, especially for lighter molding types. However, for heavier moldings, nails or screws offer a sturdier and more permanent attachment.
Before applying any adhesive, make sure the wall is clean and free of any debris or dust. If using adhesive, apply a thin layer to the back of the molding and press it firmly against the wall, holding it in place for a few seconds to ensure a secure bond. If opting for nails or screws, pre-drill holes in the molding to prevent splitting and ensure smooth installation.
After the molding is attached to the wall, the mirror can be secured to the frame using a mirror adhesive or, for heavier mirrors, using brackets and screws. Ensure that the mirror is centered within the frame and that the molding is flush with the edges of the mirror. Once the installation is complete, any gaps or imperfections can be filled with wood putty or caulk for a smooth and finished look.
Finishing Touches
Once the molding is installed and the mirror is secured, the final step involves finishing the frame. This may involve painting or staining the molding to match the bathroom's decor. If using primed molding, painting becomes much simpler, as the primer provides a smooth surface for the paint to adhere to. If using unfinished molding, sanding and priming are necessary before painting to achieve a smooth finish.
For a traditional look, consider using a high-gloss paint to add a touch of elegance. For a modern bathroom, a matte or satin finish might be more appropriate. Alternatively, consider staining the molding to match the existing wood furniture in the bathroom for a cohesive aesthetic.

Diy Bathroom Mirror Frame With Molding The Happier Homemaker

Bathroom Mirror Framed With Crown Molding Large Mirrors Frame Makeover

Framing A Bathroom Mirror Tempting Thyme

Easy Diy Tutorial Adding Trim Around A Giant Mirror For Ers

How To Frame A Mirror

How To Make An Easy Diy Bathroom Mirror Frame Momhomeguide Com

The Kids Bathroom Mirror Gets Framed House Of Hepworths

Mirror Frame Diy How To Update A Basic Bathroom Our Faux Farmhouse

Framing A Mirror Without Miter Cuts The Kim Six Fix

How To Frame Out That Builder Basic Bathroom Mirror For 20 Or Less


