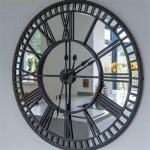
Gluing a Mirror to a Wooden Background
Attaching a mirror to a wooden background is a common DIY project, often seen in furniture restoration, home decor, and crafting. This process requires the right materials and techniques to ensure a secure and long-lasting bond. This article explores the essential steps, materials, and considerations involved in gluing a mirror to a wooden surface.
Choosing the Right Adhesive
The success of any gluing project hinges on selecting the appropriate adhesive. When gluing a mirror to wood, consider the following factors:
- Mirror Size and Weight: Large or heavy mirrors require a stronger adhesive than smaller, lighter ones.
- Wood Type: The type of wood can influence adhesive choice. Some woods are more porous than others, requiring adhesives with better penetration.
- Environmental Conditions: Exposure to moisture, temperature fluctuations, and sunlight can impact adhesive performance. Choose an adhesive specifically formulated for these conditions.
Commonly used adhesives for mirror-to-wood applications include:
- Construction Adhesive: A versatile choice, ideal for heavier mirrors and providing strong, long-lasting adhesion.
- Epoxy Resin: Provides excellent adhesion to various surfaces, including wood and glass. However, epoxy is a two-part adhesive requiring careful mixing.
- Silicone Sealant: Offers flexibility and moisture resistance, suitable for outdoor projects or areas exposed to water.
Preparing the Surfaces
Proper surface preparation is crucial for achieving a strong and durable bond. This involves:
- Cleaning the Mirror: Remove any dirt, grease, or debris from the back of the mirror using a soft cloth and a mild cleaning solution. Avoid abrasive cleaners that could damage the mirror's surface.
- Cleaning the Wood: Thoroughly clean the wooden surface, removing any dust, dirt, or loose particles. Use a tack cloth or a slightly damp cloth to ensure a dust-free surface.
- Sanding the Wood: If necessary, sand the wooden surface with fine-grit sandpaper to create a smoother and more receptive surface for the adhesive. Be careful not to create any deep scratches that could affect the adhesive bond.
Applying the Adhesive
Once the surfaces are prepared, apply the chosen adhesive following the manufacturer's instructions. Here are general guidelines:
- Use a Bead of Adhesive: Apply a thin, continuous bead of adhesive around the perimeter of the mirror and across the back surface. Ensure even coverage for a strong bond.
- Avoid Excess Adhesive: Too much adhesive can lead to messy spills and affect the quality of the bond. Apply a consistent and even layer.
- Allow for Drying Time: Depending on the adhesive, allow sufficient time for the adhesive to dry or cure before attaching the mirror. Refer to the manufacturer's instructions for specific drying times.
Attaching the Mirror
With the adhesive applied and drying time elapsed, carefully attach the mirror to the wooden surface. Consider the following:
- Use Clamps or Weights: Secure the mirror to the wood using clamps or weights to maintain pressure and ensure a tight bond. The pressure should be evenly distributed across the mirror's surface.
- Avoid Sliding or Shifting: Once the mirror is positioned, do not slide or shift it, as this can disrupt the adhesive bond. Ensure the mirror is properly aligned and firmly attached before releasing the clamps.
- Drying Time: Allow the adhesive to dry completely according to the manufacturer's specifications. Avoid stressing or handling the mirror before it fully cures.
Additional Tips
Here are some additional tips for a successful mirror-to-wood bonding project:
- Practice on a Scrap Piece: Test the adhesive on a scrap piece of wood and mirror to ensure compatibility and desired results before working on the actual project.
- Protect the Mirror: Place a layer of protective paper or a soft cloth between the clamps and the mirror to avoid causing scratches or damage during the bonding process.
- Clean Up Immediately: Clean up any excess adhesive spills or drips immediately using a damp cloth or appropriate solvent. Dried adhesive can be difficult to remove.

4 Easy Steps To Glue Mirror Wood

Full Length Wood Bead Mirror Diy Thistlewood Farm

Diy Driftwood Mirror Step By Tutorial Bird

Diy Driftwood Mirror Step By Tutorial Bird

How To Glue Mirror Wall Easy Adhesion Tips
Mirror Adhesive Adiseal Strong Glue For

10pcs Set Striped Design Mirror Stickers Self Adhesive Removable Acrylic Sheets Wall Decals For Home Art Room Bedroom Background Decoration Joom

Adhesive Mirror Temu

1pc 3d Acrylic Self Adhesive Mirror Wall Sticker For Bedroom Bathroom Home Background Decoration Shein Usa

Full Length Wood Bead Mirror Diy Thistlewood Farm

