How To Add a Frame Around a Bathroom Mirror
Adding a frame to a bathroom mirror is a simple yet effective way to elevate the room's aesthetic. This project can be completed with readily available tools and materials, offering homeowners a cost-effective method to personalize their bathroom. Whether seeking a modern, rustic, or traditional look, a framed mirror can be customized to fit any design preference.
Before initiating this project, careful planning and accurate measurements are crucial. Begin by measuring the mirror's dimensions precisely. These measurements will determine the size and type of frame material required. Consider the existing bathroom décor when selecting frame materials and styles to ensure a cohesive and aesthetically pleasing result.
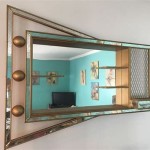
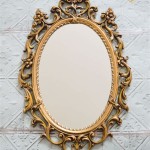
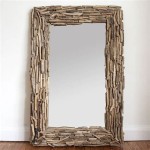
Several framing options exist for bathroom mirrors, each offering distinct advantages. Wood frames offer a classic and versatile choice, readily paintable or stainable to match existing décor. Moulding provides a decorative and ornate option, adding a touch of elegance to the bathroom. Metal frames present a modern and sleek appearance, while mosaic or tile frames offer a unique and personalized touch.
After selecting the desired frame material, the next step is to gather the necessary tools. These generally include a measuring tape, safety glasses, a pencil, a miter saw or hand saw with a miter box for angled cuts, wood glue, finishing nails, a hammer, and a caulk gun. For specific frame materials like tile or mosaic, specialized tools like tile cutters or nippers might be required. Ensure all tools are in good working order before commencing the project.
Preparing the frame pieces correctly is essential for a professional-looking finish. If using wood or moulding, cut the pieces to the exact measurements of the mirror, ensuring 45-degree angles at the corners for a seamless join. For tile or mosaic frames, arrange the pieces on a mesh backing, ensuring proper spacing and alignment. This dry-fitting process allows for adjustments before final application.
Once the frame pieces are prepared, applying adhesive is the next step. For wood or moulding frames, apply wood glue to the mitered corners and secure them with finishing nails. Allow the glue to dry completely before proceeding. For tile or mosaic frames, apply a suitable adhesive to the mirror's edges and carefully place the prepared tile or mosaic sheet onto the adhesive. Ensure firm and even pressure to secure the frame to the mirror.
After the frame is securely attached, caulking provides a finished and waterproof seal. Apply a thin bead of caulk along the inside and outside edges where the frame meets the mirror. This prevents moisture from seeping behind the frame and damaging the mirror or wall. Smooth the caulk with a wet finger or caulk tool for a clean and professional appearance. Allow the caulk to dry completely according to the manufacturer's instructions.
Finishing touches complete the framed mirror project and enhance its overall appearance. Wood or moulding frames can be painted or stained to match the bathroom décor. Consider applying a sealant to protect the frame from moisture and humidity. Tile or mosaic frames can be grouted to fill the spaces between the tiles, completing the framed look. Clean any excess grout promptly for a neat finish.
Safety precautions should be observed throughout the project. Always wear safety glasses when cutting frame materials to protect eyes from dust and debris. Use caution when handling sharp tools like saws and ensure adequate ventilation when working with adhesives or sealants. Follow manufacturer’s instructions carefully for all materials and tools.
Specific considerations apply when working with different frame materials. When using wood, ensure it is properly sealed to prevent warping or damage from bathroom humidity. With metal frames, consider using rust-resistant materials and adhesives specifically designed for metal. For tile or mosaic, choose a waterproof adhesive and grout suitable for bathroom environments.
Various resources are available to assist with this project. Online tutorials and videos offer step-by-step instructions and visual guidance. Home improvement stores provide a wide selection of frame materials, tools, and adhesives, along with expert advice from store personnel. Consulting these resources can provide valuable insights and assistance for a successful project outcome.
Adapting the project to different bathroom styles allows for personalized customization. For a modern bathroom, sleek metal or minimalist wood frames create a contemporary look. In a rustic bathroom, reclaimed wood or natural stone frames enhance the rustic charm. Traditional bathrooms benefit from ornate moulding or classic wood frames, adding a touch of elegance.
Maintaining the framed mirror ensures long-lasting beauty and functionality. Regularly clean the frame with a damp cloth and mild detergent to remove dust and grime. Avoid using abrasive cleaners that can scratch or damage the frame’s finish. Inspect the caulking periodically and reapply if necessary to maintain a waterproof seal.

The Kids Bathroom Mirror Gets Framed House Of Hepworths

How To Frame A Bathroom Mirror

How To Add A Frame Your Bathroom Mirror

Diy Mirror Frame Remodelaholic

Diy Stick On Mirror Frame Sawdust Sisters

How To Frame Your Bathroom Mirrors Beach Inspired Makeover Part 1

How To Frame A Mirror

How To Frame A Bathroom Mirror Heather O Steen Photography

Diy Stick On Mirror Frame Sawdust Sisters

How To Frame A Mirror For Dramatic Upscale Look