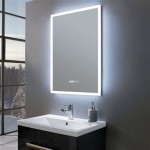
How to Add a Framed Mirror
Adding a framed mirror to a space offers both functional and aesthetic benefits. It can amplify light, create the illusion of more space, and serve as a decorative focal point. However, properly installing a framed mirror requires careful planning and execution. This article will guide you through the essential steps to successfully add a framed mirror to your wall.
1. Planning and Preparation
Before starting the installation process, meticulous planning is crucial. Begin by selecting the ideal location for the mirror. Consider factors like the room’s layout, existing décor, and the desired effect. High-traffic areas and spaces opposite windows can benefit significantly from the reflective qualities of a mirror.
Next, accurately measure the dimensions of the framed mirror. This measurement will inform the necessary wall preparations and ensure the chosen location provides adequate space. Be sure to account for any existing wall features, such as light fixtures or electrical outlets, that might interfere with the installation.
Once the location is chosen, carefully inspect the wall. Ensure it is structurally sound and capable of supporting the weight of the framed mirror. For heavier mirrors, locating wall studs is essential. A stud finder can easily identify these structural supports. If the wall is made of drywall, ensure it is properly secured to the studs. Loose drywall might require reinforcement before proceeding.
2. Gathering Necessary Tools and Materials
Having the correct tools and materials readily available streamlines the installation process. Essential tools typically include a measuring tape, level, pencil, drill, appropriate drill bits (including a pilot bit), screwdriver, and safety glasses. Depending on the hanging method, additional tools like a stud finder, hammer, or wire cutters might be necessary.
Regarding materials, the appropriate hanging hardware is paramount. D-rings and wire are commonly used for hanging framed mirrors. The weight of the mirror dictates the weight capacity the hardware must support. Choosing hardware rated for a higher weight capacity than the mirror’s weight offers an added safety margin. Wall anchors, such as toggle bolts or molly bolts, are essential for installations on drywall, especially when not hanging directly on studs.
Finally, having the correct fasteners for the chosen hanging hardware and wall type is crucial. Common fasteners include screws and nails. Ensure the chosen fasteners are the correct size and type for both the hanging hardware and the wall material. Using inappropriate fasteners can compromise the stability of the installation.
3. Mounting the Mirror
With preparations complete, the next step is to mark the desired mirror position on the wall. Use a pencil and level to ensure accurate placement and a straight hang. If using D-rings and wire, measure the distance between the rings on the back of the frame. Transfer this measurement to the wall markings, creating two points where the hanging hardware will connect.
Depending on the wall type and the weight of the mirror, either drill pilot holes and install wall anchors or locate and mark the wall studs. If using wall anchors, insert them into the drilled pilot holes according to the manufacturer’s instructions. If hanging on studs, pilot holes are generally not necessary for wood screws. However, using a pilot bit can prevent the wood from splitting, especially with harder wood species.
Next, attach the chosen hanging hardware to the wall at the marked locations. If using D-rings and wire, secure the D-rings to the back of the frame and thread the wire through them, creating a loop for hanging. Ensure the wire is taut and properly rated for the mirror's weight. Then, hang the wire onto the hooks or screws installed in the wall. If using alternative hanging hardware like French cleats or keyhole hangers, follow the manufacturer's instructions for proper installation.
After hanging the mirror, use a level to confirm it hangs straight. Make any necessary adjustments to the hanging hardware or wire to achieve perfect alignment. Once satisfied with the placement and alignment, ensure all fasteners are securely tightened. For heavier mirrors, consider adding additional support brackets underneath the frame for increased stability.
4. Final Touches and Considerations
After securing the mirror, clean the glass surface with a suitable glass cleaner for a pristine finish. Inspect the surrounding wall area for any marks or dust created during the installation process and clean as necessary. Consider adding decorative elements around the mirror, such as wall sconces or artwork, to enhance the overall aesthetic.
For particularly heavy or large mirrors, consulting a professional installer is advisable. Their expertise can ensure the safety and stability of the installation, especially in complex situations. Regularly inspect the hanging hardware and mounting points for signs of wear or loosening, particularly in high-traffic areas. Addressing any issues promptly can prevent accidents and ensure the longevity of the installation.

The Kids Bathroom Mirror Gets Framed House Of Hepworths

How To Build A Mirror Frame Simple Woodworking

How To Add A Frame Your Bathroom Mirror

Diy Stick On Mirror Frame Sawdust Sisters

Diy How To Add A Frame Builder Wall Mirror

How To Add A Frame Bathroom Mirror Makeover Series Part 4

How To Add A Frame Your Big Builder Mirror Easy Diy

How To Frame A Builder Grade Mirror The Turquoise Home

Diy Stick On Mirror Frame Sawdust Sisters

Diy Stick On Mirror Frame Sawdust Sisters