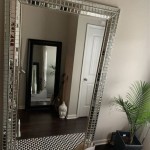
How to Adhere a Frame Mirror
A frame mirror can add a touch of elegance and sophistication to any room. However, installing a frame mirror can be a daunting task, especially if you've never done it before. This comprehensive guide will provide you with the essential steps and techniques you need to adhere a frame mirror securely and flawlessly.
Materials You'll Need:
- Frame mirror
- Mirror adhesive
- Caulking gun
- Tape measure
- Level
- Clean cloths
- Safety gloves
Step 1: Choose the Right Location
Before you begin adhering the mirror, it's crucial to choose the right location. Ensure that the wall is clean, dry, and free from any debris or uneven surfaces. Use a level to mark the desired placement of the mirror, ensuring it is level and centered.
Step 2: Clean the Surfaces
Use a clean cloth and a glass cleaner to thoroughly clean the back of the mirror and the wall surface where it will be adhered. This will remove any dirt, dust, or oils that could interfere with the adhesive bond.
Step 3: Apply Mirror Adhesive
Wear safety gloves and follow the manufacturer's instructions for applying the mirror adhesive. Typically, you will use a caulking gun to apply a continuous bead of adhesive around the perimeter of the back of the mirror, keeping it about 1 inch from the edges. Smooth out the adhesive with a clean cloth.
Step 4: Position the Mirror
Carefully lift the mirror and position it on the wall, aligning it with the marked level line. Press evenly on the mirror to ensure it makes full contact with the adhesive. Use a level to double-check that the mirror is still level.
Step 5: Secure the Mirror
To ensure a secure hold, use a few pieces of painter's tape or masking tape to temporarily support the mirror on each side. This will prevent the mirror from sliding down while the adhesive cures.
Step 6: Allow the Adhesive to Cure
Refer to the manufacturer's instructions for the recommended curing time for the adhesive. Typically, it takes several hours or even a full day for the adhesive to reach its maximum strength. Avoid applying any weight or pressure on the mirror during this time.
Step 7: Seal the Edges (Optional)
For added durability and a more finished look, you can seal the edges of the mirror with caulk. Apply a thin bead of clear silicone caulk around the edges where the mirror meets the wall. Smooth out the caulk with a damp finger or a caulk finishing tool.
Tips:
- For heavier mirrors, consider using mirror brackets or D-rings for additional support.
- If the mirror has a frame, make sure the frame is securely attached to the mirror before adhering.
- If the mirror is large or awkward to handle, seek assistance from a friend or family member.
- Allow plenty of time for the adhesive to cure before removing the painter's tape.
Conclusion:
Adhering a frame mirror can be a straightforward task with proper preparation and attention to detail. By following these steps and using the right materials, you can create a beautiful and secure display that will enhance the aesthetics of your space for years to come.

Diy Stick On Mirror Frame Sawdust Sisters

How To Frame A Mirror Sand And Sisal

Mirror Frame Diy How To Update A Basic Bathroom Our Faux Farmhouse

Diy Bathroom Mirror Frame Without Removing Clips Her Happy Home

Diy Stick On Mirror Frame Sawdust Sisters

How To Build A Mirror Frame Simple Woodworking

Easy Diy Stick Framed Mirror That Looks Expensive

How To Install A Mirrorchic Bathroom Mirror Frame Momhomeguide Com

Diy Stick On Mirror Frame Sawdust Sisters

3 Ways To Frame A Mirror Wikihow


