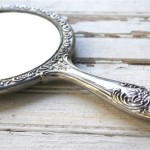
How to Antique a Mirror from the Front
Antiquing a mirror from the front allows for creative control over the aging process, offering a unique and personalized touch. This method involves applying layers of paint and other materials directly onto the mirror's reflective surface, creating an aged appearance. This process is distinct from traditional back-silvering antiquing techniques and offers different aesthetic possibilities.
Key Materials for Front Antiquing
- Mirror
- Painter's Tape
- Drop cloths or newspapers
- Cleaning solution (e.g., glass cleaner)
- Soft cloths
- Primer suitable for glass
- Acrylic paints in desired antique hues
- Sea sponge or textured cloth
- Spray bottle filled with water
- Clear sealant (e.g., acrylic varnish)
Preparing the Mirror
Proper preparation is crucial for achieving successful results. The surface must be meticulously cleaned to ensure optimal paint adhesion.
- Protect the surrounding area with drop cloths or newspapers.
- Clean the mirror thoroughly with glass cleaner and a soft cloth, removing any dust, fingerprints, or grease.
- Apply painter's tape to any sections of the mirror that should remain un-antiqued.
Applying the Primer
Priming the mirror surface ensures proper adhesion of the subsequent paint layers. Without a suitable primer, the paint might not adhere properly, resulting in an uneven or easily chipped finish.
- Select a primer specifically designed for glass or smooth surfaces.
- Apply a thin, even coat of primer to the mirror's surface using a brush or roller.
- Allow the primer to dry completely according to the manufacturer's instructions.
Creating the Antique Effect with Paint
This stage involves the application of acrylic paints to mimic the look of aged glass. The technique employed determines the final aesthetic.
- Choose acrylic paints in colors that evoke the desired antique look. Consider shades of brown, gray, black, or even subtle metallic tones.
- Apply the first layer of paint, typically a darker base coat, using a brush, sponge, or cloth, depending on the desired texture. A sea sponge can create a stippled, uneven effect, further enhancing the aged appearance.
- Allow the first paint layer to dry slightly, but not completely.
- Use a damp cloth or sponge to gently dab or wipe away sections of the still-wet paint, revealing the underlying primer or even areas of the mirror itself. This creates the illusion of worn and faded paint.
- Repeat the paint application and dabbing process with lighter colors, gradually building layers and depth to achieve the desired antiquing effect.
Distressing the Painted Surface
Distressing adds character and reinforces the aged appearance, mimicking the wear and tear of time.
- Once the paint layers are dry, consider using fine-grit sandpaper to lightly distress the edges and corners of the mirror, creating the illusion of chipped paint.
- A spray bottle filled with water can be used to create a more weathered look. Lightly spray the surface and then blot with a cloth, lifting some of the paint to create a more organic, aged effect.
Sealing the Antiqued Finish
Sealing the antiqued finish protects the paint layers and ensures the longevity of the aged effect.
- After the paint is completely dry and the distressing is complete, apply a layer of clear sealant designed for use with acrylic paints.
- The sealant protects the finish from moisture, scratches, and other potential damage.
- Allow the sealant to dry completely before handling the mirror.
Variations and Considerations for Front Antiquing
The described process provides a foundational approach to front-antiquing a mirror. Numerous variations can be incorporated to achieve specific aesthetics.
- Experiment with different paint application techniques, such as dry brushing or stippling, to create varied textures and effects.
- Metallic paints can be incorporated to add subtle shimmer or a touch of glamour to the antique finish.
- Crackle medium can be applied between paint layers to create a crackled, aged effect.
- Stencils can be used to add decorative patterns or designs to the antiqued surface.
- The opacity of the paint layers can be adjusted to control the degree of reflectivity retained by the mirror.
Cleaning and Maintaining the Antiqued Mirror
Proper care ensures the longevity of the antiqued finish.
- Clean the antiqued mirror with a soft, damp cloth, avoiding abrasive cleaners or scrubbing pads.
- Avoid exposing the mirror to excessive moisture or direct sunlight, which can damage the finish over time.

How To Antique A Mirror From The Front With Paint Average But Inspired

How To Antique A Mirror From The Front With Paint

How To Antique A Mirror Tutorial Jenna Sue Design

The Ultimate Guide On Diy Antique Mirrors So Much Better With Age

How To Antique A Mirror Tutorial Jenna Sue Design

How To Antique A Mirror

The Ultimate Guide On Diy Antique Mirrors So Much Better With Age

How To Antique A Mirror From The Front With Paint Average But Inspired

How To Antique A Mirror Easy No Scratching The Navage Patch

How To Antique A Mirror Tutorial Jenna Sue Design