How to Build a Vanity Mirror
A vanity mirror provides dedicated illumination for applying makeup, styling hair, or performing other grooming tasks. Building a custom vanity mirror allows for personalization of size, lighting style, and frame design to perfectly complement existing decor. This article provides a comprehensive guide to constructing a DIY vanity mirror.
Materials Required: The first step is to gather all necessary materials. These include a mirror, preferably of the desired size, wooden boards for the frame, light bulbs and sockets (LED bulbs are recommended for their energy efficiency and cooler operating temperature), wiring, a power cord, a switch, wood glue, screws, and finishing supplies like paint or stain.
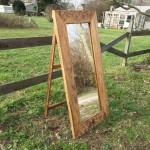
Frame Construction: The frame provides structural support and houses the lighting. Begin by measuring the mirror to determine the dimensions of the frame. Cut the wooden boards to the appropriate lengths, ensuring 45-degree angles at the corners for a mitered joint. Wood glue and screws can then be used to securely join the pieces, creating a rectangular frame. The frame should be slightly larger than the mirror to allow for mounting.
Wiring the Lighting: Before attaching the light bulbs and sockets, it is crucial to plan the wiring layout. Mark the desired locations for the light sockets on the frame, ensuring even spacing for balanced illumination. Drill holes for the wiring to pass through the frame. Wire the sockets in parallel, connecting them to the power cord and switch. It is recommended to consult wiring diagrams and follow electrical safety guidelines for this step.
Mounting the Light Sockets: Once the wiring is complete, the light sockets can be mounted onto the frame. Securely attach the sockets using screws, ensuring they are firmly in place. Then, carefully insert the chosen light bulbs into the sockets. LED bulbs are a popular choice for their long lifespan, energy efficiency, and low heat output, reducing the risk of burns.
Attaching the Mirror: With the lighting installed, the mirror can now be attached to the frame. Mirror adhesive or clips can be used for this purpose. Apply the adhesive evenly to the back of the frame or position the clips securely. Carefully place the mirror onto the frame, ensuring proper alignment and firm contact. Allow adequate drying time for the adhesive if used.
Finishing Touches: The final step involves adding finishing touches to the vanity mirror. This can include painting or staining the frame to match existing decor. Consider adding decorative elements such as molding or trim for a more personalized look. Ensure all wiring is concealed and secured for a clean and professional appearance.
Safety Considerations: When working with electrical components, always prioritize safety. Ensure the power is disconnected before starting any wiring work. Use appropriate safety equipment such as gloves and eye protection. If unsure about any electrical procedures, consult a qualified electrician. Proper grounding is essential to prevent electrical hazards.
Mirror Placement: Consider the optimal placement for the vanity mirror. Ideally, it should be mounted at a comfortable height for usage. Ensure adequate natural light or supplemental lighting in the room to complement the vanity mirror's illumination. The mirror should be positioned to minimize glare and provide a clear reflection.
Customization Options: Building a DIY vanity mirror offers a wide range of customization options. Experiment with different frame styles, lighting configurations, and finishes to create a unique piece. Consider incorporating features like a dimmer switch to control the brightness of the lights. Adding a shelf or drawers beneath the mirror can provide additional storage space for cosmetics and grooming supplies.
Maintenance: Regularly clean the mirror surface with a glass cleaner to maintain its clarity. Dust the frame and light fixtures to prevent buildup. Periodically check the wiring and connections to ensure they remain secure and in good condition. Replace any burnt-out light bulbs promptly.
Building a vanity mirror can be a rewarding DIY project, offering a personalized and functional addition to any space. By following these steps and paying attention to detail, a custom vanity mirror can be created that perfectly suits individual needs and preferences.

10 Diy Vanity Mirror Projects That Show You In A Diffe Light

Diy Light Up Vanity Mirrors You Can Make Ohmeohmy Blog

10 Diy Vanity Mirror Projects That Show You In A Diffe Light

10 Diy Vanity Mirror Projects That Show You In A Diffe Light

Diy Make Up Mirror Vanity Makeup

Diy Light Up Vanity Mirrors You Can Make Ohmeohmy Blog

10 Diy Vanity Mirror Projects That Show You In A Diffe Light

Diy Light Up Vanity Mirrors You Can Make Ohmeohmy Blog

Diy Rustic Hollywood Mirror Design Asylum Blog By Kellie Smith Vanity Bathroom Decor

How To Make A Diy Makeup Vanity With Hollywood Lighted Mirror