How To Change A Bathroom Mirror
Changing a bathroom mirror can significantly update the room's aesthetic. While it may seem daunting, the process is relatively straightforward with the right tools and approach. This guide outlines the necessary steps to safely and effectively replace your existing bathroom mirror.
1. Assessing the Existing Mirror and Choosing a Replacement
Before starting, carefully examine the current mirror setup. Note the dimensions of the existing mirror and how it's attached to the wall. Common methods include clips, adhesive, or a frame. Understanding the current installation will inform the removal process and guide the selection of a suitable replacement. Consider the size and style of the new mirror, ensuring it complements the bathroom's design and available space.
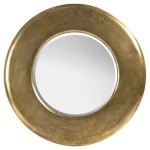
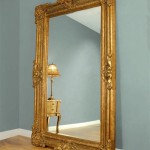
When choosing a replacement, consider the overall style of your bathroom. A framed mirror offers a classic look, while a frameless mirror provides a more modern aesthetic. Beveled edges can add a touch of elegance. Measure the space carefully to ensure the new mirror fits comfortably, leaving enough clearance for surrounding fixtures.
2. Gathering Necessary Tools and Materials
Having the right tools on hand will streamline the process and minimize potential complications. Essential tools include a putty knife or pry bar, safety glasses, work gloves, a screwdriver (if the mirror is screwed into the wall), a hammer, a stud finder, and a pencil. For adhesive-backed mirrors, a heat gun or hair dryer may be required to soften the adhesive.
Depending on the installation method for the new mirror, additional materials may be necessary. These include mirror adhesive, mirror clips, screws, and wall anchors. Ensure you have the appropriate hardware for the weight and size of your new mirror. Having a drop cloth or old newspapers is also advisable to protect the sink and countertop.
3. Safely Removing the Old Mirror
Safety is paramount when removing the old mirror. Always wear safety glasses and work gloves to protect against shards of glass. If the mirror is held by clips, carefully pry them away from the wall with a putty knife. For adhesive-backed mirrors, use a heat gun or hair dryer to soften the adhesive, then gently work a putty knife behind the mirror to separate it from the wall. Work slowly and methodically to avoid cracking the mirror.
If the mirror is screwed into the wall, locate the screws and remove them with a screwdriver. If the mirror is heavy, have a helper assist with supporting it during removal. Once the mirror is detached, carefully dispose of it by wrapping it in heavy-duty cardboard or a thick blanket and labeling it clearly as broken glass.
4. Preparing the Wall Surface
Once the old mirror is removed, prepare the wall surface for the new installation. Remove any remaining adhesive residue using a putty knife or adhesive remover. Patch any holes or imperfections in the wall with spackle and allow it to dry completely. Sand the patched areas smooth and wipe the wall clean with a damp cloth.
If the new mirror is significantly different in size from the old one, you may need to repaint the wall section where the old mirror was located. This ensures a uniform finish and prevents visible differences in paint color or texture.
5. Installing the New Mirror
The installation method will depend on the type of mirror and the wall structure. For adhesive-backed mirrors, follow the manufacturer's instructions carefully. Apply the adhesive evenly to the back of the mirror and press it firmly against the wall, ensuring it's level. For mirrors with clips, install the clips on the wall according to the manufacturer’s instructions, then carefully position the mirror within the clips.
For heavy mirrors, it is advisable to install them on wall studs for added support. Use a stud finder to locate the studs and mark their location. Pre-drill pilot holes and then use screws specifically designed for hanging mirrors. If the wall is not suitable for directly screwing into studs, use appropriate wall anchors to provide sufficient support.
6. Applying Finishing Touches and Clean Up
Once the mirror is securely mounted, apply any necessary finishing touches, such as caulking around the edges to seal the gap between the mirror and the wall. This provides a finished look and prevents moisture buildup. Clean the mirror surface with a glass cleaner to remove fingerprints and smudges.
Clean up the work area by disposing of any debris, including leftover adhesive, broken glass (if any), and packaging materials. Put away all tools and ensure the bathroom is clean and tidy.
7. Considerations for Different Mirror Types
Different types of mirrors may require specific considerations during installation. For example, installing a medicine cabinet mirror will involve connecting electrical wiring if the cabinet includes lighting or other electrical components. Always consult the manufacturer's instructions for specific guidance related to the type of mirror being installed.
Larger, heavier mirrors, especially those with ornate frames, may require extra support and possibly assistance during installation. Always prioritize safety and use appropriate lifting techniques to prevent injury.

How To Remove A Bathroom Mirror Lowe S

How To Safely And Easily Remove A Large Bathroom Builder Mirror From The Wall Site Title

How To Remove Mirror Off Wallsafely

How To Remove A Bathroom Mirror Lowe S

How To Remove A Mirror Glued The Wall Forbes Home

How To Safely And Easily Remove A Large Bathroom Builder Mirror From The Wall Site Title

How To Safely And Easily Remove A Large Bathroom Builder Mirror From The Wall Site Title

How To Safely And Easily Remove A Large Bathroom Builder Mirror From The Wall Site Title

How To Frame Out That Builder Basic Bathroom Mirror For 20 Or Less

How To Safely And Easily Remove A Large Bathroom Builder Mirror From The Wall Site Title