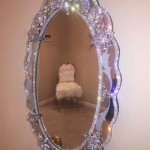
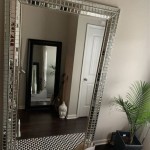
How to Change a Large Bathroom Mirror
Replacing a large bathroom mirror can seem like a daunting task, but it's a manageable project with the right tools and approach. Whether you're upgrading to a more modern style, fixing a cracked mirror, or simply refreshing the look of your bathroom, this guide will walk you through the process step-by-step.
Step 1: Gather Your Tools and Supplies
Before you begin, ensure you have the following items gathered and ready to go:
- New mirror: Measure the existing mirror and ensure the new one is the desired size and shape.
- Level: Essential for ensuring the new mirror hangs straight.
- Measuring tape: Useful for determining the correct placement of the mirror and mounting hardware.
- Pencil: To mark the wall for the mirror's placement.
- Drill: To create pilot holes for the mounting hardware.
- Screwdriver: For securing the mounting hardware.
- Stud finder: To locate wall studs for added support.
- Safety goggles: Protect your eyes from debris during the removal process.
- Heavy-duty adhesive: If your mirror doesn't have a mounting frame, consider using a strong adhesive for extra security.
- Cleaning supplies: To clean the old mirror and the wall area where the new mirror will be placed.
Step 2: Removing the Old Mirror
The removal process depends on how the old mirror is mounted:
Mirrors Secured with Screws or Nails
- Carefully remove any decorative trim or molding around the mirror. This may involve using a screwdriver or pry bar, taking care not to damage the surrounding wall.
- Locate the screws or nails securing the mirror to the wall. Some mirrors may have hidden screws or nails behind decorative caps, which can be carefully removed.
- Gently remove the screws or nails, supporting the mirror as you do so to prevent it from falling. You may need to use a hammer and a nail puller for stubborn nails.
- Once the screws or nails are removed, carefully take down the mirror. Be sure to have someone assist you, especially if the mirror is large and heavy.
Mirrors Adhered with Adhesive
- If the mirror is stuck to the wall with adhesive, use a putty knife or a scraper to carefully pry it loose. Start from one corner and work your way around the mirror, gently separating it from the adhesive.
- If the adhesive is stubborn, you can use a hairdryer to soften it. Apply heat to the adhesive for a few minutes, then try to pry the mirror off again.
- Once the mirror is removed, use a scraper to remove any remaining adhesive from the wall. Be careful not to damage the wall surface.
Step 3: Preparing the Wall
After removing the old mirror, make sure the wall is clean and ready for the new one:
- Use a damp cloth to wipe down the wall area where the mirror will be mounted. Remove any dust, dirt, or debris to ensure a secure bond.
- If there are any holes or imperfections in the wall, fill them with spackle or drywall compound and let it dry completely.
- Sand the filled areas smooth and prime the wall with a primer suitable for your wall type. This will help the new mirror adhere better and prevent future problems.
Step 4: Installing the New Mirror
Once the wall is prepared, you can move on to installing the new mirror. The installation method will depend on the mirror's design and mounting hardware:
Mirrors with a Built-in Mounting Frame
- Using a level, determine the desired height and position of the mirror on the wall. Mark the wall with a pencil.
- Locate studs in the wall using a stud finder. If possible, try to mount the mirror directly into studs for added stability.
- Using a drill, create pilot holes for the mounting screws or nails provided with the mirror. Ensure the holes are the correct size for the hardware.
- Align the mirror with the marked spot on the wall, ensuring it is level. Secure the mirror to the wall using the screws or nails provided.
Mirrors without a Mounting Frame
- For mirrors without a mounting frame, consider using heavy-duty adhesive for secure mounting. Apply the adhesive to the back of the mirror, following the manufacturer's instructions.
- Carefully position the mirror on the wall, aligning it with the marked spot and ensuring it is level. Press firmly on the mirror for several minutes to ensure a good bond.
- Alternatively, use a heavy-duty mirror hanger. Apply a layer of adhesive to the back of the mirror and then apply the hanger to the mirror.
- Press firmly for a few minutes, allowing the adhesive to bond. Use a drill to secure the mirror hanger to the wall.
Step 5: Finishing Touches
After installing the mirror, inspect the mounting for any loose screws or hanging issues. Make sure the mirror hangs straight and secure. You can add decorative trim or molding around the mirror for a finished look, if desired.

How To Safely And Easily Remove A Large Bathroom Builder Mirror From The Wall Site Title

How To Safely And Easily Remove A Large Bathroom Builder Mirror From The Wall Site Title

How To Remove A Bathroom Mirror Lowe S

How To Safely And Easily Remove A Large Bathroom Builder Mirror From The Wall Site Title

How To Safely And Easily Remove A Large Bathroom Builder Mirror From The Wall Site Title

10 Stunning Ways To Transform Your Bathroom Mirror Without Removing It Hometalk

How To Frame Out That Builder Basic Bathroom Mirror For 20 Or Less

How To Safely And Easily Remove A Large Bathroom Builder Mirror From The Wall Site Title

Large Mirror Removal Safely

How To Remove A Bathroom Mirror Lowe S