How To Frame A Mirror With Wood
Framing a mirror with wood enhances its aesthetic appeal and integrates it seamlessly into a room's decor. This process involves several steps, from selecting the appropriate materials to achieving a professional finish.
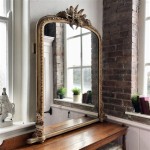
Planning and Material Selection: Accurate measurements are crucial. Measure the mirror's length and width precisely to determine the dimensions of the frame. Consider the mirror's existing style and the room's overall aesthetic when choosing wood. Popular choices include oak, pine, maple, and cherry, each offering distinct grain patterns and colors. The wood's thickness should be proportionate to the mirror's size; larger mirrors generally benefit from thicker frames.
Wood Preparation: Once the wood is selected, it needs to be cut to the correct dimensions. A miter saw ensures accurate 45-degree angle cuts for clean corners. Four pieces are required: two for the length and two for the width. The inside edges of these pieces must be slightly shorter than the corresponding mirror dimensions to allow for a snug fit. Sanding the wood surfaces, both faces and edges, with progressively finer grits of sandpaper creates a smooth finish, ready for staining or painting.
Frame Assembly: Wood glue is essential for a strong and durable frame. Apply a thin, even layer to the mitered edges of each piece. Clamp the pieces together, ensuring tight joints and proper alignment. Wood clamps or specialized corner clamps maintain the 45-degree angles during the drying process. Allow the glue to dry completely according to the manufacturer's instructions. For added strength, consider reinforcing the joints with small nails or brads, countersinking them and filling the holes with wood putty for a seamless appearance.
Finishing the Frame: The finishing process protects the wood and enhances its visual appeal. Staining adds color and highlights the wood grain. Apply the stain evenly with a brush or cloth, following the manufacturer's instructions. Allow the stain to dry completely before applying a sealant. A clear sealant, such as polyurethane, protects the wood from moisture and damage. Multiple coats of sealant, with light sanding between each coat, create a smooth and durable finish. Alternatively, paint can be used to achieve a specific color scheme. Primer should be applied before the paint for better adhesion and coverage. Multiple coats of paint might be necessary for a uniform finish.
Attaching the Mirror to the Frame: Several methods exist for securing the mirror within the frame. Mirror adhesive, specifically designed for this purpose, provides a strong bond. Apply the adhesive to the back of the frame in a consistent pattern. Carefully place the mirror onto the adhesive, ensuring proper alignment. Alternatively, mirror clips, small metal brackets, can be used to hold the mirror in place. Screw the clips to the inside edge of the frame, creating a lip that secures the mirror. This method allows for easier removal of the mirror if necessary.
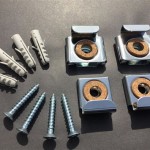
Adding Backing and Hanging Hardware: A backing board, typically thin plywood or hardboard, provides additional support and protects the back of the mirror. Cut the backing board to fit snugly inside the frame. Secure it to the frame using small nails or staples. Hanging hardware, such as D-rings or wire hangers, should be attached to the backing board. Ensure the hardware is appropriately sized and positioned for secure hanging. Consider the weight of the framed mirror when selecting hardware.
Considerations for Different Wood Types: Different wood types require specific considerations during the framing process. Hardwoods, such as oak and maple, are durable but can be more challenging to work with. Softwoods, like pine, are easier to cut and shape but might require more care during finishing to prevent blotching. Understanding the characteristics of the chosen wood species will result in a more successful framing project.
Safety Precautions: Safety glasses should be worn throughout the process to protect eyes from wood dust and debris. Gloves protect hands from splinters and chemicals in stains and finishes. Adequate ventilation is essential when working with stains and sealants. Following manufacturer's instructions for all materials and tools ensures safe and effective use.
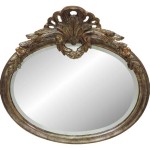
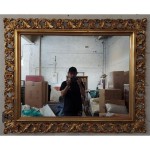
Alternative Frame Designs: While the standard mitered frame is common, exploring alternative designs can add a unique touch. Beveled frames, where the inner edge of the frame is angled, create a more intricate look. Sculpted or carved frames add a decorative element. Consider the mirror's style and the overall aesthetic when choosing a frame design. Experimenting with different profiles and shapes can result in a truly personalized framed mirror.

Diy Farmhouse Wood Frame Mirror She Gave It A Go

Diy Wood Frame Mirror Farmhouse Industrial Bathroom Joyfully Treasured

How To Build A Wood Frame Around Bathroom Mirror Young House Love

How To Frame A Mirror

How Build A Wooden Diy Mirror Frame For Entryway Thediyplan

Wood Mirror Diy Shanty 2 Chic

Diy Rustic Wood Frame Mirror Amanda Katherine

Iheart Organizing Diy Wood Framed Mirror

How To Build A Diy Wood Mirror Frame The Holtz House

How To Frame A Bathroom Mirror Diy Family Handyman