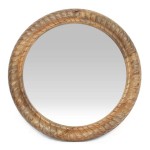
How To Frame Your Own Mirror
Framing a mirror elevates its appearance, transforming it from a functional object into a decorative piece. This process, while requiring some precision, is achievable with the right tools and techniques. This article provides a comprehensive guide to framing a mirror, outlining the necessary materials, step-by-step instructions, and helpful tips for a successful outcome.
Materials Required:
Several key materials are essential for this project. These include the mirror itself, frame moulding, measuring tape, wood glue, a miter saw or miter box and saw, finishing nails, a hammer, wood filler, sandpaper, safety glasses, and appropriate wood finish (paint, stain, or sealant). The specific type of wood finish will depend on the desired aesthetic and the type of frame moulding chosen.
Measuring and Cutting the Frame Moulding:
Accurate measurement is crucial for a well-fitted frame. Begin by carefully measuring the length and width of the mirror. Add the desired frame width to each measurement twice (once for each side) to determine the total length of moulding required for each side. Transfer these measurements to the frame moulding, marking the cut lines with a pencil.
A miter saw or miter box and saw are essential for creating precise 45-degree angles at the corners of the frame. When using a miter saw, ensure the moulding is securely held against the fence before making the cut. With a miter box, position the moulding firmly and use a fine-toothed saw for a clean cut. Double-check all measurements and angles before making any cuts.
Assembling the Frame:
Once all pieces are cut, dry-fit the frame around the mirror to ensure a snug fit. Any necessary adjustments should be made before applying glue. Apply a thin, even layer of wood glue to the mitered edges of each piece of moulding. Join the pieces together, forming a complete frame. Use clamps or masking tape to hold the corners tightly together while the glue dries. The drying time will vary depending on the type of glue used; refer to the manufacturer's instructions for specific drying times.
Securing the Frame:
After the glue has dried completely, reinforce the frame joints with finishing nails. Pre-drill pilot holes to prevent the wood from splitting, especially with thinner mouldings. Hammer the finishing nails into the pre-drilled holes, countersinking them slightly below the surface of the wood. Fill the nail holes with wood filler and allow it to dry completely.
Sanding and Finishing:
Once the wood filler is dry, sand the entire frame smooth, paying particular attention to the filled nail holes and joints. Start with a coarser grit sandpaper (e.g., 120-grit) and progressively move to finer grits (e.g., 220-grit) for a smooth, professional finish. Remove all sanding dust with a tack cloth before applying the chosen finish.
The choice of finish will depend on the desired aesthetic and the type of moulding used. Paint, stain, or a clear sealant can be applied. Follow the manufacturer's instructions for application and drying times. Multiple coats may be required for optimal coverage and durability. Allow each coat to dry completely before applying the next.
Attaching the Mirror to the Frame:
Several methods can be employed to attach the mirror to the frame. Mirror adhesive, specifically designed for this purpose, offers a strong and reliable bond. Alternatively, mirror clips or small L-brackets can be used, especially for heavier mirrors. Ensure the mirror is centered within the frame and securely fastened before mounting.
Mounting the Framed Mirror:
The method for mounting the framed mirror will depend on its size and weight. D-rings and wire are suitable for lighter mirrors, while heavier mirrors may require more robust hardware, such as French cleats or specialized mirror hangers. Ensure the chosen hanging method is appropriate for the weight of the mirror and the wall material. Always follow the manufacturer’s instructions for the specific hanging hardware used.
Safety Precautions:
Throughout the entire process, prioritize safety. Wear safety glasses when cutting, sanding, and hammering. Work in a well-ventilated area when using wood glue, wood filler, and finishes. Dispose of all materials properly according to local regulations. If using power tools, familiarize yourself with their operation and safety guidelines before use.

How To Make A Diy Bathroom Mirror Frame Thediyplan

How To Install A Mirrorchic Bathroom Mirror Frame Momhomeguide Com

Builder Basic Mirror To Custom Framed

How It Works Frames For Mirror Frame Kit Driftwood

How To Easily Make A Custom Mirror Frame

How To Make Your Own Mirror A Rustic Diy Project Ideas For The Home

30 Diy Mirror Frame Ideas For Every Style And Budget

Diy Mirror Frame With Glass Mosaic Tile Armchair Builder Blog Build Renovate Repair Your Own Home Save Money As An Owner

Diy Fluted Wall Mirror Persia Lou

Diy Repurposed Mirror Frame With Vintage Tin Lora Bloomquist Create Ponder

