How To Hang a Heavy Mirror on Concrete Walls
Hanging a heavy mirror on a concrete wall requires careful planning and execution to ensure both safety and stability. This process involves understanding the weight of the mirror, selecting appropriate hanging hardware, and utilizing proper drilling techniques for concrete.
Assessing the Mirror and Wall: Begin by accurately weighing the mirror. This information is crucial for selecting hardware with a sufficient weight capacity. Examine the concrete wall for any existing cracks or damage. If the wall is in poor condition, consult a professional before proceeding.
Choosing the Right Hanging Hardware: Several options are available for hanging heavy objects on concrete, each offering varying levels of support. Heavy-duty anchors, such as concrete screws, expansion bolts, or toggle bolts, are recommended for heavier mirrors. The chosen hardware’s weight rating should significantly exceed the mirror's actual weight to provide a safety margin.
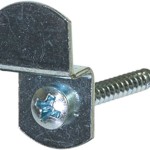
Concrete Screws: These screws are specifically designed for concrete and offer a straightforward installation process. They require a pre-drilled hole and are driven directly into the concrete. Ensure the chosen concrete screws are rated for the mirror's weight and the concrete's density.
Expansion Bolts: These bolts utilize a sleeve that expands as the bolt is tightened, creating a secure hold within the concrete. They are suitable for heavier mirrors and provide a robust anchoring solution. Proper drilling and careful tightening are essential for optimal performance.
Toggle Bolts: Toggle bolts are ideal for anchoring into hollow concrete block walls. They utilize a spring-loaded toggle that expands behind the wall, distributing the weight and providing a secure hold. Select toggle bolts with a sufficient weight capacity and ensure proper installation to prevent failure.
French Cleats: For extremely heavy mirrors, a French cleat system provides exceptional support. This involves attaching one piece of the cleat to the wall and the other to the back of the mirror. The two interlocking pieces create a strong and stable hanging mechanism.
Gathering the Necessary Tools: Before starting the installation, gather the required tools: a hammer drill, appropriate drill bits (matching the chosen anchor size), a level, a measuring tape, a pencil, safety glasses, and dust mask. Having all the necessary tools readily available streamlines the process.
Marking the Hanging Points: Carefully measure and mark the desired location of the mirror on the wall. Use a level to ensure the markings are perfectly horizontal. Accurate measurements and level placement are crucial for a straight and balanced hanging.
Drilling the Holes: With safety glasses and a dust mask on, use a hammer drill to create the pilot holes. The drill bit size should correspond to the chosen anchor’s specifications. Drill to the appropriate depth, ensuring the hole is clean and free of debris. Accurate drilling is essential for the anchors to perform correctly.
Installing the Anchors: Insert the chosen anchors into the pre-drilled holes. Follow the manufacturer's instructions for proper installation, which may involve hammering or tightening. Ensure the anchors are flush with the wall surface.
Attaching the Mirror to the Anchors: Carefully lift the mirror and align it with the installed anchors. Depending on the hanging hardware, this may involve attaching D-rings or other mounting hardware to the back of the mirror beforehand. Slowly and carefully lower the mirror onto the anchors, ensuring it is securely in place.
Verifying Stability: Once the mirror is hung, gently test its stability. Ensure it is firmly attached to the wall and does not wobble or shift. If any movement is detected, re-evaluate the installation and ensure the anchors are properly installed.
Safety Precautions: Throughout the entire process, prioritize safety. Wear appropriate safety gear, including safety glasses and a dust mask. Use caution when handling heavy objects and operating power tools. If uncertain about any aspect of the process, consult a professional for assistance. Heavy mirrors can be dangerous if not handled and installed correctly, so always err on the side of caution.
Alternative Hanging Methods for Lighter Mirrors: For lighter mirrors, adhesive hangers specifically designed for mirrors and concrete may suffice. However, always check the weight limit of the adhesive hanger and the manufacturer's instructions to ensure it is appropriate for the specific mirror and wall surface. Adhesive hangers may not be suitable for all mirrors or wall conditions.
Considering Professional Installation: While hanging a lighter mirror may be a manageable DIY project, installing a heavy mirror on concrete can present challenges. If there are concerns about the weight, wall condition, or the installation process, seeking professional assistance is highly recommended. A professional installer has the experience and expertise to ensure the mirror is hung safely and securely.

Hanging A Heavy Mirror On Concrete Wall

Cement Wall Gym Mirror Installation Two J Channel Method 10 Steps Instructables

How To Hang A Heavy Mirror In 5 Simple Steps

Hanging A Heavy Mirror On Concrete Wall

How To Hang A Heavy Mirror The Home Depot

How To Hang A Large Or Heavy Mirror

Hanging Mirror With Tapcon Concrete S In Mount On Wall French Cleat

How To Hang A Large Wall Mirror Step By Tutorial

How To Hang A Very Heavy Picture Or Mirror The Best
How To Hang A 100 Pound Mirror On Drywall Quora

