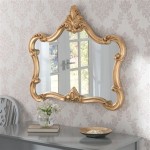
How to Hang a Vanity Mirror
Hanging a vanity mirror correctly involves several key steps to ensure both safety and aesthetics. This guide provides a comprehensive overview of the process, incorporating best practices recommended by experts like Chip Wade, a renowned carpenter and television personality known for his practical, straightforward approach to home improvement projects.
1. Assessing the Wall and Choosing the Right Hardware
Before beginning, it is crucial to identify the wall type. Drywall requires different anchors and screws than masonry or tile. A stud finder can locate wall studs for optimal support, especially for heavier mirrors. Chip Wade frequently emphasizes the importance of using appropriate hardware. For drywall, toggle bolts or molly bolts provide robust support. Masonry walls require masonry screws or anchors specifically designed for concrete or brick. Consider the weight of the mirror when selecting anchors, opting for heavier-duty options for larger, more substantial mirrors.
2. Precise Measurements and Marking
Accurate measurements are essential for a level and properly positioned mirror. Measure the mirror's width and determine the desired height. The standard height for a vanity mirror typically places the center of the mirror at eye level, but individual preferences may vary. Mark the desired top and bottom points on the wall using a pencil. Use a level to ensure these marks create a perfectly horizontal line. Measure the distance between the mirror's hanging hardware (D-rings, wire, or cleats) and transfer these measurements to the marked line on the wall. This precision ensures accurate placement of the mounting hardware.
3. Installing the Wall Anchors or Mounting Hardware
Once the placement is marked, carefully drill pilot holes at the designated points. The drill bit size should correspond to the chosen anchor or screw. For drywall, insert the anchors according to the manufacturer's instructions. For heavier mirrors, Chip Wade recommends using a toggle bolt, ensuring it's fully expanded behind the drywall for maximum holding power. For masonry walls, use a hammer drill with a masonry bit to create the pilot holes, then insert the appropriate anchors.
4. Hanging the Mirror Securely
With the anchors or mounting hardware securely in place, carefully lift the mirror and align its hanging hardware with the installed anchors or screws. Gently lower the mirror onto the hardware, ensuring it's seated correctly. For mirrors with D-rings, ensure the rings are hooked securely onto the screws. Mirrors with a wire hanging system should be hung on appropriately spaced hooks or screws. Cleat systems require precise alignment for a flush, secure mount.
5. Verifying Level and Stability
Once the mirror is hung, use a level to verify its horizontal alignment. Adjust as needed by gently shifting the mirror or tightening screws. Give the mirror a gentle push to ensure it's stable and securely mounted. Chip Wade often stresses the importance of this final check to prevent accidents and ensure the mirror remains in place.
6. Applying Finishing Touches (Optional)
Depending on the mirror and the wall, consider applying finishing touches such as decorative caps over the screws or sealant around the edges of the mirror to prevent moisture intrusion in bathrooms. These final details can enhance the overall aesthetic and provide additional protection.
7. Considering Lighting and Surroundings
The placement of the vanity mirror should also take into account the surrounding lighting. Ideally, the mirror should be positioned to maximize natural light. Supplementary lighting, such as sconces flanking the mirror, can further enhance visibility and create a more functional and aesthetically pleasing space. Chip Wade emphasizes considering the entire room's design when planning the mirror's installation to ensure a cohesive and well-balanced final result.
Following these steps and paying close attention to detail will ensure the successful and safe installation of a vanity mirror, resulting in a functional and stylish addition to any bathroom or vanity area.

Chip Wade Interview On How To Make Your Bathroom Feel Like A Spa

Chip Wade Interview On How To Make Your Bathroom Feel Like A Spa

How To Install A Bathroom Mirror

Homemadeville Your Place For Homemade Inspiration A Bathroom Renovation Guide Selecting Measuring Installing

How To Install A Bathroom Mirror

Daltile Featured In Chip Wade S New Show Home News Floor Covering Weekly

Homemadeville Your Place For Homemade Inspiration A Bathroom Renovation Guide Selecting Measuring Installing

Chip Wade Interview On How To Make Your Bathroom Feel Like A Spa

Inspiration From Designer Chip Wade S Georgia Mountain Retreat Inspired At Home A Blog By Ames

The 10 Best Bathroom Vanities In 2024