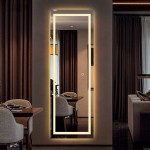
How To Install a Frameless Bathroom Mirror
A frameless bathroom mirror offers a sleek, modern aesthetic. Its clean lines and minimalist design can enhance the perceived size of a bathroom, creating a sense of spaciousness. However, installing a frameless mirror requires precision and attention to detail. This guide outlines the process for successfully installing a frameless bathroom mirror, ensuring a secure and visually appealing result.
Preparing the Wall and Mirror
Proper preparation is crucial for a successful installation. The wall surface must be clean, dry, and completely smooth. Any imperfections will be magnified by the mirror. Begin by thoroughly cleaning the wall with a suitable cleaner to remove any dust, dirt, or grease. If the wall has any existing wallpaper or peeling paint, these should be removed and the wall repaired and sanded smooth.
Next, measure the mirror carefully and mark the desired location on the wall. Use a level to ensure the markings are perfectly horizontal and vertical. This step is critical for achieving a straight and even installation. Consider the placement of any existing light fixtures or other bathroom elements. Ensure sufficient clearance exists around the mirror for a balanced aesthetic.
The back of the mirror also requires preparation. Clean it thoroughly to ensure optimal adhesion with the adhesive. Inspect the mirror for any chips or cracks. Any damage could compromise the integrity of the mirror during installation.
Choosing the Right Adhesive
Selecting the appropriate adhesive is paramount for a secure and lasting installation. Neutral cure silicone adhesive is a popular choice due to its strong bonding properties and resistance to moisture. It's crucial to select an adhesive specifically designed for mirrors. Avoid using general-purpose construction adhesives, as these may damage the mirror's backing or react with the silvering.
The amount of adhesive required depends on the size and weight of the mirror. Consult the adhesive manufacturer's instructions for specific recommendations. Always err on the side of caution and use more adhesive rather than less. A strong bond is essential for preventing the mirror from shifting or falling.
Consider the environment in which the mirror will be installed. Bathrooms are prone to high humidity and temperature fluctuations. Choose an adhesive that is specifically formulated to withstand these conditions. This will ensure the mirror remains securely attached over time.
Applying the Adhesive and Mounting the Mirror
With the wall and mirror prepared, and the correct adhesive selected, the next step is application and mounting. Begin by applying the adhesive to the back of the mirror. Depending on the size and shape of the mirror, applying the adhesive in vertical lines or a grid pattern can provide even coverage and prevent air pockets. Avoid applying the adhesive too close to the edges of the mirror to prevent it from squeezing out during installation.
Carefully lift the mirror and position it on the wall according to the pre-marked guidelines. Apply even pressure across the entire surface of the mirror to ensure proper contact with the adhesive. Use spacers or shims at the bottom of the mirror to maintain a consistent gap between the mirror and the vanity or countertop. This gap allows for expansion and contraction and prevents the mirror from cracking.
Once the mirror is in position, secure it with mirror clips or mounting tape. These provide additional support while the adhesive cures. Follow the manufacturer's instructions regarding the number and placement of clips or tape. Ensure the clips are appropriately sized for the thickness of the mirror.
Finishing Touches and Considerations
After securing the mirror, allow the adhesive to cure completely. The curing time varies depending on the specific adhesive used, so refer to the manufacturer's instructions. Avoid disturbing the mirror during the curing process. Once the adhesive has cured, carefully remove any excess adhesive using a razor blade or utility knife.
Clean the mirror surface with a glass cleaner designed for mirrors. This will remove any fingerprints or smudges and provide a sparkling finish. Inspect the edges of the mirror and the surrounding wall for any gaps or imperfections. Caulk can be used to fill any gaps and provide a seamless, water-resistant seal.
For larger or heavier mirrors, it is advisable to seek professional assistance. Professional installers have the experience and expertise to handle complex installations and ensure a safe and secure outcome. They can also provide advice on the best adhesive and mounting techniques for specific situations. Furthermore, ensure the wall structure is suitable to support the weight of the mirror. A professional can assess the wall and recommend appropriate reinforcements if necessary.

How To Install A Mirror Without Frame Merrypad

Oval Frameless Wall Mirror Installation Fab Glass And
:strip_icc()/DesireeBurnsInteriors1-f76d25cad90041c88fbae4a7dc10aab4.jpg?strip=all "2 Simple Ways To Hang A Frameless Mirror")
2 Simple Ways To Hang A Frameless Mirror

How To Install A Clipless Frameless Mirror Part 1 Keystone Home

How To Hang A Frameless Mirror On Wall

How To Hang A Frameless Mirror On The Wall With Pictures

Wall Mount A Bathroom Mirror N Handyman

Where And How To Install Frameless Mirrors Wassup Mate

5 Easy Ways To Upgrade Your Frameless Bathroom Mirror

Frameless Bathroom Mirror South Melbourne Glass