How to Make a Floor Mirror
Creating a custom floor mirror offers a rewarding project for home improvement enthusiasts. This guide outlines the steps involved in crafting a stylish and functional floor mirror tailored to individual preferences.
Selecting the Mirror
The first crucial step involves choosing the right mirror. Factors to consider include size, shape, and thickness. Larger mirrors provide a grander statement, while smaller ones suit more compact spaces. Rectangular and oval shapes are popular choices, but circular or uniquely shaped mirrors can add a distinctive touch. Mirror thickness impacts durability; thicker mirrors are less prone to warping or breaking. Measure the intended space carefully to determine the optimal mirror dimensions.
Choosing the Frame Material
The frame material significantly influences the mirror's aesthetic. Wood offers a classic and versatile option, available in various finishes and stains to complement existing decor. Metal frames, such as aluminum or steel, provide a sleek and modern look. Repurposed materials, like reclaimed wood or vintage picture frames, offer a unique and sustainable alternative. Consider the overall style of the room when selecting the frame material.
Gathering Necessary Tools and Supplies
Proper preparation streamlines the construction process. Essential tools typically include a measuring tape, saw (suitable for the chosen frame material), safety glasses, gloves, wood glue (if using a wood frame), screws, and a drill. Other helpful supplies include sandpaper, wood filler, paint or stain (if finishing the frame), and mirror adhesive.
Constructing the Frame
Accurate measurements are critical during frame construction. Cut the chosen frame material according to the measured dimensions, ensuring precise angles for a seamless fit. If using wood, assemble the frame pieces using wood glue and secure them with screws. For metal frames, welding or specialized fasteners may be required. Sand any rough edges and apply wood filler to imperfections, if necessary. Allow the frame to dry completely before proceeding.
Finishing the Frame
This stage presents an opportunity to personalize the mirror. Apply paint or stain to achieve the desired finish, ensuring even coverage. Multiple coats may be necessary for optimal results. Allow each coat to dry thoroughly before applying the next. Consider adding decorative elements, such as molding or trim, to enhance the frame's visual appeal. A sealant can protect the finish and increase durability.
Attaching the Mirror to the Frame
Careful handling of the mirror is paramount during this step. Apply mirror adhesive to the back of the mirror, following the manufacturer's instructions. Carefully position the mirror within the frame, ensuring even spacing on all sides. Apply gentle pressure to secure the bond. Allow the adhesive to cure completely before moving the mirror.
Adding Support and Stability
Floor mirrors require adequate support to prevent tipping. Attaching supporting brackets or legs to the back of the frame enhances stability. Consider the mirror's size and weight when selecting appropriate support mechanisms. Ensure the supports are securely fastened to prevent accidents.
Positioning the Floor Mirror
Once the mirror is complete, select the desired location. Consider factors such as lighting, traffic flow, and existing furniture. Leaning the mirror against a wall is a common practice, but ensure it's secured to prevent accidental falls. Alternatively, specialized hardware can be used to hang the mirror securely on the wall, transforming it into a large wall-mounted mirror.

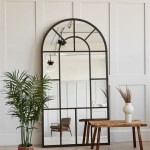
Framed Floor Mirror Love Grows Wild

Diy Wood Floor Mirror Grace Oaks Designs

How To Make A Giant Standing Mirror For Less Than 100 One Crafdiy Girl

Diy Floor Mirror Liz Marie Blog

Diy Floor Mirror Liz Marie Blog

Diy Wood Floor Mirror Grace Oaks Designs

Diy Modern Floating Floor Mirror Tutorial And

I Saved Hundreds Easy Diy Modern Framed Floor Mirror

Diy Full Length Mirror Maker Gray

How To Build A Mirror Frame Simple Woodworking