How to Craft an Illuminating LED Backlit Mirror: A Comprehensive Guide
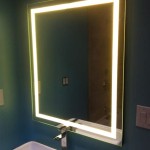
Elevate your bathroom or vanity space with the allure of an LED backlit mirror, a captivating blend of functionality and aesthetics. Creating one yourself is a rewarding experience that grants you the freedom to customize and personalize this radiant addition to your home. This comprehensive guide will illuminate the essential steps involved, empowering you to craft a mirror that radiates both style and illumination.
Materials and Tools: Assembling the Essentials
To embark on this project, gather these essential materials:
- Mirror: Select a mirror of your desired size and shape
- LED strip lights: Choose strips with a suitable brightness and color temperature
- Power supply: Ensure it matches the voltage and amperage requirements of your LED strips
- Connecting wires: Solders or wire connectors for joining the components
- Mounting brackets: For securing the mirror to the wall
- Adhesive: To affix the LED strips to the mirror's back
- Tools: Screwdriver, soldering iron (optional), wire strippers, level
- Consider using waterproof LED strips for added durability in humid environments.
- Experiment with different LED colors to create a personalized ambiance.
- Install a dimmer switch to adjust the brightness and create the perfect atmosphere.
- Ensure the LED strips are spaced evenly for an optimal light distribution.
- Double-check all connections to prevent any electrical issues.
Step 1: Setting the Stage
Begin by preparing the mirror's back surface. Clean it thoroughly to remove any dust or debris that could hinder adhesion. Next, determine the placement of your LED strips. For an even glow, space them evenly around the mirror's perimeter or focus them on a specific area.
Step 2: Illuminating the Mirror
Adhere the LED strips to the mirror's back using the provided adhesive or mounting clips. Ensure that the strips are firmly attached and follow the manufacturer's instructions for proper installation. Connect the strips' ends to the power supply, making sure the positive and negative terminals are aligned correctly.
Step 3: Powering Up
Mount the power supply in a convenient location near the mirror. Connect it to the LED strips and a power source. Test the illumination to ensure everything is functioning as intended. Adjust the LED strip's brightness or color temperature if needed, using a compatible dimmer or controller.
Step 4: Mounting the Mirror
Use mounting brackets to securely attach the mirror to the wall. Choose brackets that can support the mirror's weight and ensure a sturdy installation. Carefully level the mirror for a polished and professional finish.
Step 5: Completing the Masterpiece
Conceal any exposed wires or cables using wire covers or raceways. These finishing touches enhance the overall aesthetic and ensure a clutter-free appearance. Admire the radiance of your custom-crafted LED backlit mirror, a testament to your creativity and craftsmanship.
Additional Tips for Success:

How To Backlight A Mirror 14 Steps With Pictures Wikihow

How To Backlight A Mirror 14 Steps With Pictures Wikihow

Bathroom Remodel Diy Backlit Mirror Leah And Joe Home Projects Crafts

Diy Led Framed Mirror Modern Builds Ep 74

How To Diy Vanity Mirror With Led Strip Lights

Bathroom Remodel Diy Backlit Mirror Leah And Joe Home Projects Crafts

Backlit Mirror 5 Steps Instructables

Bathroom Remodel Diy Backlit Mirror Leah And Joe Home Projects Crafts

25 Beautiful Diy Vanity Mirror That Is Easy And To Do Most Of This Projects Can Be Done Bathroom Makeover Design Small Mirrors

Diy Led Backlit Mirror Step By Guide

