How to Make a Lighted Bathroom Mirror
Creating a custom lighted bathroom mirror offers a blend of functionality and aesthetic appeal. This project can be accomplished with readily available materials and tools, adding a touch of personalized elegance to any bathroom. The following guide outlines the steps involved in crafting a DIY lighted bathroom mirror.
Planning and Preparation
Careful planning is essential for a successful outcome. This involves determining the desired size and style of the mirror, selecting appropriate lighting, and gathering the necessary materials and tools.
- Measure the space designated for the mirror to determine the appropriate dimensions.
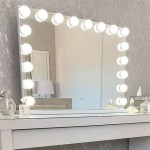
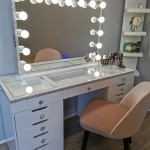
- Choose the type of lighting, such as LED strips, vanity bulbs, or globe lights, considering the desired brightness and color temperature.
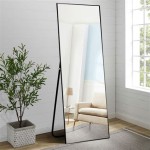
- Acquire a frameless mirror of the correct size. Ensure it is suitable for mounting.
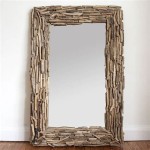
- Gather materials for the frame, such as wood, metal, or plastic, based on the desired aesthetic.
- Assemble the necessary tools, including a measuring tape, saw, drill, screws, wiring, and safety equipment like gloves and eye protection.
Building the Frame
The frame provides structural support for the mirror and houses the lighting elements. The construction method will vary depending on the chosen frame material.
- Cut the frame material to the appropriate dimensions, ensuring accurate measurements for a snug fit around the mirror.
- Assemble the frame pieces using appropriate joinery techniques, such as screws, nails, or adhesive, depending on the material.
- Sand and finish the frame to achieve a smooth and polished surface. Apply paint or stain as desired.
- Create channels or recesses within the frame to accommodate the wiring and lighting fixtures. Ensure these are strategically placed for optimal light distribution.
Installing the Lighting
Proper installation of the lighting components is crucial for both functionality and safety. Follow the manufacturer's instructions for specific wiring guidelines.
- Attach the lighting fixtures to the frame, ensuring they are securely fastened and positioned correctly.
- Wire the lighting fixtures according to the manufacturer's instructions, ensuring all connections are secure and properly insulated.
- Test the lighting to verify that all fixtures are functioning correctly before proceeding to the next step.
- Consider incorporating a dimmer switch for adjustable brightness control.
Mounting the Mirror
Securing the mirror to the frame requires careful handling to prevent damage. Use appropriate adhesives and mounting hardware for a secure and lasting installation.
- Apply mirror adhesive to the back of the mirror, ensuring even coverage for a strong bond.
- Carefully position the mirror within the frame, pressing firmly to secure it to the adhesive.
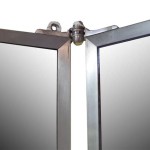
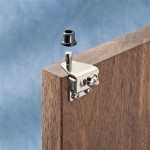
- Use mounting clips or brackets to further secure the mirror to the frame, providing additional support and stability.
- Allow adequate drying time for the adhesive before proceeding to the final steps.
Connecting the Wiring and Finishing Touches
The final steps involve connecting the wiring to the power supply and adding any finishing touches to complete the project.
- Connect the wiring from the lighting fixtures to the designated power supply, ensuring proper grounding and adherence to electrical codes.
- Conceal the wiring within the frame or use wire covers for a neat and professional appearance.
- Install the mirror in the desired location, ensuring secure mounting to the wall.
- Add any decorative elements, such as trim or molding, to enhance the aesthetic appeal of the finished product.
Safety Precautions
Prioritizing safety throughout the project is paramount. Taking necessary precautions prevents accidents and ensures a safe working environment.
- Wear appropriate safety gear, including gloves and eye protection, throughout the entire process.
- Disconnect the power supply before working with any electrical components.
- Use caution when handling sharp tools and materials, such as glass and cutting instruments.
- Consult local electrical codes and regulations to ensure compliance with safety standards.
- If unsure about any aspect of the project, seek professional assistance from a qualified electrician or contractor.
Choosing the Right Lighting
Selecting the appropriate lighting is crucial for achieving the desired ambiance and functionality. Consider the following factors when choosing lighting for your lighted bathroom mirror:
- Color Temperature: Opt for a color temperature that complements the bathroom's overall aesthetic. Warmer tones create a relaxing atmosphere, while cooler tones provide brighter, more task-oriented lighting.
- Brightness: Choose a brightness level that provides adequate illumination for tasks such as applying makeup or shaving.
- Light Distribution: Consider how the light will be distributed across the mirror's surface. Even distribution prevents shadows and ensures optimal visibility.
- Energy Efficiency: LED lights are a popular choice for their energy efficiency and long lifespan.

Diy Led Framed Mirror Modern Builds Ep 74

Diy Round Floating Bathroom Mirror Rechargeable Led Strip Lights Kc Mum Life

Diy Light Up Vanity Mirrors You Can Make Ohmeohmy Blog

Led Bathroom Mirror How To Install A Vanity Diy

How To Install An Led Mirror Bokih Bathroom

How To Wire Bathroom Led Mirrors Diy Lighted Wall Mirror Reviews Installation

How Do I Choose A Lighted Bathroom Mirror

Lighted Bathroom Mirrors Are They Worth The Cost

50 Charming Fabulous Bathroom Mirror Designs Design Led Diy Vanity

Es Diy 84 In W X 32 H Rectangular Frameless Led Light Anti Fog Wall Bathroom Vanity Mirror Rgb Backlit Front Lighted Cjfxbm8432rgb The Home Depot