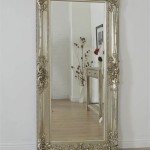
How To Make A Mirror Frame Out Of Crown Molding
Crown molding, typically used to add a decorative touch to the transition between walls and ceilings, can also be repurposed to create elegant mirror frames. This project offers an affordable and customizable way to elevate the look of any mirror, adding a touch of architectural interest to your space. By following these steps, you can easily transform ordinary mirrors into eye-catching focal points.
Step 1: Gather Your Supplies
Before you begin, ensure you have the necessary materials. This project requires:
- Crown molding: Choose a style that complements the mirror and the existing decor of your room.
- Mirror: Select a mirror that fits your desired dimensions. If you plan to cut the molding to fit, choose a mirror that is slightly smaller than the desired overall size.
- Miter saw: Essential for accurate cuts, ensuring a seamless fit of the molding pieces.
- Wood glue: Provides strong adhesion for joining the molding pieces.
- Finishing nails: Used to secure the molding to the mirror frame.
- Wood filler: For filling gaps and creating a smooth surface.
- Sandpaper: Used to smooth rough edges and prepare the surface for painting.
- Primer: Prepares the surface for paint and ensures a smooth finish.
- Paint: Choose a color that complements the mirror and your existing decor.
- Paintbrush: For applying primer and paint.
- Measuring tape: For accurate measurements of the mirror and molding pieces.
- Pencil: For marking cutting lines on the molding.
- Clamps: To hold the molding pieces together while the glue dries.
Step 2: Measure and Cut the Molding
The first step is to measure the dimensions of your mirror. You'll need to determine the length and width of the frame you want to create.
Measure the width and height of the mirror and add the desired frame size. Use this measurement to calculate the length of each molding piece. Remember to account for miter cuts at the corners.
Using a miter saw, carefully cut the molding pieces at 45-degree angles to create miter joints. This technique creates clean corners for a professional look. Mark the cutting lines on the molding using a pencil and be sure to make precise cuts for a perfect fit.
Step 3: Assemble the Frame
After cutting the molding pieces, assemble the frame using wood glue and finishing nails. Spread a thin layer of wood glue along the edges of each molding piece. Align the pieces at the corners and carefully clamp them together, ensuring the corners meet at a 90-degree angle.
Using a nail gun or hammer and finishing nails, secure the molding pieces at the corners. Gently tap the nails into place, taking care not to split the molding. You can also use wood glue to secure the molding to the mirror, but this will not be necessary if using glue and nails.
Step 4: Finish the Frame
Once the frame is assembled and the glue has dried, fill any gaps or imperfections in the frame with wood filler. Use a putty knife to smooth the filler and allow it to dry completely. Sand the filler smooth using different grades of sandpaper, starting with a coarser grit and then transitioning to a finer grit.
Prime the entire frame with a primer, ensuring it is applied evenly and covers the entire surface. Allow the primer to dry thoroughly. Once the primer is dry, paint the frame with your chosen paint color, using a brush to apply thin coats and avoid drips. Allow the paint to dry completely before handling the frame.
Step 5: Attach the Mirror
After the paint has dried, create a secure attachment point for the mirror. Several options are available depending on the weight of the mirror and the desired finish. You can use:
- Heavy-duty adhesive: For lightweight mirrors, a strong adhesive can be sufficient.
- Mirror clips: These clips attach to the back of the frame and secure the mirror.
- Mirror hanging system: A system of wires or a bracket can be employed to hang the mirror securely.
Choose the method that best suits your mirror and desired look. Use caution when attaching the mirror, ensuring it is secure and level.
Your custom-made crown molding mirror frame is ready to enhance your space. The result is a unique and elegant addition to your room that reflects your style and taste. By following these steps, you can add a touch of architectural flair to any mirror with a little time and effort.

Crafty Again

Bathroom Mirror Framed With Crown Molding Hometalk

Crafty Again
How To Upgrade Your Builder Grade Mirror Frame It

How To Frame A Bathroom Mirror Nest For Less

Mirror Molding Framing A With Crown Mirrormate
Framing A Builder Grade Mirror That Is Not Between Two Walls

How To Frame A Mirror Sand And Sisal

How To Build A Mirror Frame With Bought Crown Molding

How To Frame A Bathroom Mirror Nest For Less

