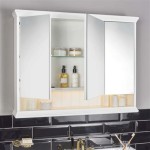
How to Put a Frame Around a Bathroom Mirror
A framed bathroom mirror can elevate the look of your bathroom, adding a touch of elegance and sophistication. It can also help to create a more cohesive design scheme and make your bathroom feel more luxurious. Framing a bathroom mirror is a relatively simple DIY project that can be accomplished with a few basic tools and materials. This article will guide you through the process of framing a bathroom mirror, providing clear instructions and helpful tips along the way.
Choosing the Right Frame
The first step is to choose the right frame for your bathroom mirror. Consider the following factors:
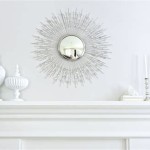
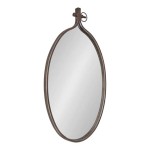
- Style: Choose a frame style that complements the overall style of your bathroom. For a traditional bathroom, consider a classic ornate frame. For a modern bathroom, a minimalist frame or a sleek metal frame would be more appropriate.
- Material: The frame material should be water-resistant and durable, as it will be exposed to moisture. Wood, metal, and resin frames are popular choices, but other materials like acrylic or faux wood are also available.
- Color: The frame color should complement the bathroom's color scheme. You can choose a frame that matches the walls, cabinetry, or even the countertop. Alternatively, you can choose a contrasting color to create a focal point.
- Size: The frame size should match the mirror dimensions. Ideally, the frame should be slightly larger than the mirror, creating a border around the glass.
Once you have chosen a frame, you can purchase it online or at a local home improvement store. You can also create a custom frame by using moulding from a lumberyard.
Preparing the Mirror and Frame
Before you begin framing the mirror, you need to prepare both the mirror and the frame. This includes:
- Cleaning the Mirror: Wipe down the mirror thoroughly to remove any dust, dirt, or grime. Use a glass cleaner and a microfiber cloth for the best results.
- Preparing the Frame: If you have a wooden frame, ensure it is sanded smooth and free of any imperfections. If you have a metal frame, make sure it is clean and free of rust.
- Measuring the Mirror: Measure the width and height of your mirror accurately to ensure the frame fits perfectly.
- Cutting the Frame: If necessary, cut the frame pieces to the correct size using a miter saw or a handsaw. Be sure to make precise cuts to ensure that the frame fits together neatly.
Framing the Mirror
Once the mirror and frame are prepared, you can start framing the mirror. Here are the steps you need to follow:
- Attaching the Frame: There are two main methods for attaching the frame to the mirror. One is by using adhesive, such as mirror adhesive or epoxy. Apply the adhesive to the back of the frame, making sure to cover all the edges. Then, carefully press the frame onto the mirror, ensuring the adhesive is spread evenly. Make sure to clean up any excess adhesive. The other method is by using picture hanging wire and hooks. If your frame doesn't have a pre-installed hanging wire, you can purchase a hanging kit that includes everything needed to get the job done. You need to attach the wire to the back of the frame and then use the hooks to hang the mirror on the wall. Both methods are effective but the adhesive method is generally easier and requires fewer tools.
- Securing the Frame: After the frame is attached, you can secure it further using small nails or screws. To prevent the frame from scratching mirror, use a rubber mallet to tap the nails or screws into place. Make sure to use a pilot hole before securing the frame if you are using screws.
- Adding Finishing Touches: Once the frame is securely attached, you can add finishing touches such as adding decorative elements or painting the frame. If you are using a wooden frame, you can paint or stain it to match the bathroom's decor. You can also add decorative elements such as decorative hooks or knobs.
Tips for Framing a Bathroom Mirror
Here are some general tips for framing a bathroom mirror:
- Measure twice, cut once: Ensure you take accurate measurements of the mirror. A small mistake in the measurement can affect the frame's fit and alignment.
- Don't forget the grout: If you are using a frame with a groove for grout, apply a thin layer of grout to the frame's edges. Use a grout sponge to wipe away excess grout. Grouting will create a clean and polished look.
- Use safety equipment: When working with tools like saws or hammers, ensure you wear safety glasses and gloves.
- Clean before framing: It is always a good idea to clean the mirror and frame before attaching them. This will ensure a smooth and seamless finish.
- Wait for the adhesive to dry: Ensure the adhesive used for framing is fully dry before hanging the mirror. Follow the adhesive manufacturer's instructions for best results.
- Use a level: Ensure the frame is level before attaching it to the mirror. This will ensure that the mirror hangs correctly, and the frame is aligned properly.
By following these steps, you can create a beautiful and functional framed bathroom mirror that adds elegance to your bathroom.

Easy Diy Tutorial Adding Trim Around A Giant Mirror For Ers

The Kids Bathroom Mirror Gets Framed House Of Hepworths

Diy Bathroom Mirror Frame With Molding The Happier Homemaker

How To Frame A Mirror

How To Frame A Bathroom Mirror

How To Add A Frame Your Bathroom Mirror

How To Install A Mirrorchic Bathroom Mirror Frame Momhomeguide Com

Bathroom Mirror Frames 2 Easy To Install Sources A Diy Tutorial Retro Renovation

Diy Stick On Mirror Frame Sawdust Sisters

Diy Stick On Mirror Frame Sawdust Sisters