How To Put a Mirror on a Bathroom Wall
Installing a bathroom mirror involves several key steps to ensure a secure and lasting fit. This guide provides a comprehensive overview of the process, from selecting the appropriate mounting method to completing the final touches.
Assessing the Wall and Mirror: Begin by carefully inspecting the bathroom wall. Identify its material, whether drywall, tile, or plaster. This will determine the necessary hardware and installation approach. Next, accurately measure the dimensions and weight of the mirror. Heavier mirrors will require more robust mounting systems.
Choosing the Right Mounting Method: Several options exist for securing a mirror to a bathroom wall. Adhesive mounting using mirror mastic is suitable for lighter mirrors on smooth, even surfaces. Clips and brackets provide a more secure hold for medium-weight mirrors. For heavy mirrors, especially on uneven walls, J-channels or Z-clips offer the strongest support. Screws, often used in conjunction with clips or channels, provide the most permanent and stable fixing.
Gathering the Necessary Tools and Materials: Once the mounting method is chosen, gather the necessary tools. Commonly required tools include a measuring tape, level, pencil, drill (if necessary), stud finder, safety glasses, and gloves. The chosen mounting hardware (adhesive, clips, screws, etc.) should also be readily available, along with appropriate wall anchors if dealing with drywall or plaster.
Preparing the Wall Surface: A clean and dry surface is crucial for successful adhesion or a tight fit. Thoroughly clean the wall area where the mirror will be installed using a suitable cleaner to remove any dust, grease, or residue. For tiled walls, ensure the grout is intact and level. Mark the desired mirror position on the wall using a pencil and a level to ensure straight and accurate placement.
Applying Mirror Mastic (Adhesive Method): If using mirror mastic, apply the adhesive to the back of the mirror according to the manufacturer's instructions. Typically, the mastic is applied in vertical beads or a grid pattern, leaving a gap around the perimeter to allow for expansion and contraction. The mirror is then carefully pressed against the marked area on the wall, ensuring proper alignment and firm contact.
Installing Clips and Brackets: When using clips and brackets, first attach the clips to the wall at appropriate points, ensuring they are level. These points should correspond with pre-drilled holes or designated areas on the back of the mirror. The mirror is then placed onto the clips, and the brackets are installed to secure it in place. Ensure the clips and brackets are appropriately sized and rated for the weight of the mirror.
Utilizing J-Channels or Z-Clips: J-channels or Z-clips offer robust support for heavy mirrors. J-channels are installed on the bottom and sides of the mirror's designated location. The mirror is then slid into the channels, providing secure support. Z-clips consist of two interlocking pieces, one attached to the wall and the other to the back of the mirror. These interlock to hold the mirror securely. This method often requires precise measurements and careful alignment.
Securing the Mirror with Screws: Screws can be used in conjunction with clips, channels, or directly through the mirror frame (if applicable). When using screws, it is crucial to locate wall studs for optimal support. If studs are unavailable, use appropriate wall anchors to prevent the mirror from pulling out. Drive the screws slowly and carefully to avoid damaging the wall or the mirror.
Adding Finishing Touches: Once the mirror is securely mounted, inspect the installation to ensure it is level and stable. Clean any excess adhesive or markings from the wall. Seal the edges of the mirror with a neutral-cure silicone sealant to prevent moisture from getting behind the mirror and potentially damaging the wall or the mirror backing.
Safety Precautions: Throughout the installation process, prioritize safety. Wear safety glasses to protect your eyes from dust and debris. Handle the mirror carefully to avoid breakage. Use gloves when working with adhesives or cleaning agents. If working with power tools, ensure proper usage and follow all safety guidelines. If unsure about any part of the process, consult a qualified professional for assistance.

How To Hang Mirrors On Tile 3 Ways A Bonus The Palette Muse

Tutorial How To Hang A Bathroom Mirror The Diy Playbook

How To Hang Mirrors On Tile 3 Ways A Bonus The Palette Muse

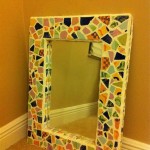
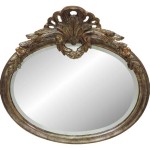
Antique Mirrors In A Bathroom Adding Charm Character

Klajowp 30 In W X 22 H Small Rectangular Framed Wall Mounted Bathroom Vanity Mirror Black Rm01 5676 120 The Home Depot

Dextrus 40 X24 Led Mirror For Bathroom Lighted Mirrors Wall Mount Vanity With Lights Gradient Front And Backlit Double Makeup Anti Fog Memory Function Tempered Glass Com

Inster 40 In W X 24 H Rectangular Frameless Anti Fog Dimmable Horizontal Wall Mount Led Bathroom Vanity Mirror Wshdrmmr0051 The Home Depot

Tetote 48 X 30 Inch Brushed Nickel Bathroom Vanity Mirror Silver Framed Modern Farmhouse Decorative Rectangle Wall Mount Horizontal Vertical Com

Inster Tune 72 In W X 32 H Rectangular Black Framed Wall Mount Bathroom Vanity Mirror Hdodbynmr043 The Home Depot

Anyhi Large Modern Wall Mirror Rectangle Mounted Hanging Horizontal Or Vertical For Bedroom Bathroom 36 X 24 Com