How To Remove a Shower Mirror
Removing a shower mirror requires careful preparation and execution to prevent damage to the wall and the mirror itself. The removal process varies depending on the installation method, which is generally either adhesive or clips/framing. Understanding the installation type is the first step in ensuring a smooth and damage-free removal.
Identifying the Installation Method: Carefully examine the mirror's edges. If the edges are visible and there appears to be a frame or clips holding it in place, it's likely a framed or clipped installation. If the edges are concealed and the mirror seems to be flush against the wall, it's likely adhered directly to the wall.
Tools and Materials for Both Methods: Several tools and materials are common to both removal methods. These include safety glasses, work gloves, a drop cloth or old towels, a utility knife or razor blade scraper, masking tape, and a heat gun or hairdryer. Additional tools might be needed depending on the specific installation, which will be discussed in the respective sections.
Removing an Adhesively Bonded Mirror: Removing an adhesive-backed mirror requires patience and a delicate approach. The primary goal is to weaken the adhesive bond while minimizing stress on the mirror.
Step 1: Protecting the Surroundings: Cover the shower floor and any nearby fixtures with a drop cloth or old towels to protect them from falling glass shards or debris. Apply masking tape around the mirror's edges to protect the surrounding wall surface.
Step 2: Applying Heat: A heat gun or hairdryer can soften the adhesive. Use the tool on a low setting and direct the heat evenly across the mirror's surface, keeping the tool moving to avoid concentrating heat in one spot. Overheating can crack the mirror. Test the adhesive periodically by gently pushing on the mirror’s edges.
Step 3: Loosening the Mirror: Once the adhesive feels softened, carefully insert a thin, flexible putty knife or a razor blade scraper behind the mirror. Work slowly and gently, applying leverage to pry the mirror away from the wall. If the mirror resists, apply more heat.
Step 4: Working in Sections: Large mirrors may require working in sections. As a section is loosened, use suction cups or a helper to support the detached portion. Continue applying heat and working the putty knife or scraper until the entire mirror is removed.
Step 5: Adhesive Removal After the mirror is removed, residual adhesive likely remains on the wall. This can be removed with a commercial adhesive remover, following the manufacturer’s instructions. Alternatively, rubbing alcohol or mineral spirits can be used, but always test these on a small, inconspicuous area first to ensure they don’t damage the wall surface.
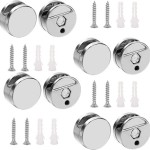
Removing a Clipped or Framed Mirror: This method generally involves locating and removing the clips or screws that secure the mirror to the wall.
Step 1: Identifying the Fasteners: Carefully inspect the mirror’s edges and frame for screws, clips, or other fastening mechanisms. These might be hidden beneath decorative caps or covers.
Step 2: Removing Decorative Caps or Covers: If present, carefully pry off any decorative caps or covers using a small flathead screwdriver or a putty knife. Protect the surrounding surfaces with masking tape to avoid scratches.
Step 3: Unscrewing or Unclipping the Mirror: Once the fasteners are exposed, use the appropriate tool – a screwdriver for screws or pliers for clips – to remove them. If the mirror is heavy, have a helper support it while removing the fasteners.
Step 4: Lifting the Mirror: Once all the fasteners are removed, carefully lift the mirror away from the wall. Some mirrors may have a lip or edge that rests on a mounting bracket; be mindful of this when lifting.
Step 5: Patching the Wall: After removing the mirror, patch any holes left by screws or clips with spackle or wall filler. Allow the filler to dry completely and sand it smooth before repainting.
Safety Precautions: Regardless of the removal method, prioritizing safety is crucial. Always wear safety glasses and work gloves to protect yourself from glass shards and sharp edges. Be cautious when using sharp tools and when handling potentially broken glass. Dispose of broken glass properly in a designated container to prevent injuries.
Dealing with Broken Mirrors: If the mirror breaks during removal, exercise extreme caution. Sweep up large pieces of glass carefully with a broom and dustpan. Use a vacuum cleaner with a hose attachment to collect smaller shards. Wear thick gloves and consider using a piece of cardboard or stiff paper to scoop up broken pieces. Dispose of broken glass immediately and properly.

How To Remove A Bathroom Mirror Lowe S

How To Remove A Bathroom Mirror Lowe S

How To Remove A Mirror Glued The Wall Forbes Home

How To Remove Mirror Off Wallsafely
:strip_icc()/Design_CathieHongInteriorsPhoto_ChristyQPhotography-b2290decbe0e4d0b952f280fb7bdc896.jpg?strip=all)
How To Remove A Bathroom Mirror From The Wall

How To Remove A Glued Bathroom Mirror From The Wall

How To Cut A Bathroom Mirror In Half Gray House Studio

How To Remove Mirror Off Wallsafely
:strip_icc()/DesireeBurnsInteriors-2abaae8e2c2e4741abe976ecd40c0837.jpg?strip=all)
How To Remove A Bathroom Mirror From The Wall

Clean Mirrors Without Streaking Bond Cleaning In Adelaide


